Starting as a first year TVI in the middle of a pandemic was not something I anticipated when starting this career. As I began my new position, I wanted to remotely assess students as accurately as possible without requiring assistance from families or teachers to complete it. The only part that required involvement from the teams was setting up the meetings with me through whatever virtual platform they were utilizing. I was able to send this in two pieces: the clipboard and the ruler attachment for easy shipment. All the student had to do was put the attachment inside the slot on the clipboard and it was assembled. I also sent the student materials based on what I was hoping to assess and had a copy for myself to reference. When the student had the measuring tool put together, which typically occurred on screen, they would orient themselves with the ruler facing the camera. This allowed me to see the distance they were reading the material from.
The use of this tool is endless, whether it is reading a book, determining to correct print size or font style, or simply just the student’s functional near distance viewing. When talking with some veteran TVIs and showing off my “cool, new tool,” they mentioned that it would be great to keep in my bag for when I go into schools because it will allow me to see where the student is reading from, without getting into their personal space and pulling out a tape measurer.
Materials:
- Clipboard
- Long, Flat Stick (at least 15 inches)
- L-Shaped Shelf Support Peg
- Printable Ruler
- Hot glue gun
- Hot glue
- Pliers/Wire cutters
- Cardstock
- Printer
- Scissors
- Double-Sided Tape
- Tacky Glue (optional)
- Fine permanent marker (optional)
- Straight, flat edge or ruler (optional)

Instructions:
- Start by gathering all the materials.
- Print off 2 rulers on cardstock.
- Cut out the 2 rulers. On the second ruler, cut from 2 inches to 6 inches. Write a number 1 in front of the numbers 3-6 on the second ruler.
- If you would like to darken your numbers, this is when you should retrace all the numbers.
- Use tacky glue or hot glue and line one side of the long, flat stick. Place the rulers on the stick. (I recommend putting the 12” ruler on first.) **Make sure that the 0-1” edge is lined with the edge of the stick.
- Use the pliers/wire cutters to remove the hanging tag on the clipboard. (This is the hardest part)
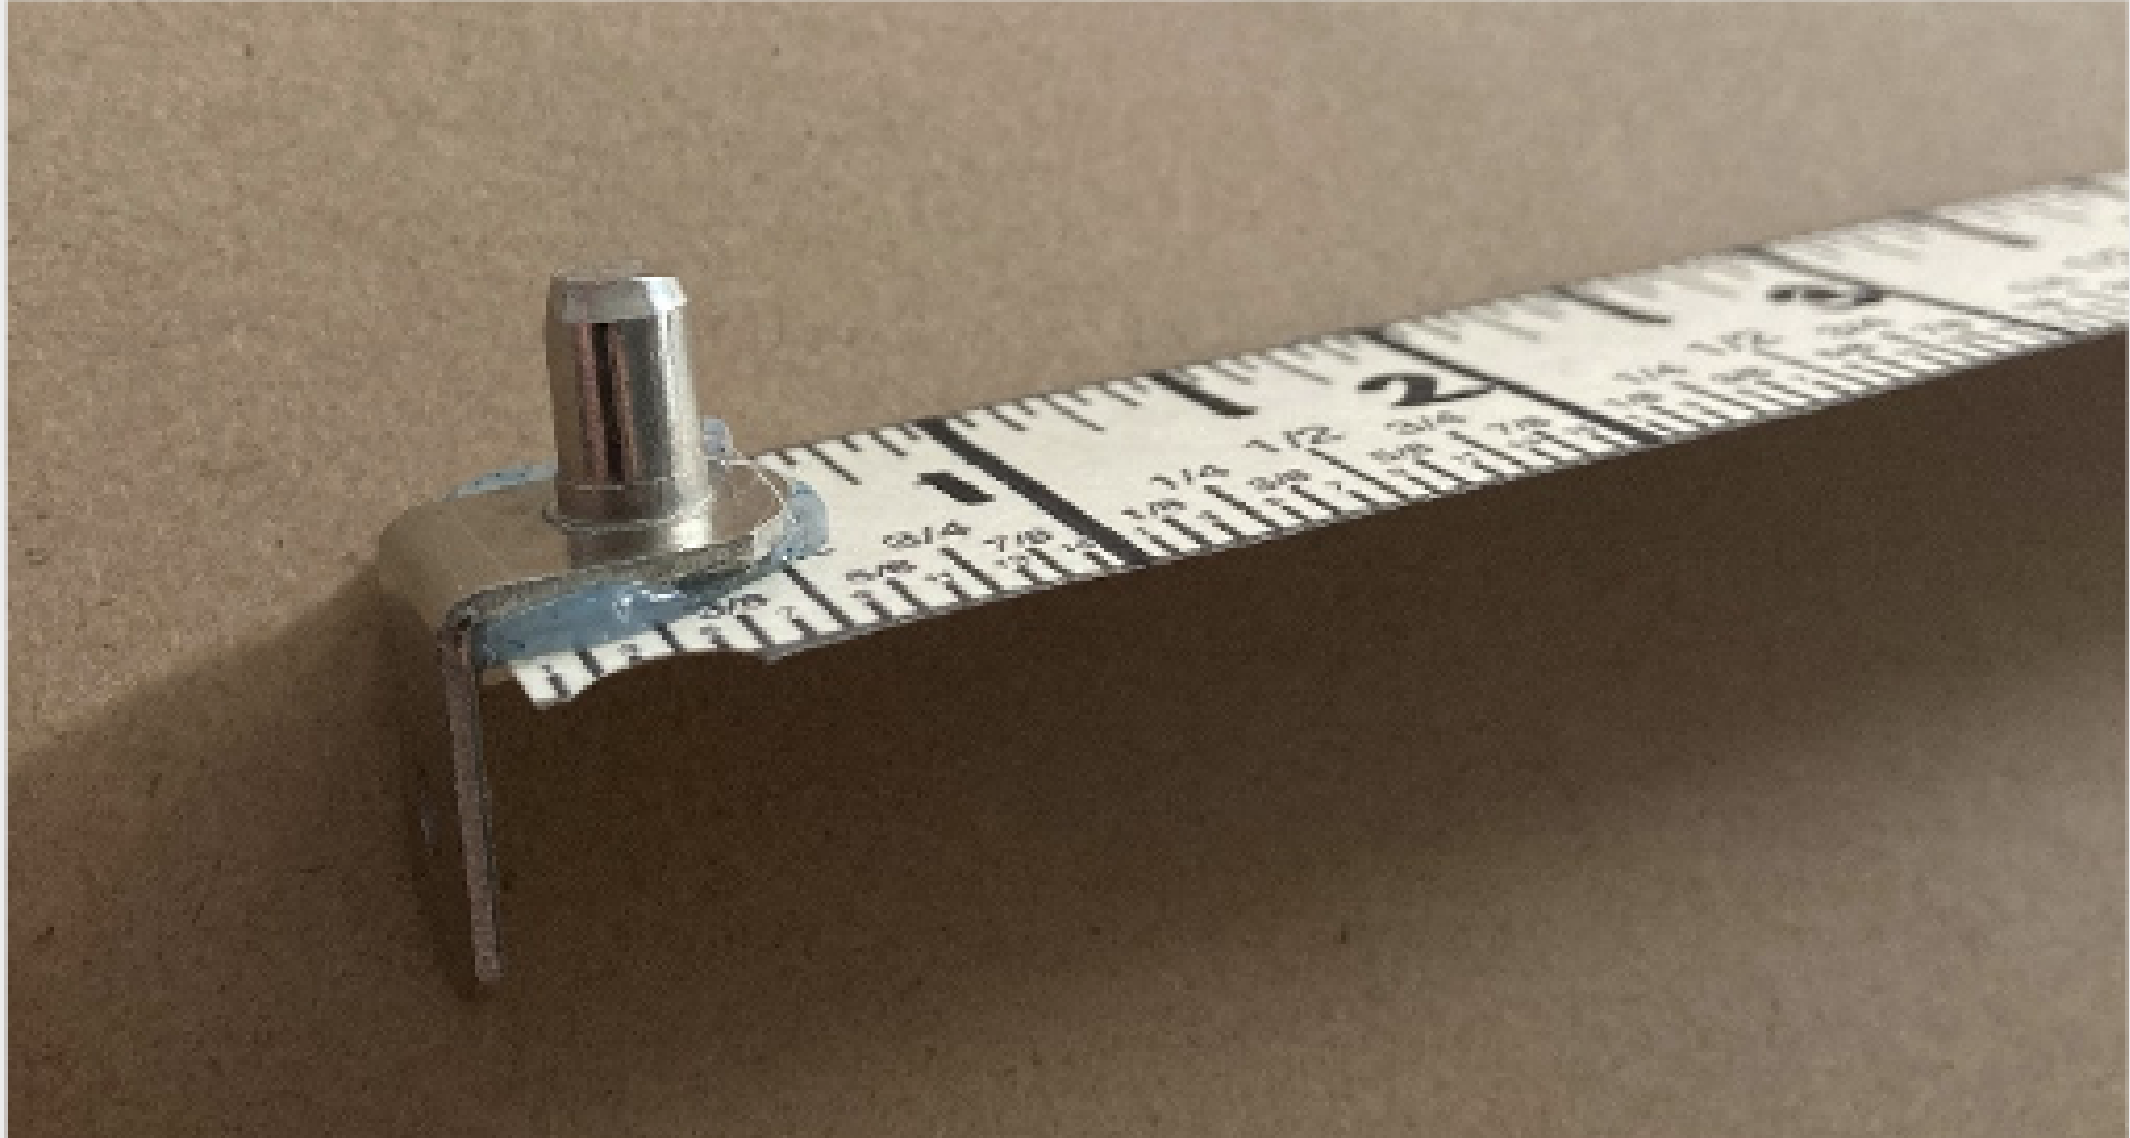
- Once the hanging tag and your ruler are ready to be used, hold the shelf support by the peg with the rest of the shelf support above your fingers. Glue on this side (the one with no hole).
- Press the hot glue against the ruler, allowing the side with the hole to be aligned with the flat edge of the ruler. Let this cool.
- Put a piece of double-sided tape on the bottom on the side with the hole.
- Slide that edge into where you removed the hanging tag and press firmly.
- It is complete. To send this to students, just remove the tag, reapply a piece of double-sided tape, and send it.