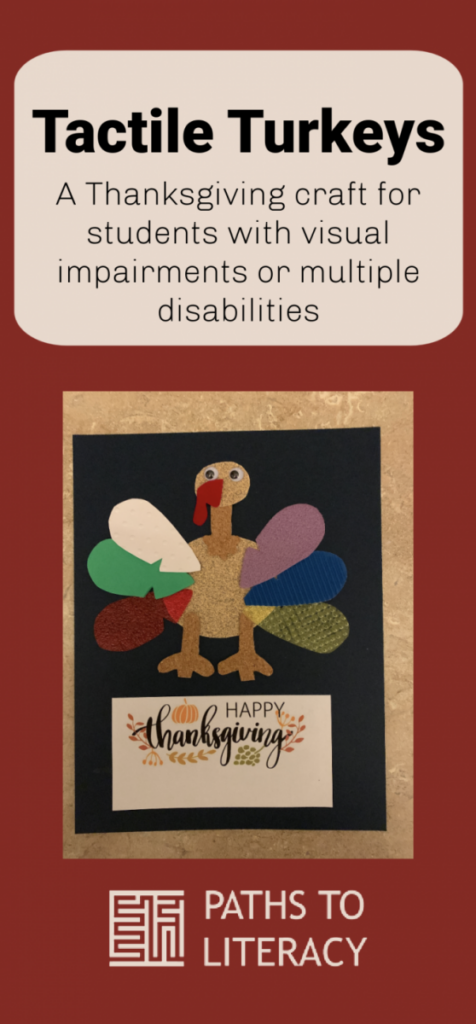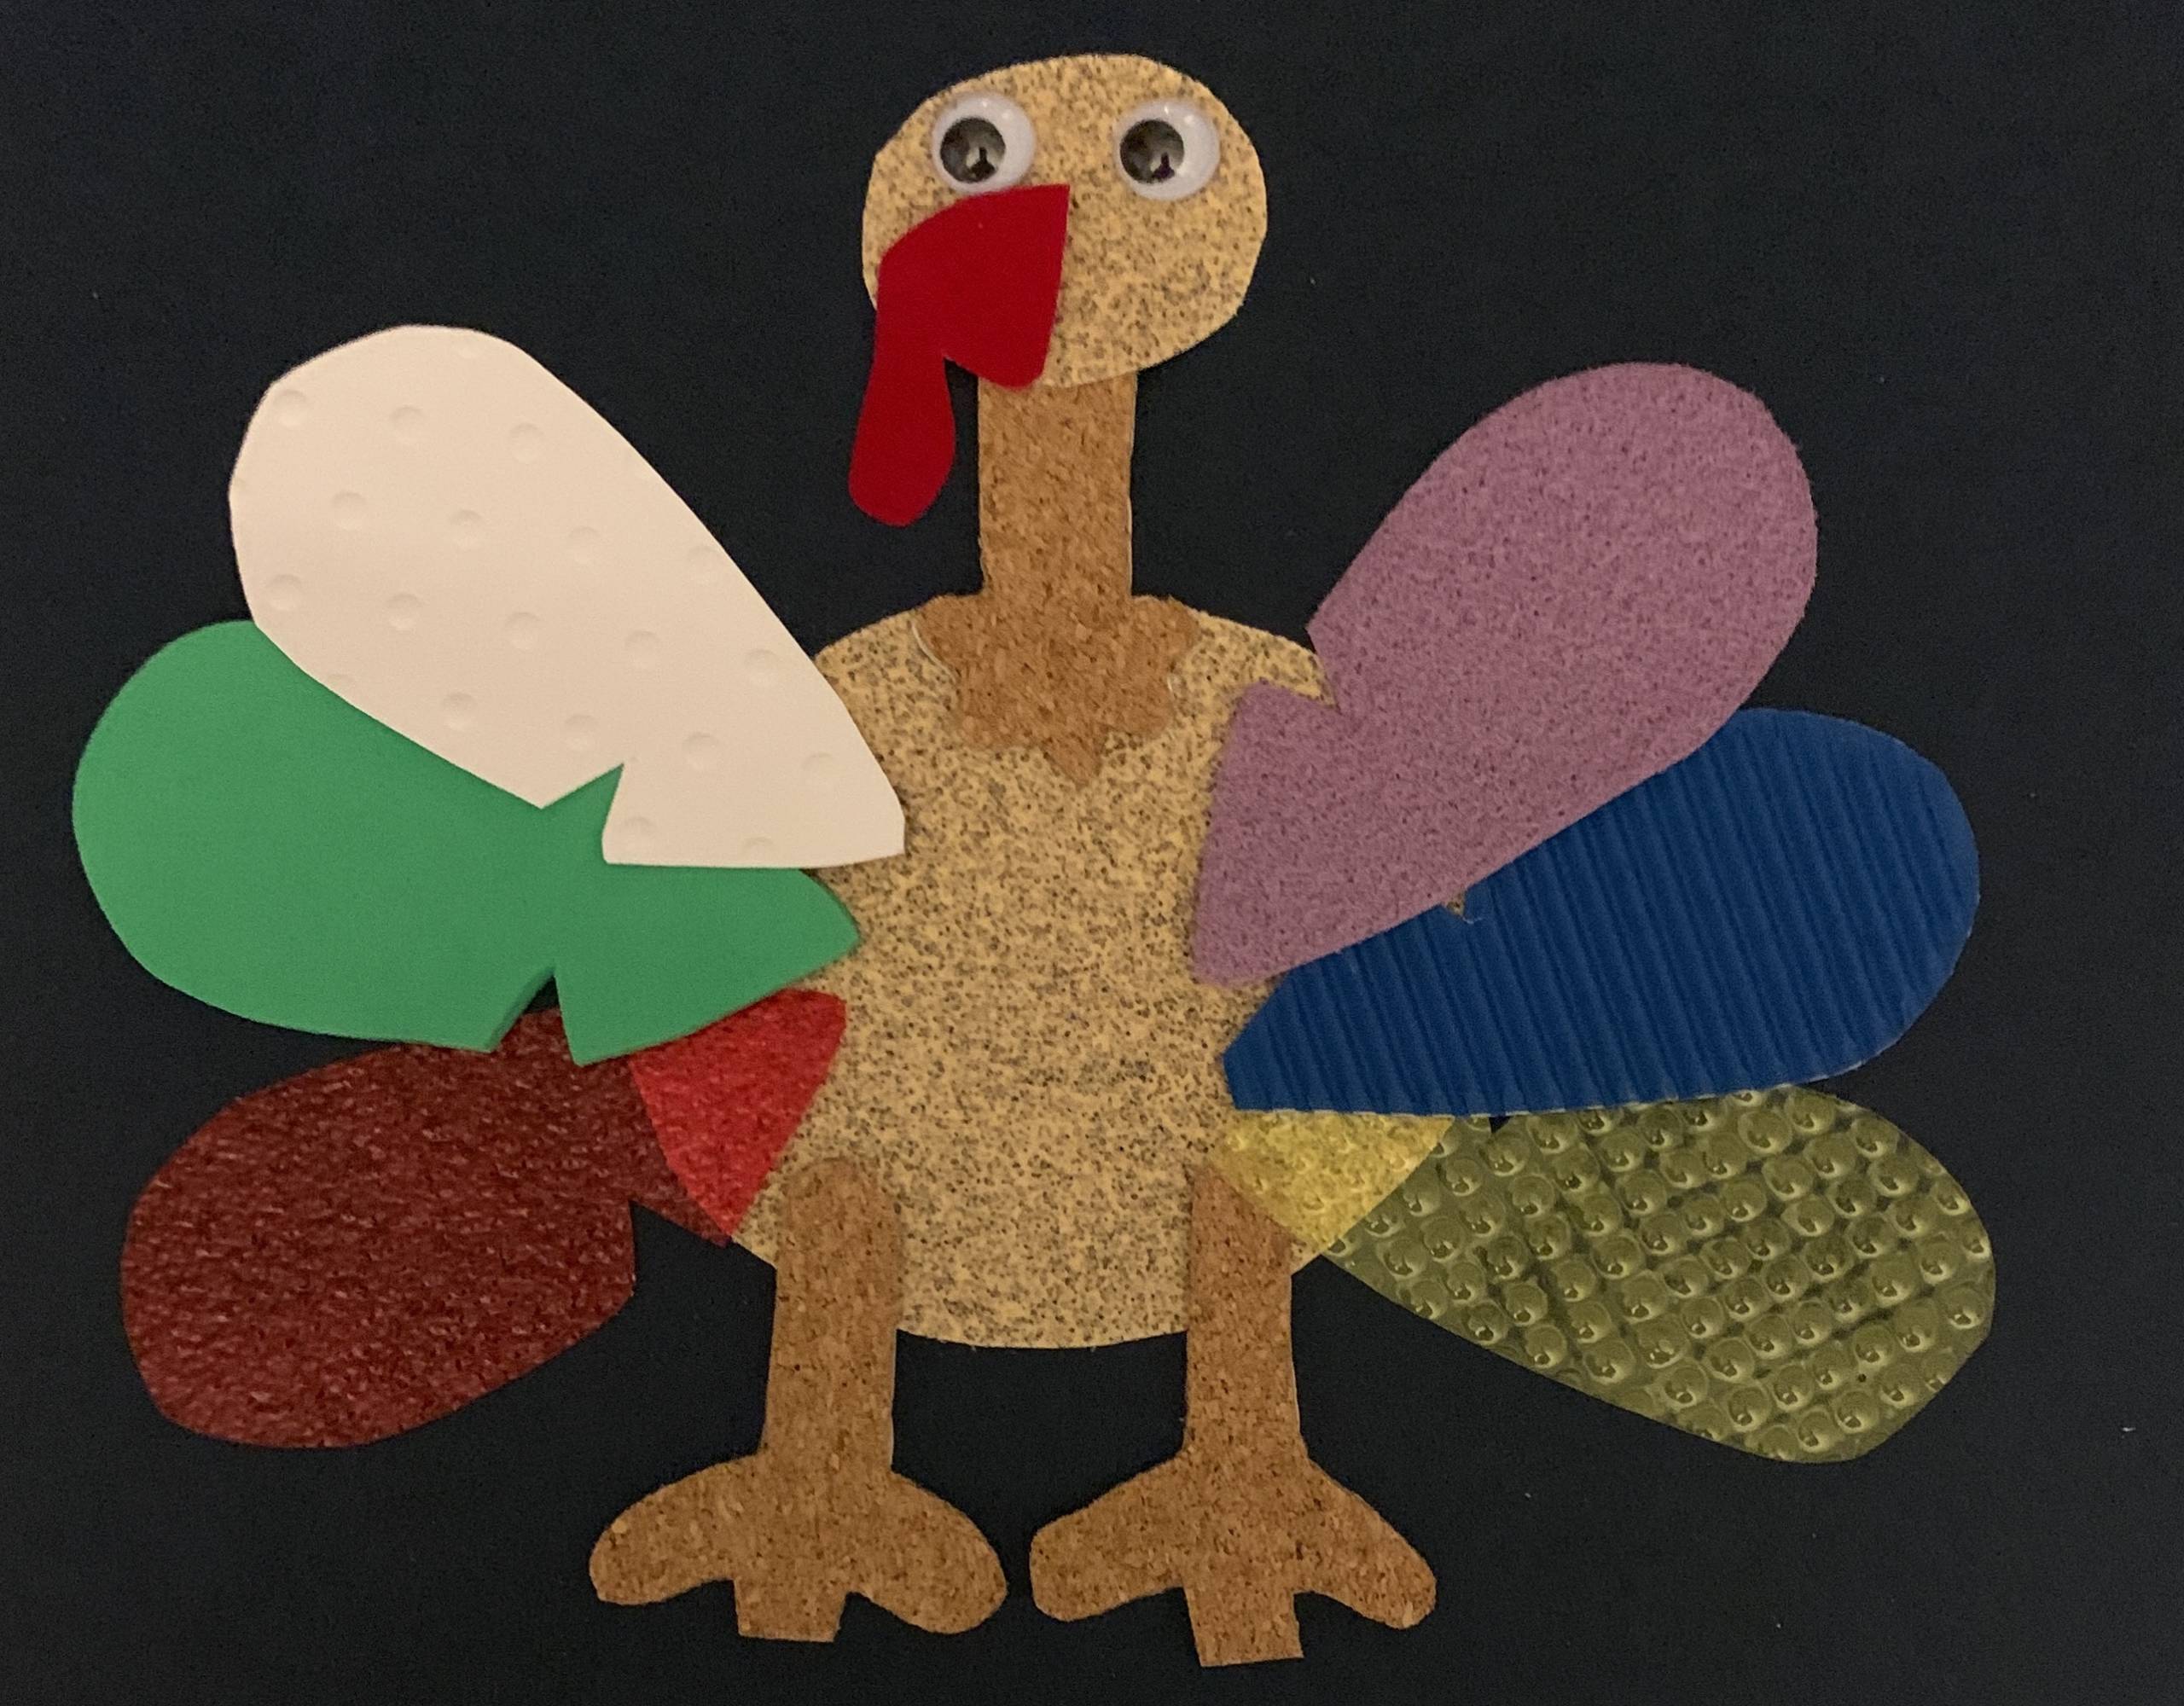
I wanted a fun and multipurpose craft activity for Thanksgiving with my students in the elementary setting. While searching through Teachers Pay Teachers, I saw this little gem “Colorful Turkey Feathers Coloring Sorting Task Cards by Mrs. Jacksons Little Learners for $1.50. I decided to take the idea and put my spin to it. Instead of printing the cards to do a task box, I used the turkey and a feather as a pattern to make a tactile turkey.
Possible activities from this:
- Following directions
- Review of paper placement terminology (i.e. portrait/landscape or vertical/horizontal), as well as orientation (e.g. top, middle, left)
- Exploring the textures…sorting by texture/naming the texture (e.g. soft/rough)
- Counting the pieces of the craft “kit”
- Peeling the stickers off
- Putting the items down in a purposeful manner
- Writing a message for their family or gluing a thanksgiving message down
Materials
- I got most of the textured paper from APH’s Carousel of Textures.
- I had extra textures in my garage, but you could easily find at a craft store.
- I added sand paper, self-adhesive cork sheet, and textured paper from the scrapbooking section (I chose a “bumpy” page).
- I chose a dark cardstock to adhere the “turkey” to in order to make the turkey pop.
- I also added wiggly adhesive eyes.

My goal was to do an activity that did not require gluing (or as little as possible) where we could work on fine motor skills in a fun craft. The head/body and the legs/neck are similar in color for a reason. I want to have the conversation with my students about the difference in texture, or, for my nonverbal students, give them the opportunity to feel the difference in texture.
I traced and cut out all the shapes and placed the items needed in a Ziploc bag with the student’s name written on the outside of the bag. The names on the bag were mainly done for me so I do not forget anyone.

Directions (post exploration):
- Put the cardstock on the table in front of you in portrait view.
- Find the body of the turkey (describe if needed) and take the sticker off the back. Put the “body” on the cardstock in the middle of the paper.
- Find the neck of the turkey (describe if needed) and take the sticker off the back. Put the “neck” on the top of the ‘body’ in the middle with the frilly side down.
- Find the head of the turkey (describe if needed) and take the sticker off the back. Put the “head” on the top edge of the neck.
- Find the left leg of the turkey (describe if needed) and take the sticker off the back. Put the “left leg” on the bottom of the “body”.
- Find the right leg of the turkey (describe if needed) and take the sticker off the back. Put the “right leg” on the bottom of the “body” beside the “left leg”.

- Find the “wattle” of the turkey (describe if needed) and take the sticker off the back. Put the “wattle” on the bottom center of the face.

- Find the two “eyes” of the turkey (describe if needed) and take the sticker off the back. Put the “eyes” on the top center of the face.

- Find the 6 “feathers” of the turkey (describe if needed) and take the sticker off the back. Put the “feathers” on the sides of the “body”. 3 feathers on the right and 3 feathers on the left.

- Glue the Thanksgiving message to the bottom of the cardstock under the “turkey”. Add braille to the message, if appropriate.

Optional: If you know your student might struggle with all the pieces, put part of it together for them. You will know how much to do, as you know your students.
Tips:
- When doing the legs, I wrote L or R on the back to differentiate between the left and right legs. This makes life WAY easier when trying to put them back.
- Number your items while tracing. This helps me know how many I’ve traced without having to continually recount them.
- Don’t forget to turn the image face down on the back of the textured paper you are using. This ensures everything fits correctly when it’s assembly time!
- If the textured paper doesn’t have an adhesive back, use the double-backed adhesive sheets that come in APH’s Carousel of Textures.