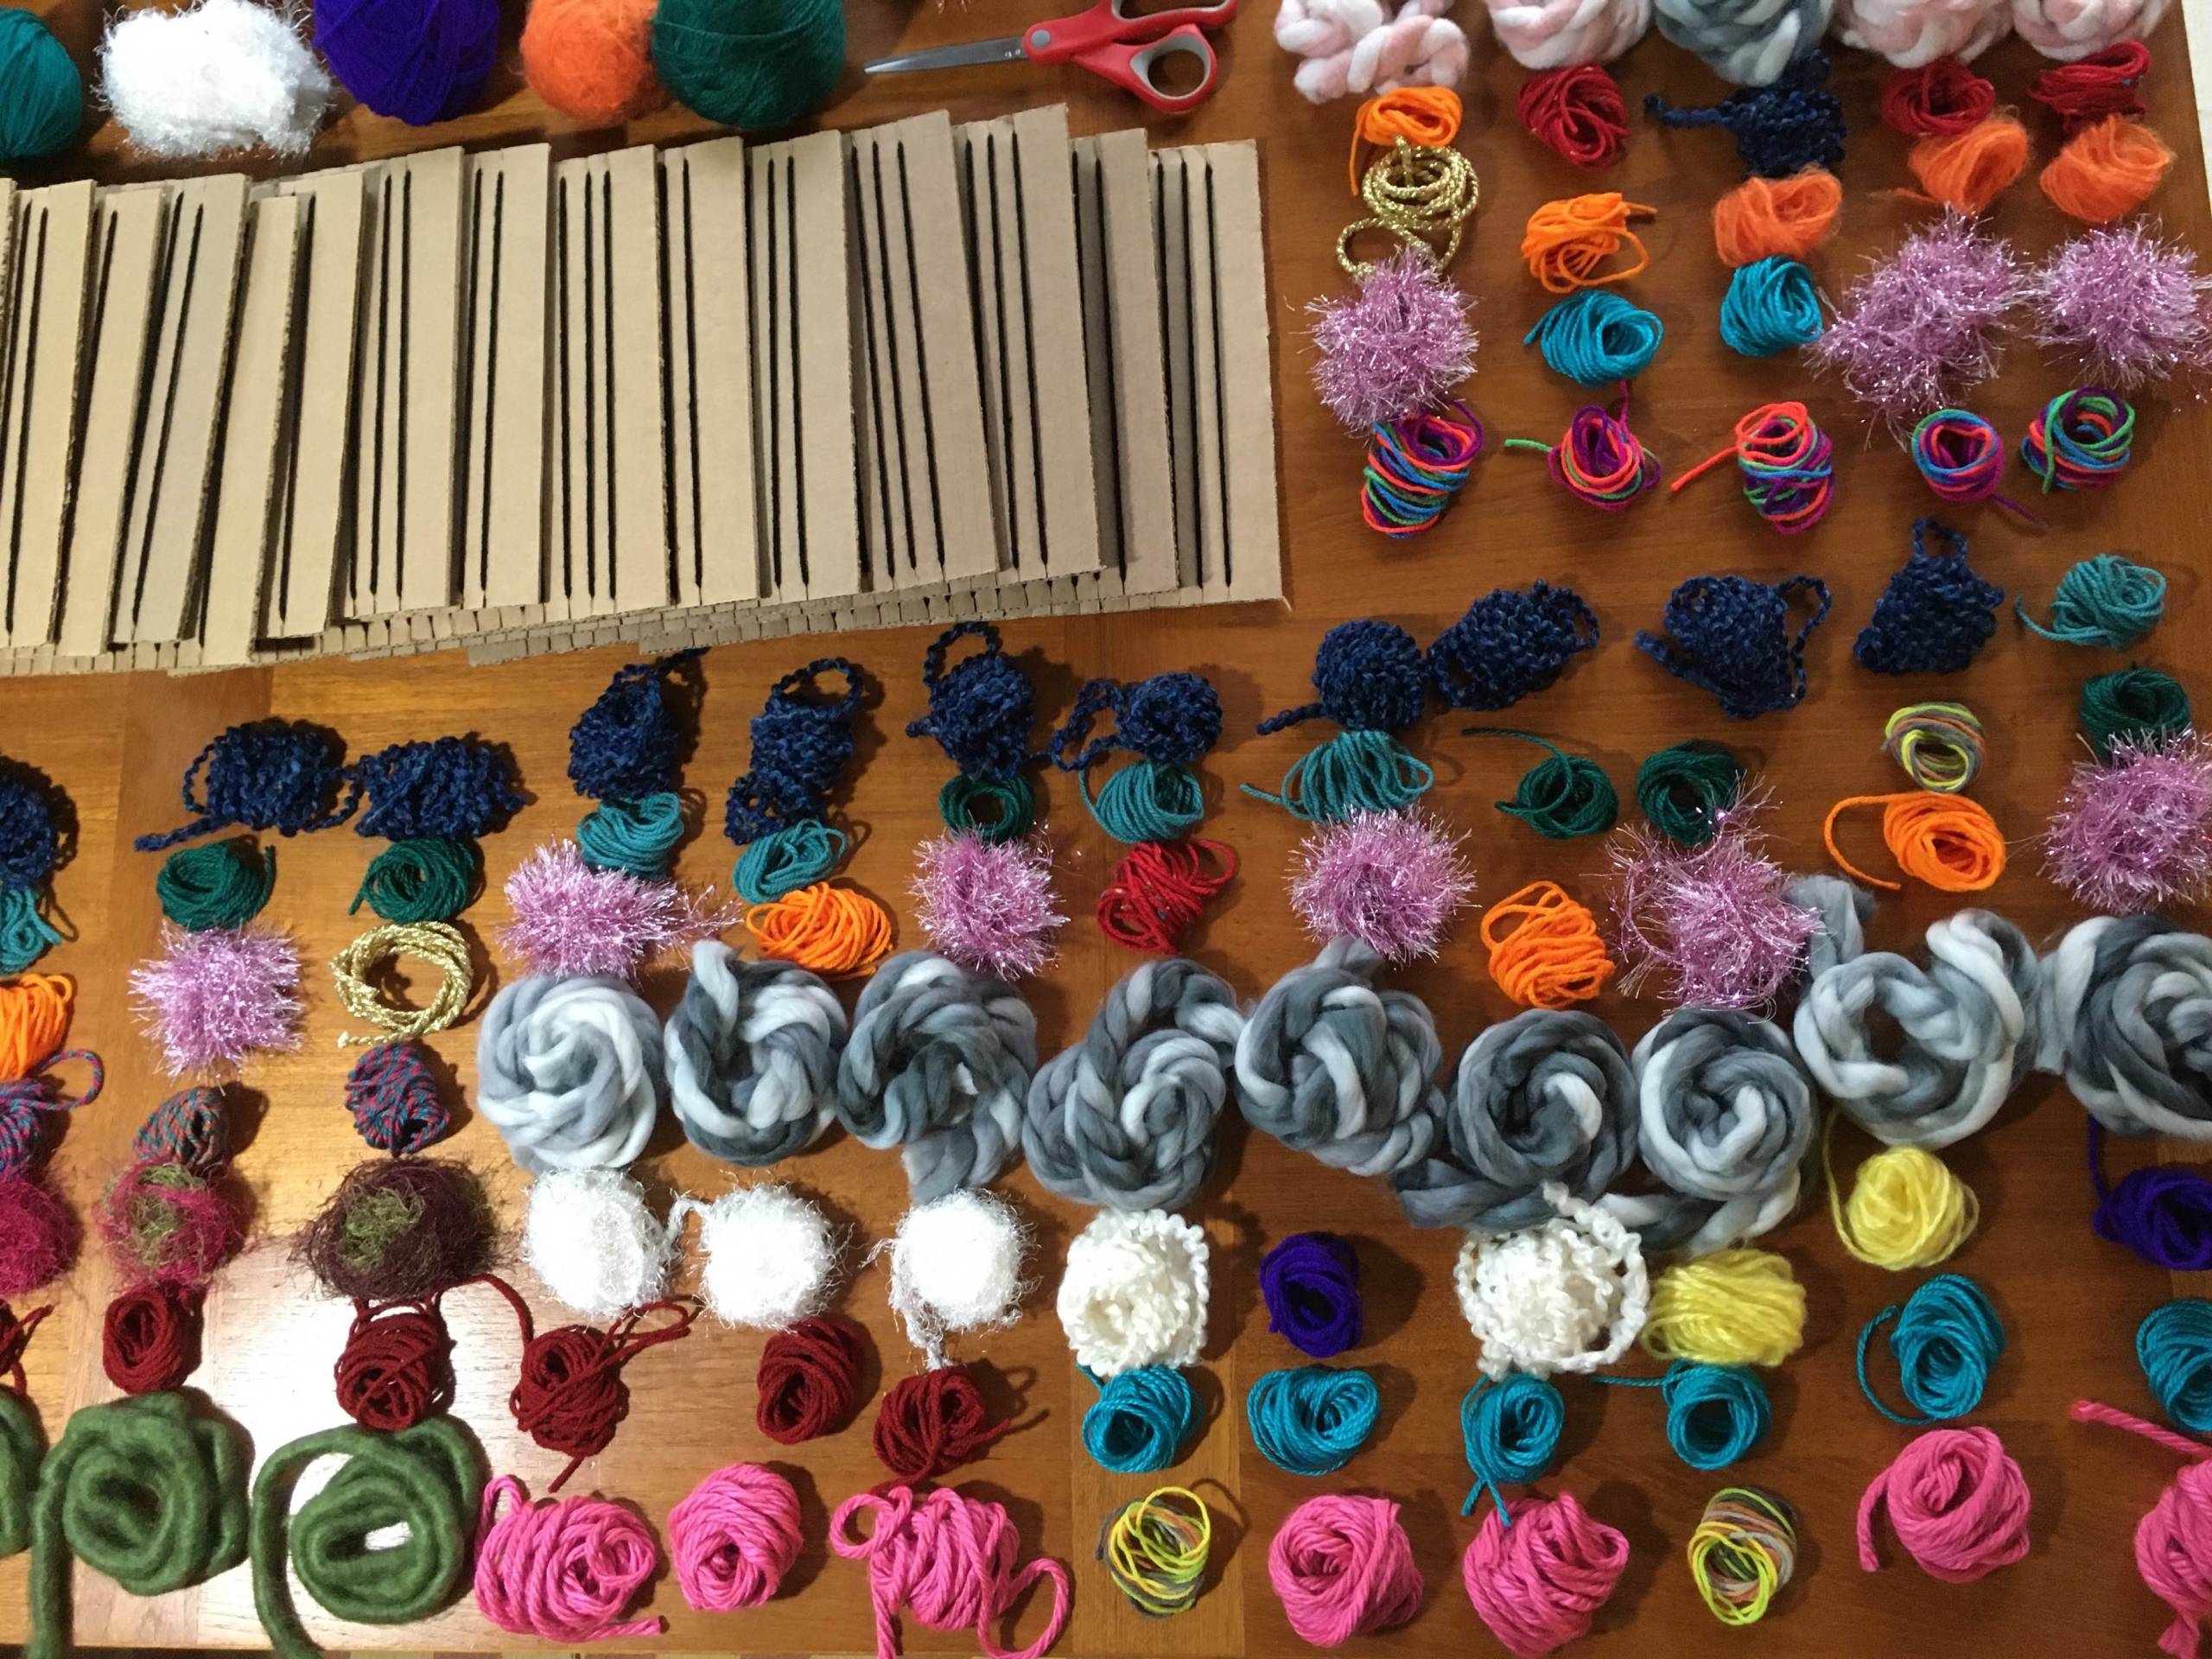
You will need:
- Cardboard loom – this is what you will use to make your weaving. It already has the warp yarn on it.

- Popsicle stick for a shed stick – you will attach your yarn to the end of this with tape and then use this to pull your yarn through the warp threads on the loom.

- Bundles of yarn for making the weaving. This is also called the weft yarn.

- Wooden Dowel to hang finished weaving

- You will need to provide masking tape and scissors to complete this project.
Definitions of the terms I will use in this instruction:
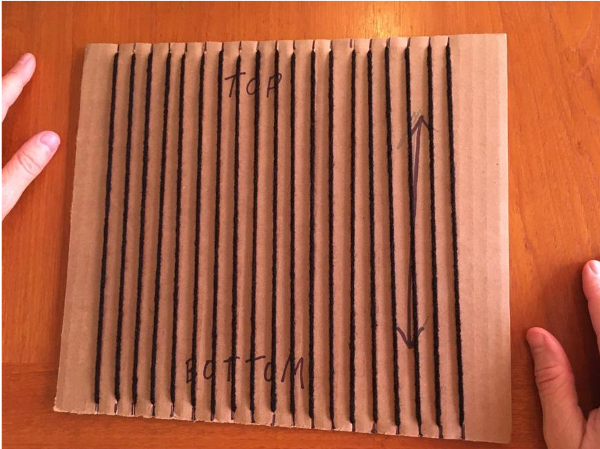
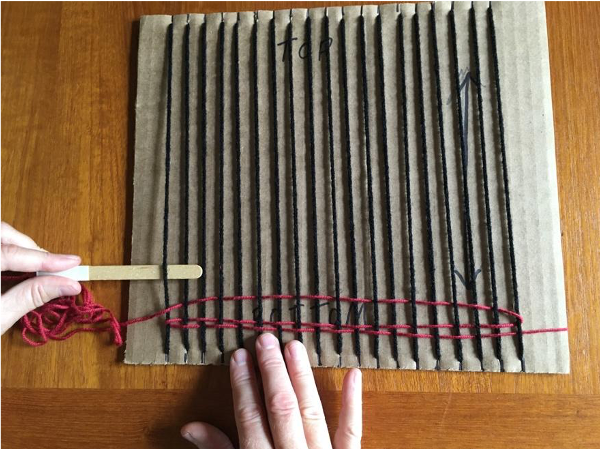
- Loom – flat piece of cardboard with warp yarn on it
- Warp – The yarn on the cardboard loom that goes from top to bottom
- Weft – The yarn that you will weave that goes from left to right
- Shed stick – The popsicle stick. This is what you will attach to your weft yarn in order to weave and to pull it through the warp yarn to create your weaving.
- Dowel – the stick that you will use to hang your finished weaving
Instructions on how to weave:
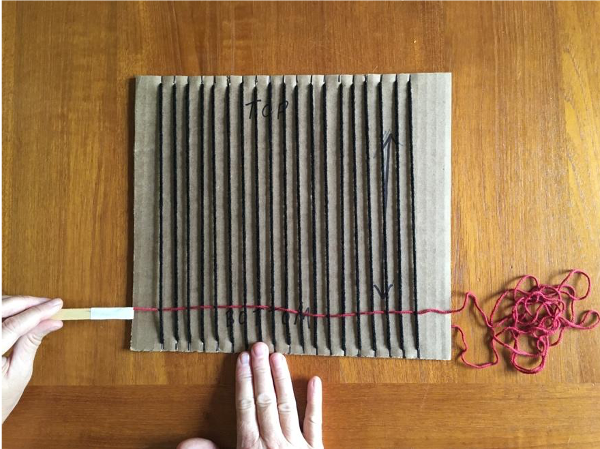
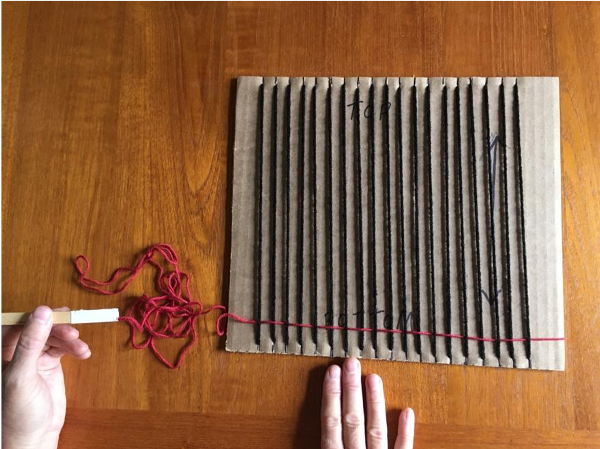
- Choose a bundle of yarn to start your weaving.
- Attach one end of the yarn to the stick.


- Tape the other end of the yarn to the back of the right or left side of the bottom of the loom.

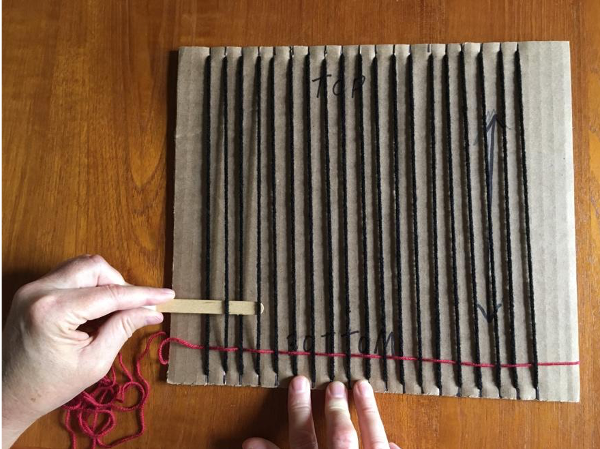
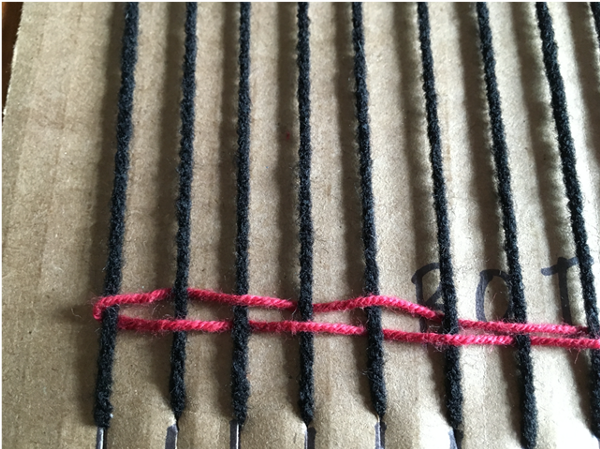
- Flip the loom over and begin to weave your weft yarn from the right to left side through your warp yarn. To do this, put your shed stick over one yarn and under the next yarn, following this pattern of under and over until you reach the other side of the loom and pull all the yarn through the weaving to the left side. You will be making the weaving from the bottom up.


- Now you have all of your weft yarn on the left side of your loom. You will now weave through your warp yarn from the left side to the right side of the loom.

- Again, you will put your shed stick over the warp yarn and under the next warp yarn. Whether you go under or over depends on what you did on the last warp yarn. Did you go over or under? Then do the opposite for the new line of your weaving. You will know it’s not right if, when you pull the yarn through with your shed stick, it comes undone. NO Worries! Just start again.


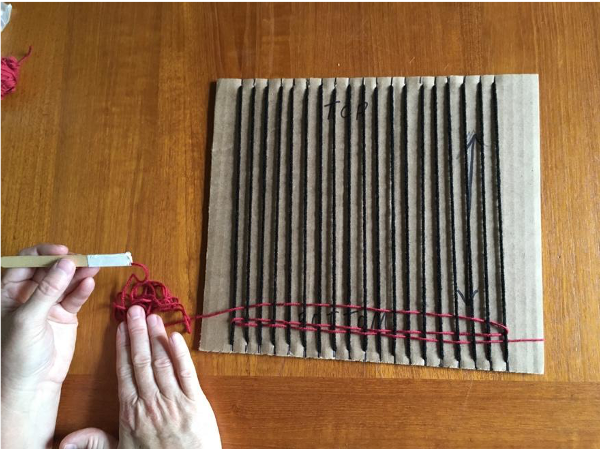

- Repeat steps 4-6 until you are done with your first color of yarn.
- When you are done with your first color of yarn, clip the shed stick from it and remove the tape from the shed stick.

- Choose another color of yarn and tie it to the end of the first color of yarn with a simple knot.


- Find the other end of the next color of weft yarn and tape your shed stick to it just like you did in the beginning.


- Continue to weave with the new color following steps 4-7 until you are ready for a new color.


- Repeat steps 8 through 11 until you are done with your weaving.
- If you run out of yarn that I have sent, remember you can cut an old t-shirt or fabric into strips, you can use rope, string, paper, dried grass or seed pods, anything you’d like. Be creative and see what you can weave into your weaving.
- Now your beautiful creation is almost done and it is time to remove your weaving from the cardboard loom.

- Turn the loom over and take all of the tape off of the loom and your weaving.


- Detach the warp yarn at the top and bottom of the cardboard loom by gently pulling it off of the tabs of the loom.


Be careful to leave space in the yarn to weave your dowel through the top.

- Use the dowel that is included in your packet and insert it through the loops at the top of your weaving.


There will be a loose string at one end that you will tie in a loop and put the dowel through.


- Hang your beautiful creation and show everyone you know what you made.

Here is a website that also has great explanations for weaving. Check it out. It also explains other weaving techniques.