Last week, I had the opportunity to observe and participate in a wonderful lesson for elementary students who were attending a Short-Term Program at Texas School for the Blind and Visually Impaired focused on art and creativity. This activity was adapted from an idea by blogger and social media influencer, Cassie Stephens. In her blog, Art Teacherin’ 101, she describes herself as an elementary art teacher who loves to create with her students in Nashville, Tennessee.
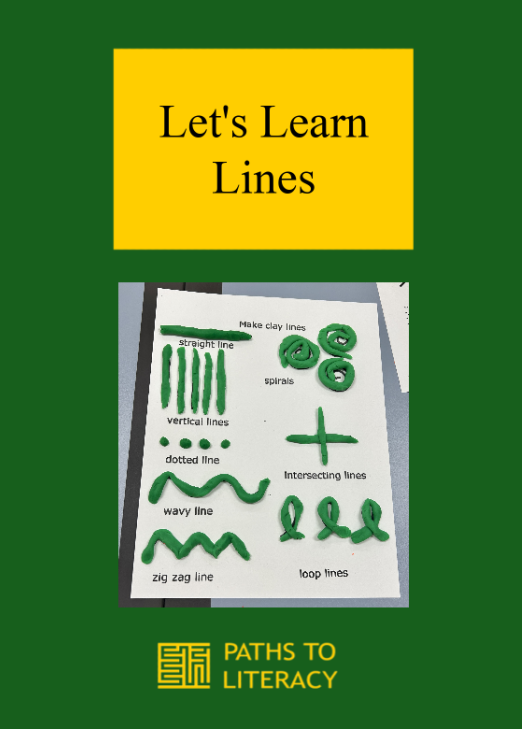
TSBVI teacher, Kathryn Heitman (TVI), and Short-Term Programs teacher assistant, Neely Kulhanek, adapted Cassie’s lesson for their students with visual impairments. Using Cassie’s template as a guide, Neely created a print and braille version of the worksheet on Swell Touch Paper to create a raised line tactile graphic. Below is a description of the activity, materials needed, and additional ideas.
Description
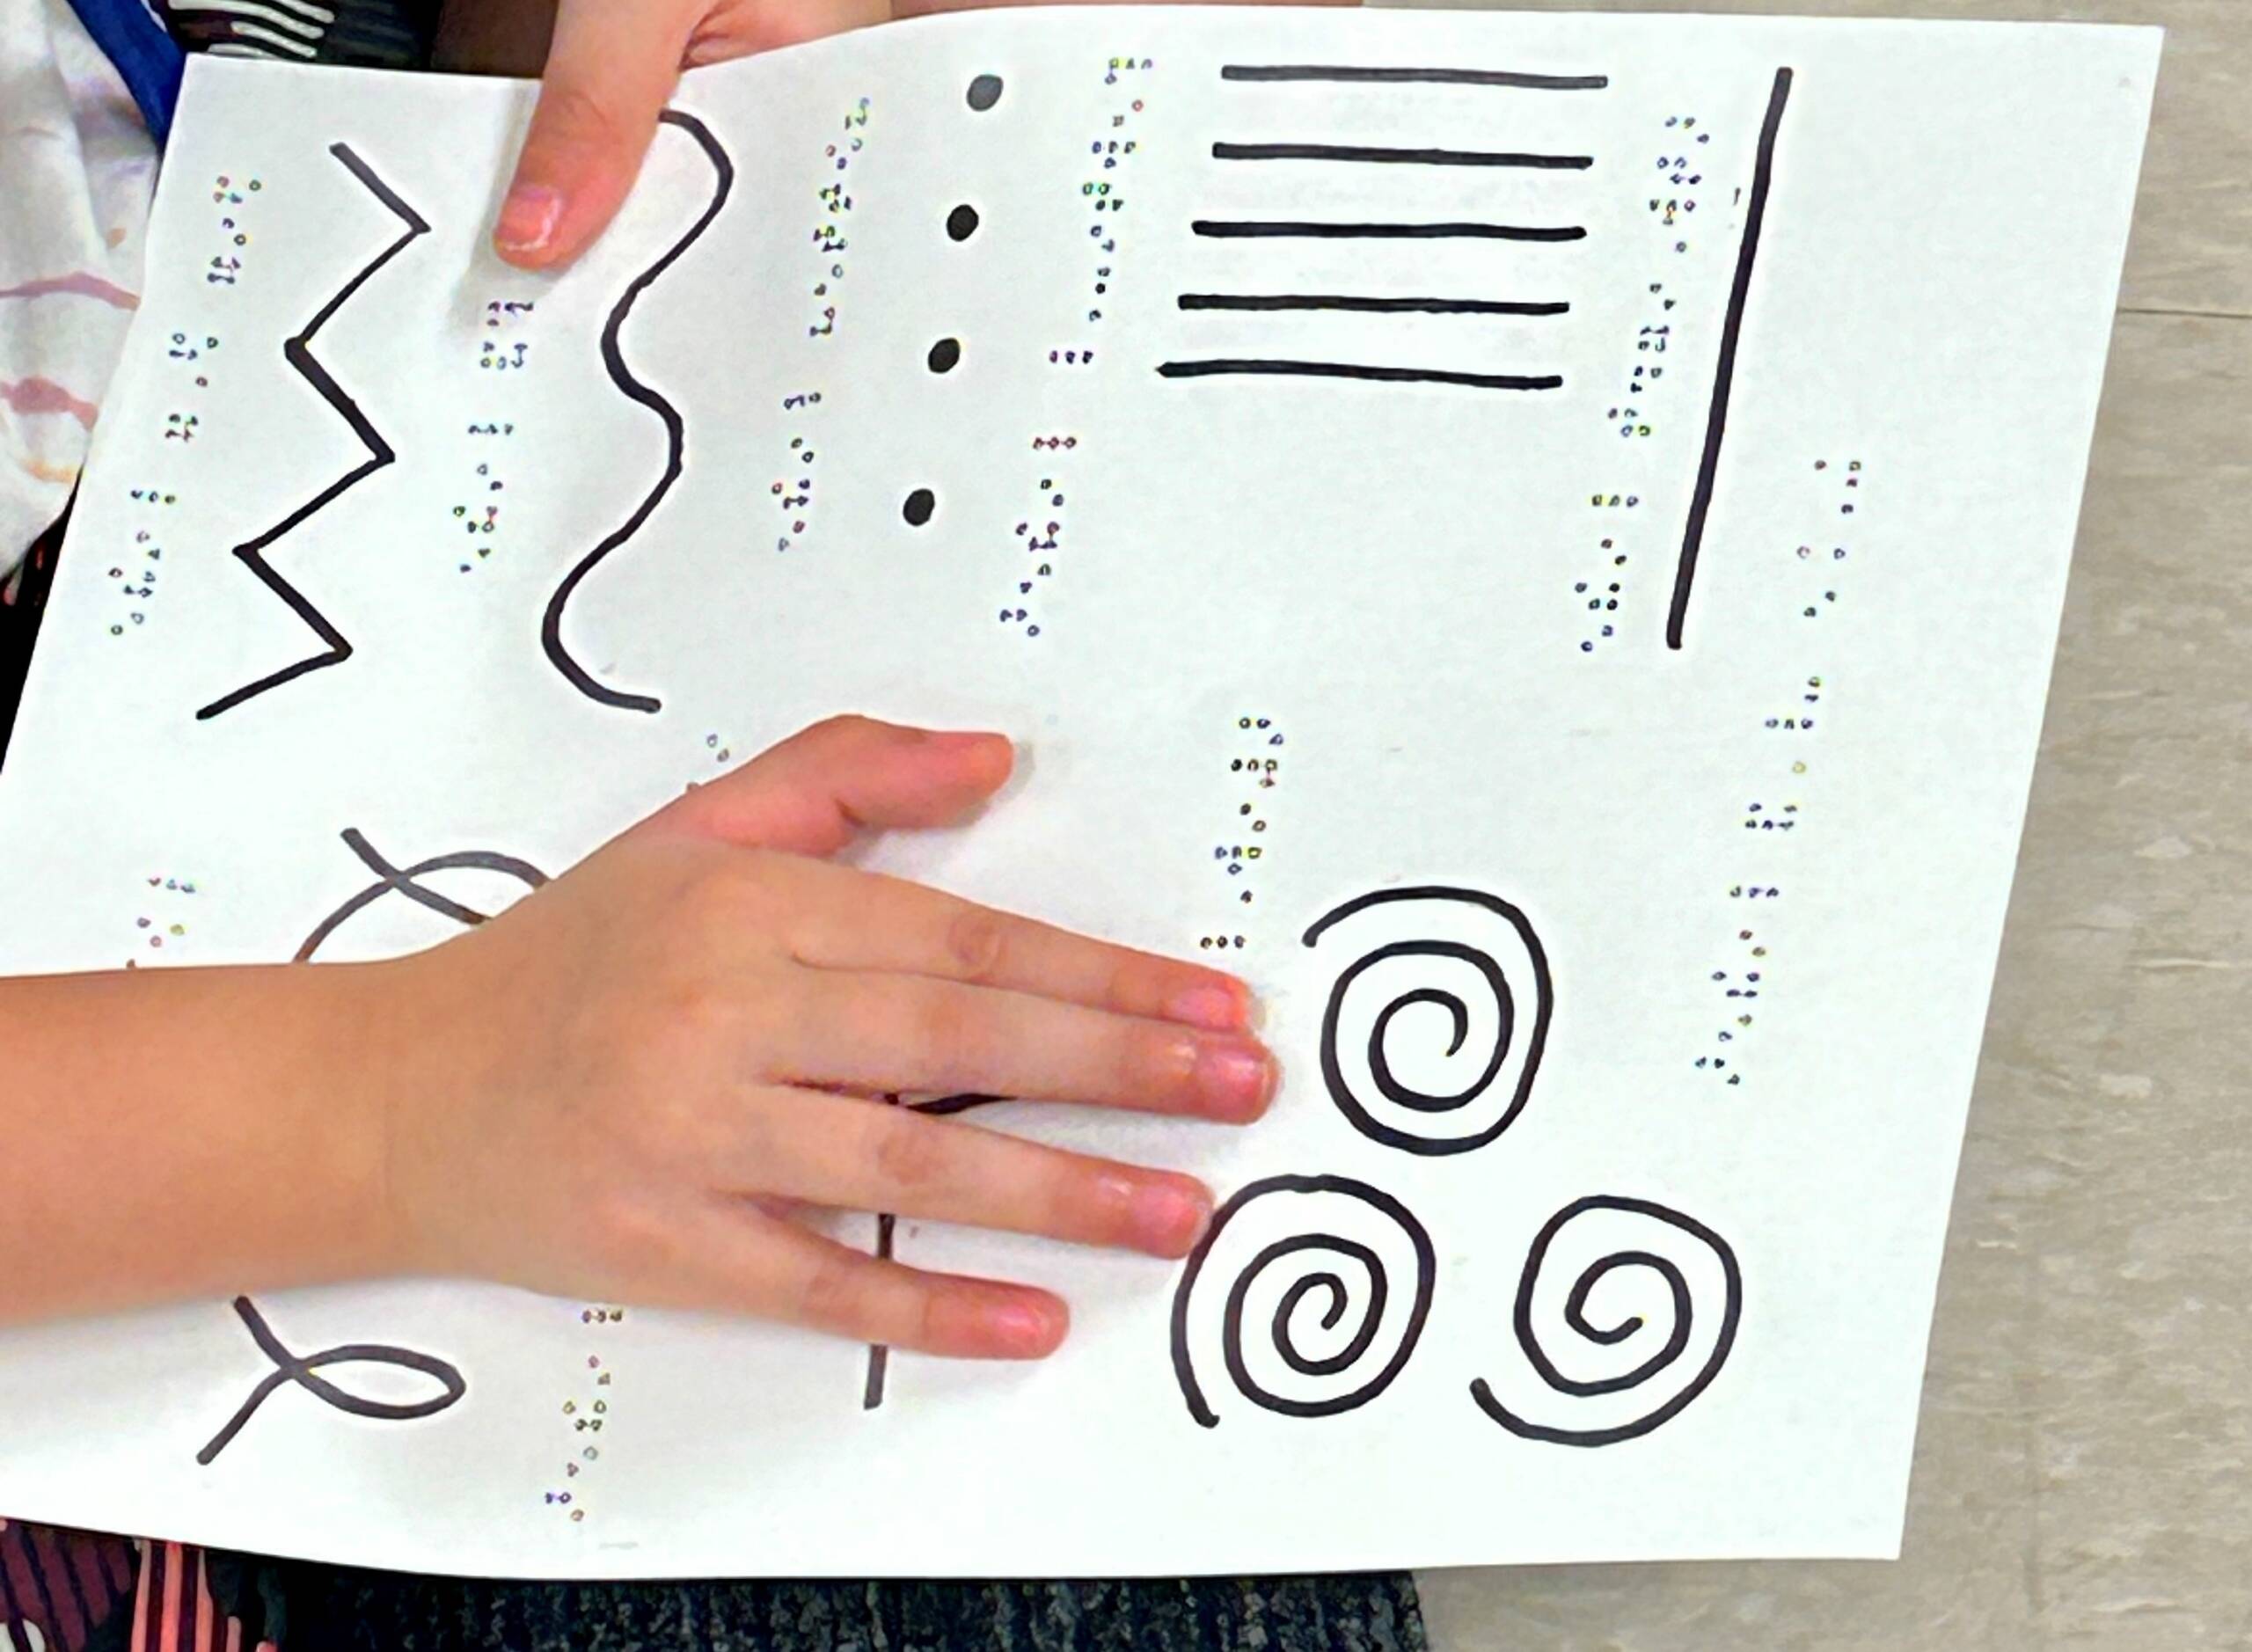
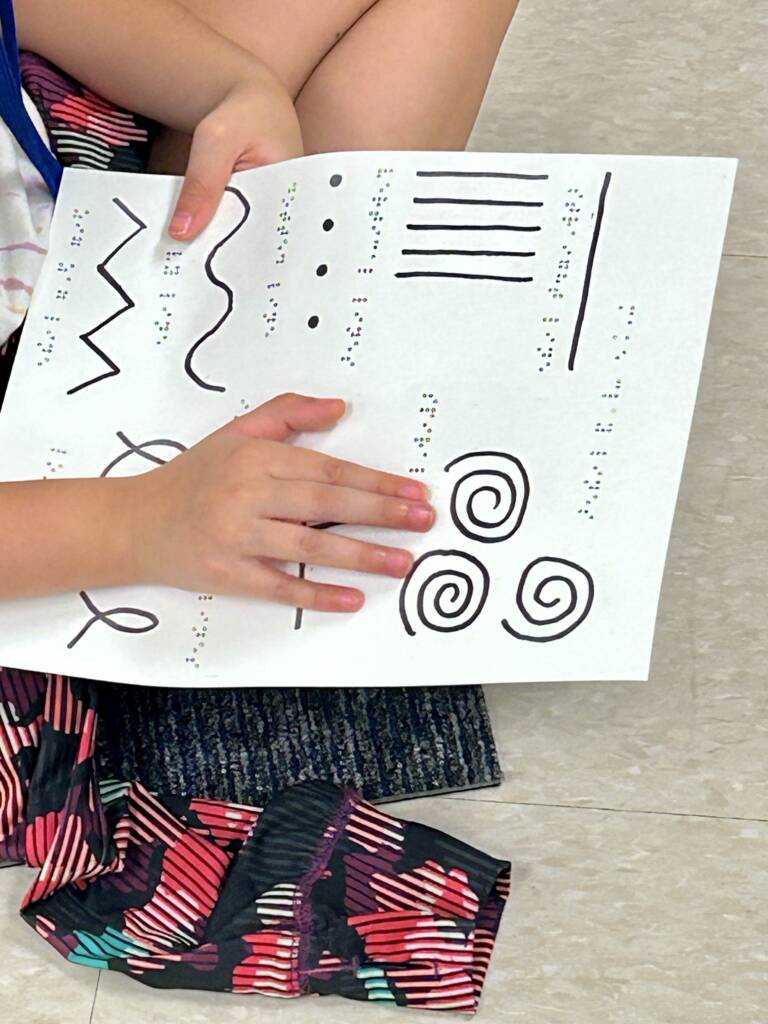
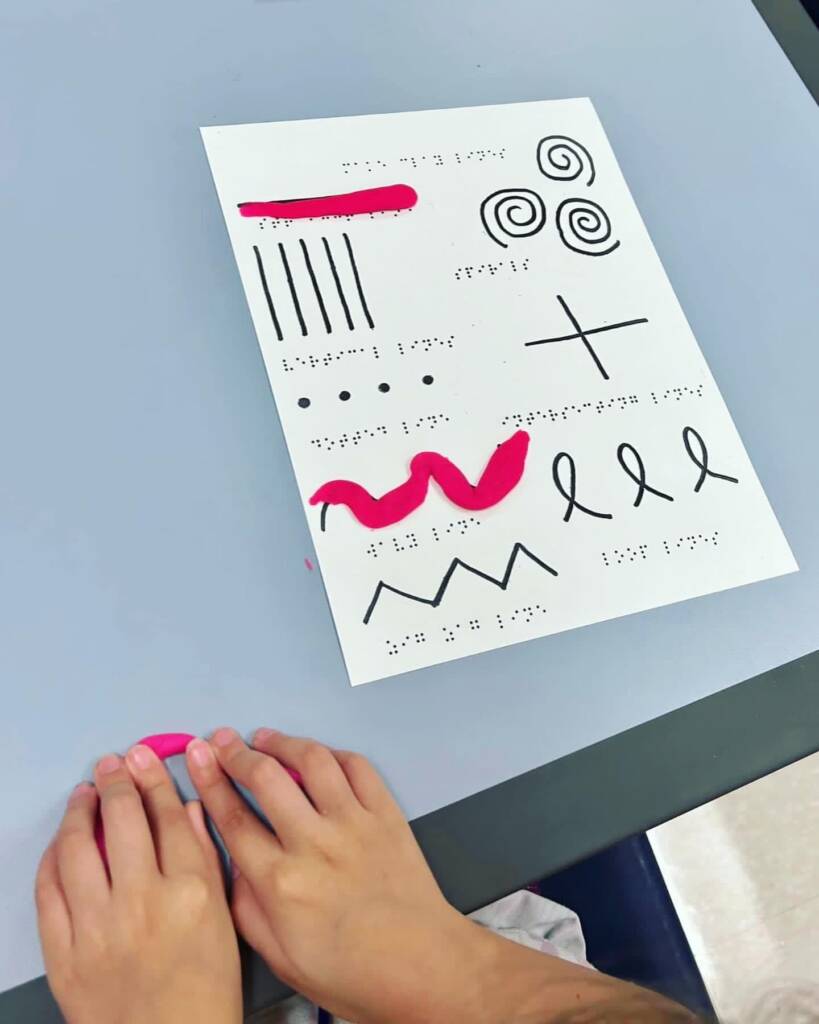
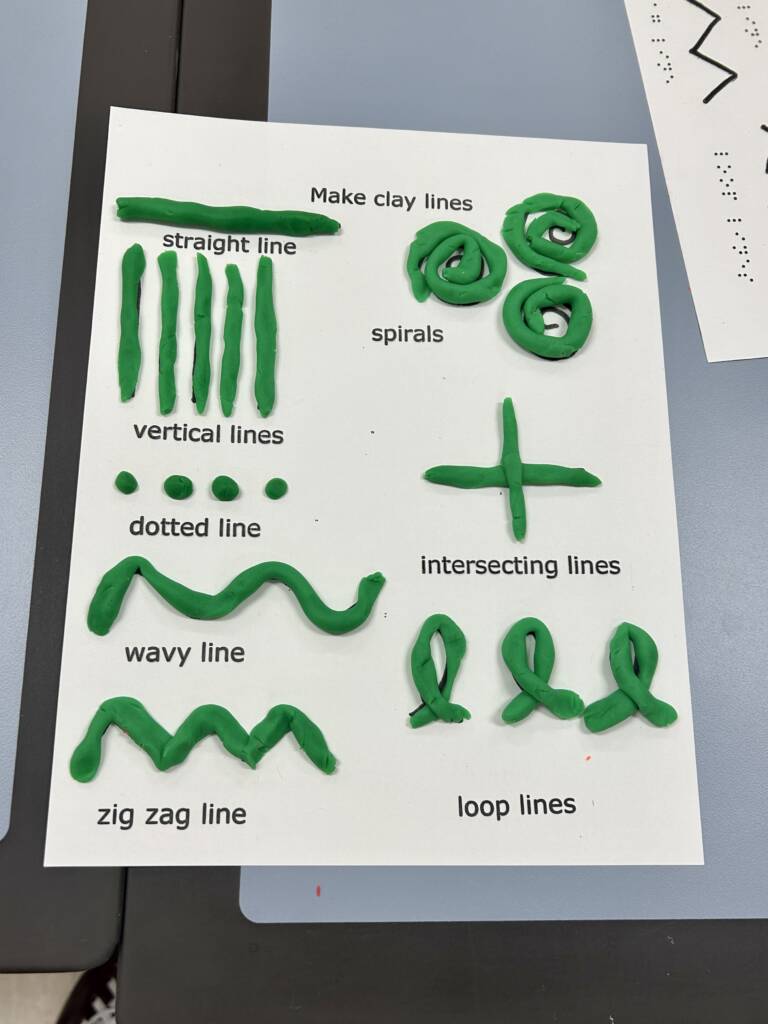
In this lesson, students were presented with a tactile graphic to explore. On the page were a variety of line types such as vertical lines, spirals, a dotted line, and a set of intersecting lines. Each style was labeled in print or braille for access. The teacher led the students through a discovery discussion to orient them to the graphic and explore the information presented. Students were given a container of playdough and asked to recreate the line types. They could choose to do this on the table next to the graphic or directly on top of the graphic.
Materials Needed
- Creating Lines with Modeling Clay Lesson
- Let’s Learn Lines Document (Print)
- Let’s Learn Lines Document (Braille)
- Playdough
- Work mat or tray (optional)
Modifications and Extensions
- Discuss the connection to other subjects like math, science, and writing.
- Encourage students to trace the lines from left to right with their fingers and to locate the beginning and end of each line.
- Extend the activity by having students create a sculpture with the playdough lines.
- Facilitate a scavenger hunt to find different types of lines in the natural environment.
- Modify this activity by using different materials such as chenille stems or wiki sticks.
- Reduce clutter and complexity by putting fewer line types on the page, removing the braille/print, or by putting each type on its own card or page.
- Provide physical support by rolling the playdough into long strips prior to the activity.
- For students with low vision, enlarge a print copy on plain paper or use colored paper for increased visibility.