Sighted people typically communicate key information by pointing, drawing, demonstrating, moving, and writing in print. They may say something only to bring attention to this visual information. However, when they’re speaking to listeners with visual impairments/blindness, it’s important that they describe in ways that don’t rely solely on visual information. Below are some alternatives to “this, that, and there” taken from Classroom Collaboration, a handbook for classroom teams serving students with visual impairments/blindness, published by Perkins.
In introducing others to verbal description, it may be helpful to send them the link to this Powerpoint. (You might do this in the late Summer/Fall, as inclusion classroom teams for students with visual impairments/blindness are just starting up.) The Powerpoint is usually self-explanatory, but it will be particularly effective with a face-to-face follow-up including additional examples that are specific to students and their settings. Click here to download the Powerpoint.
|
This, That, There Statements |
Stand-alone, Non-visual Statements |
|
1. “The number is in that corner of the page,” (pointing.) |
1. “The number is in the near, right corner of the page.” |
|
2. “This is today’s homework,” (writing on board.) |
2. “I’ll read today’s homework as I write it on the board.” |
|
3. “It’s about this big,” (spreading arms.) |
3. “It’s about as big as I can spread my arms apart.” |
|
|
4. “New Zealand is in the South Pacific Ocean, East of Australia.” |
|
5. “I want everyone to go over there,” (pointing.) |
5. “I want everyone to go to the back of the room.” |
|
6. “It’s this student’s turn,” (gazing.) |
6. “It’s Joshua’s turn.” |
|
7. “The hurricane started there,” (pointing on a map.) |
7. “The hurricane started in Jamaica, one of the Caribbean Islands.” |
|
8. “Your reading folders are in that corner of the room,” (pointing.) |
8. “Your reading folders are in the corner where the window wall meets the board wall.” |
|
9. “That was unacceptable (glaring at a student,) “you’re going to need to stay for silent lunch.” |
9. “J’Nai, looking at your neighbor’s paper was unacceptable. You’re going to need to stay for silent lunch.” |
|
10. “Start on this side of the paper,” (marking with a pencil.) |
10. “Start on the left side of the paper.” |
|
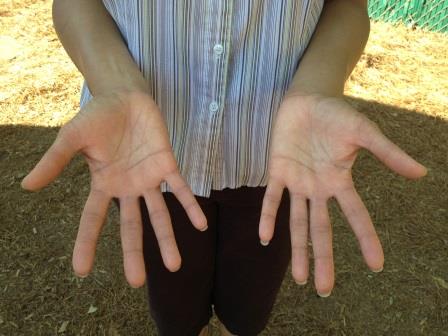
11. “He |
11. “He held his hands with his palms up and his fingers spread apart.” |
|
12. “I want you to stop what you’re doing whenever I do this.” (raising one hand.) |
12. “I want you to stop what you’re doing whenever I raise my hand. I’ll say outloud, ‘I’m raising my hand now.’” |
|
13. “Please line up at that door,” (looking toward the back door.) |
13. “Please line up at the back door,” |
|
14. “Draw a line like this, (marking on board.) |
14. “Draw a straight, vertical line from the top to the bottom of your page.” |
|
15. “This row may be dismissed,” (looking toward the row and nodding.) |
15. “The row with Zara in front may be dismissed.” |
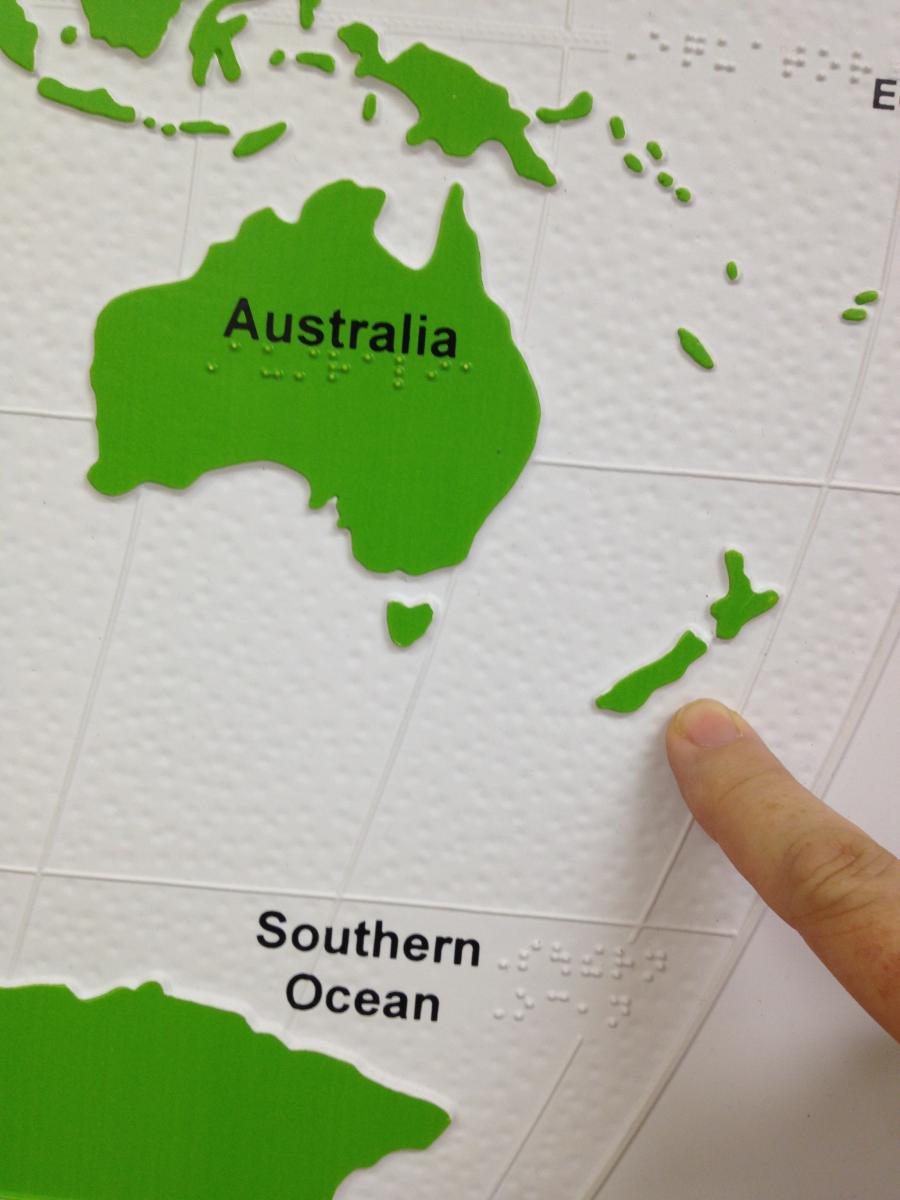 4. “New Zealand is there,” (marking on a map.)
 held his hands something like this,” (demonstrating.)
Adapted from Classroom Collaboration, page 59