A few months ago, I started working with a student on using braille signs and room numbers to locate destinations on our school’s campus during her orientation and mobility lessons. As a blind student with multiple disabilities, she generally locates destinations using rote memorization of the route and environmental cues. While she was getting around well on campus using her known routes, I felt working on using the braille available in the environment would be a good skill to practice prior to her graduation. Interestingly, once we
started using braille in this way, I kept finding new ways for us to incorporate braille into our lessons to make them more meaningful and to support her use of braille.
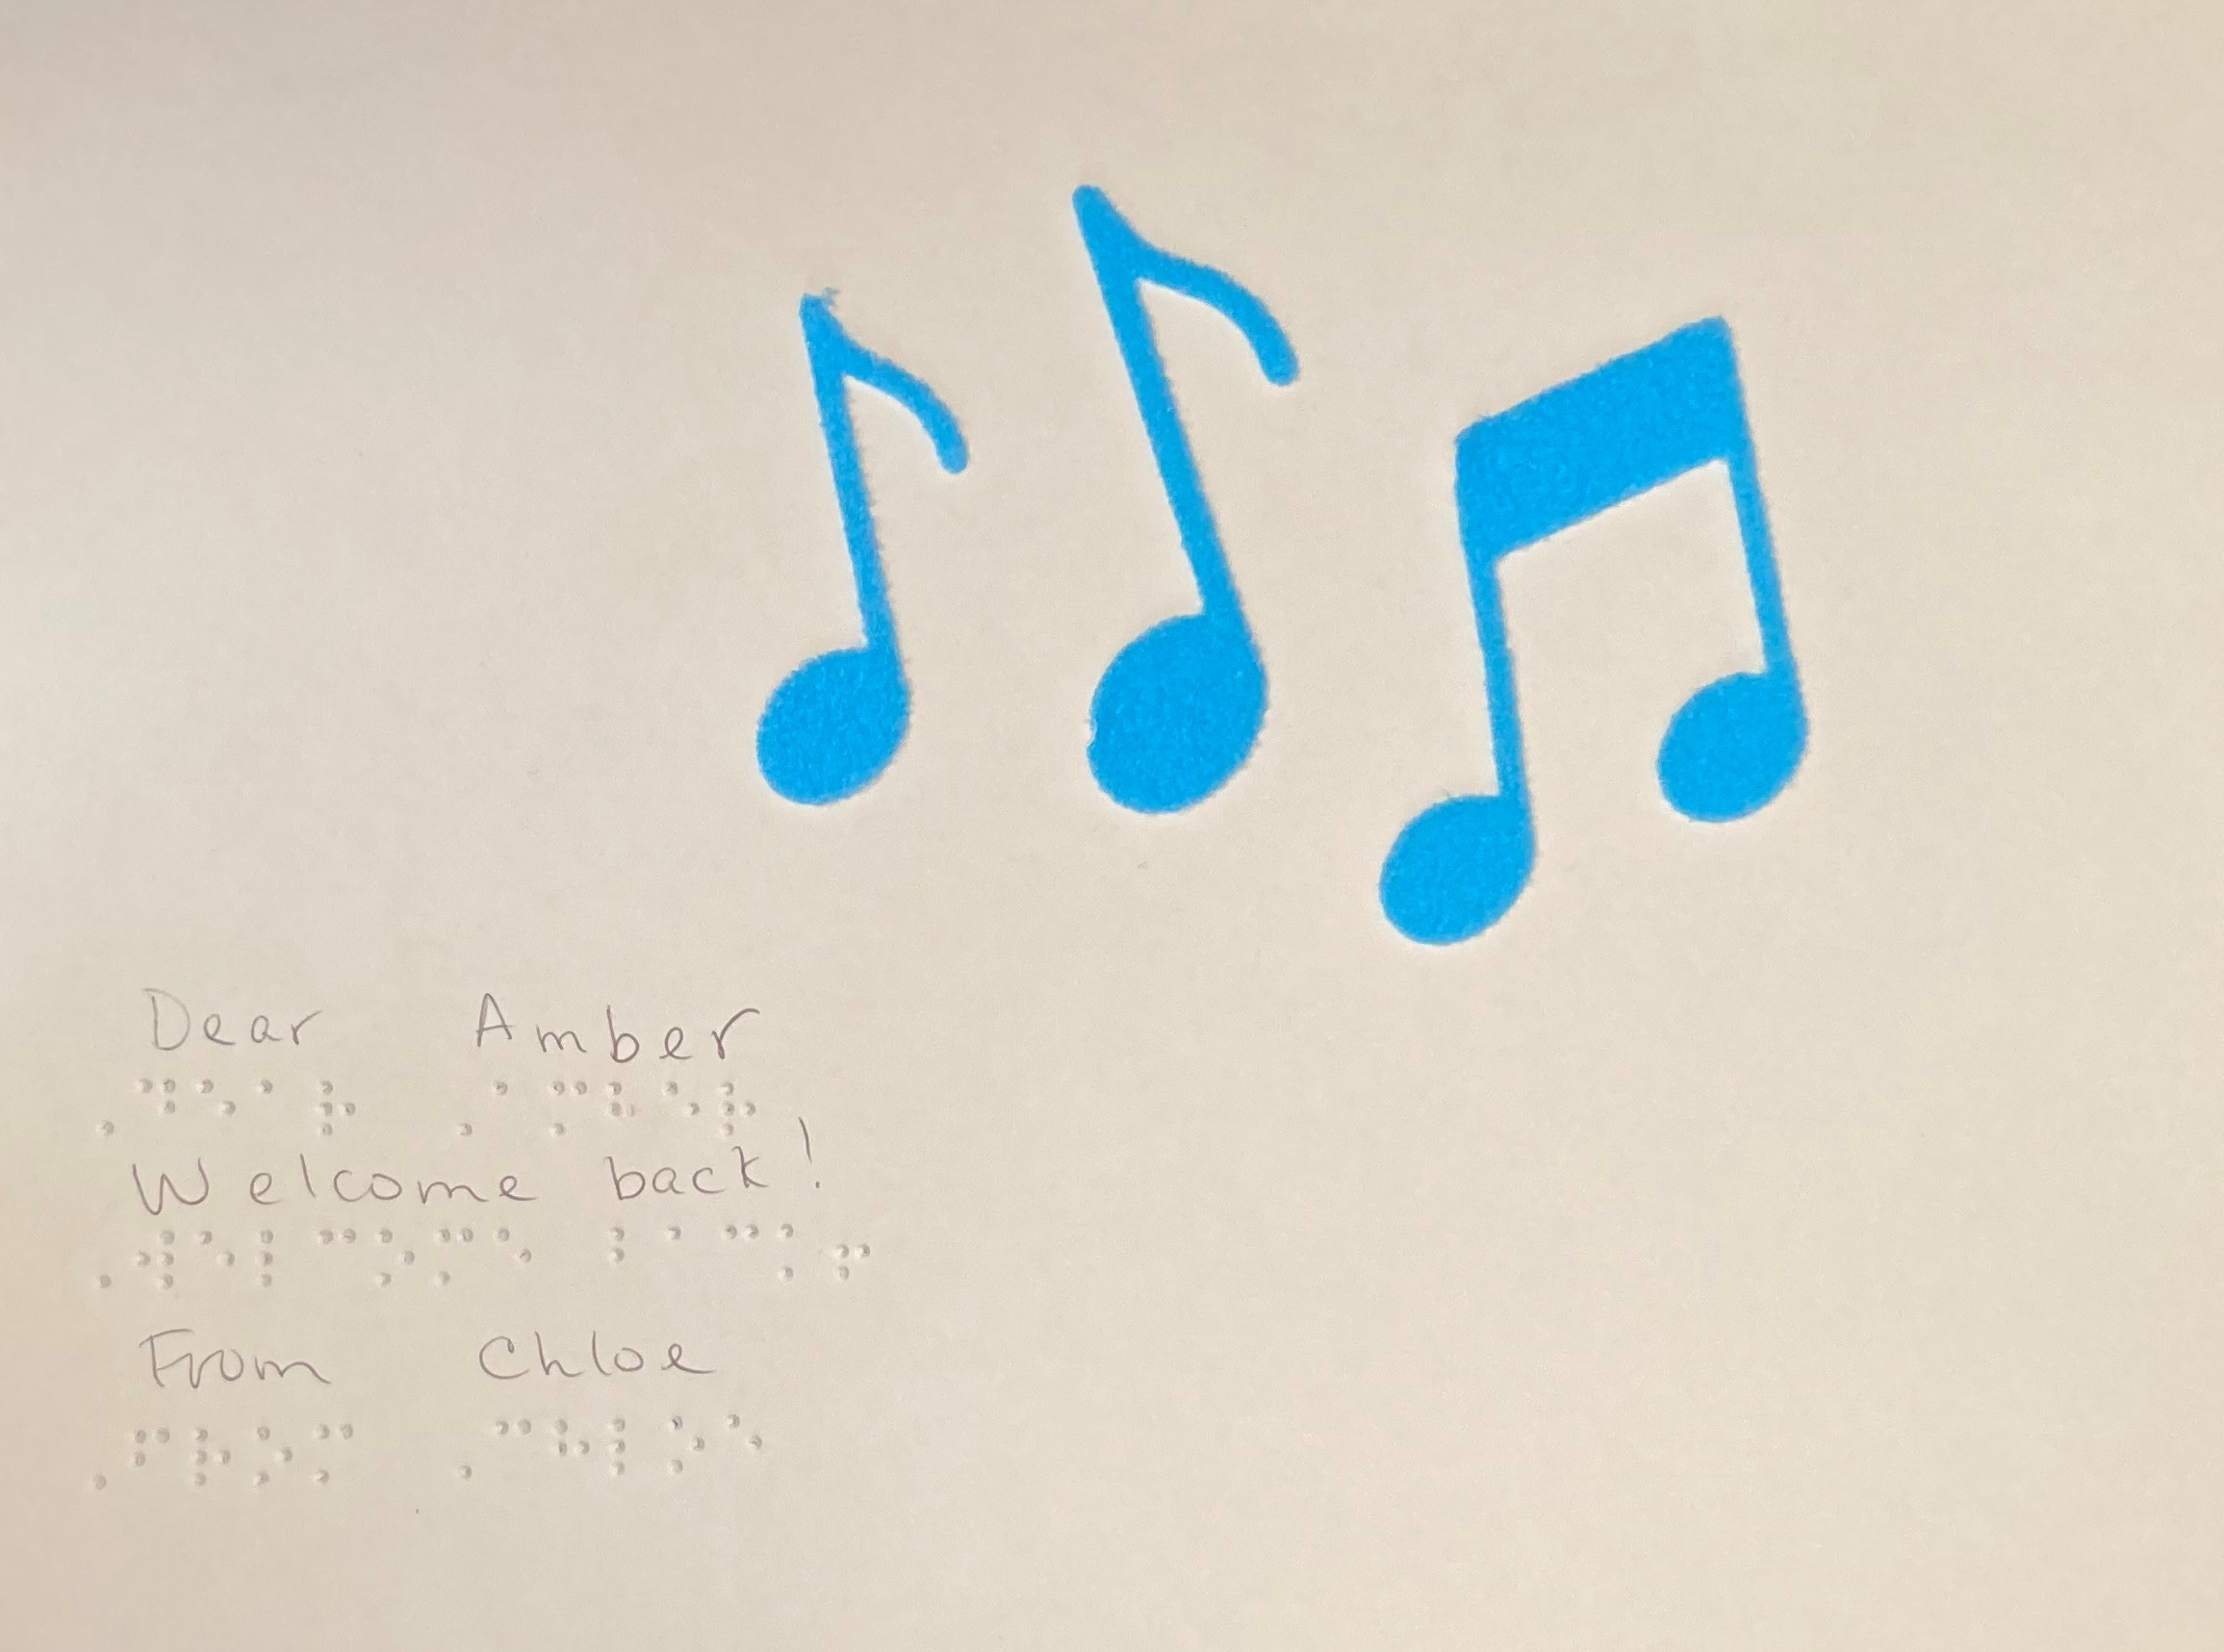
We started out using braille that was already around the building, and I made practice sheets and maps for her to start to understand the numbering systems and elevator button labels. Then we started doing some packaging tasks, and I would put braille labels on the package. Then it occurred to me that my student could make the labels herself. And then I wondered what else she could write that could be part of our deliveries? And I came up with the idea of making braille greeting cards.
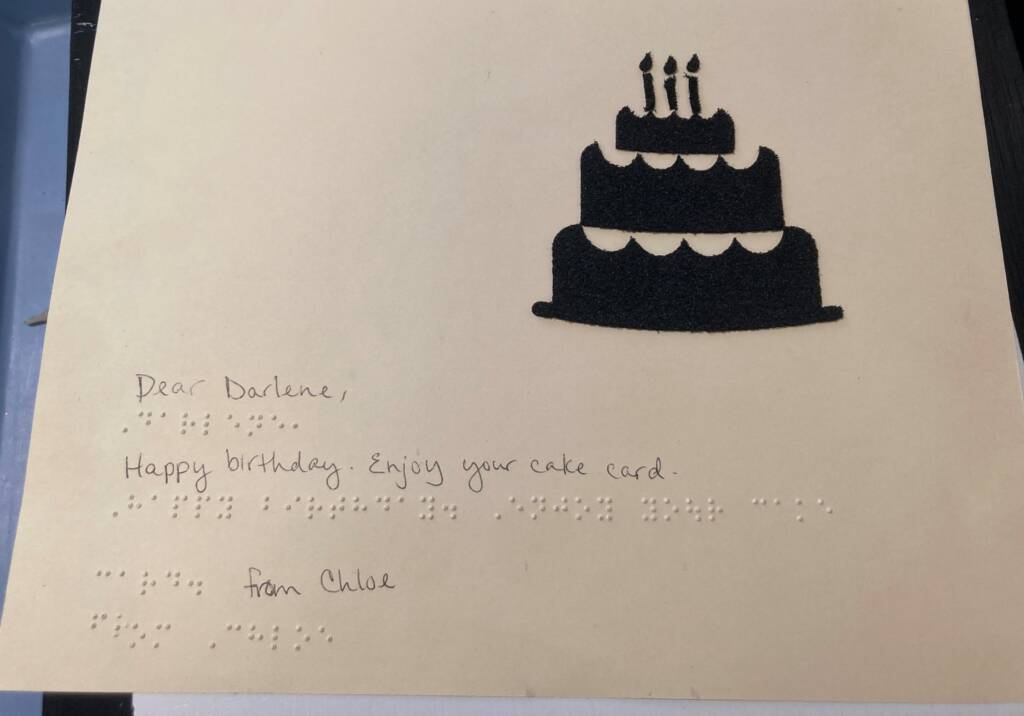
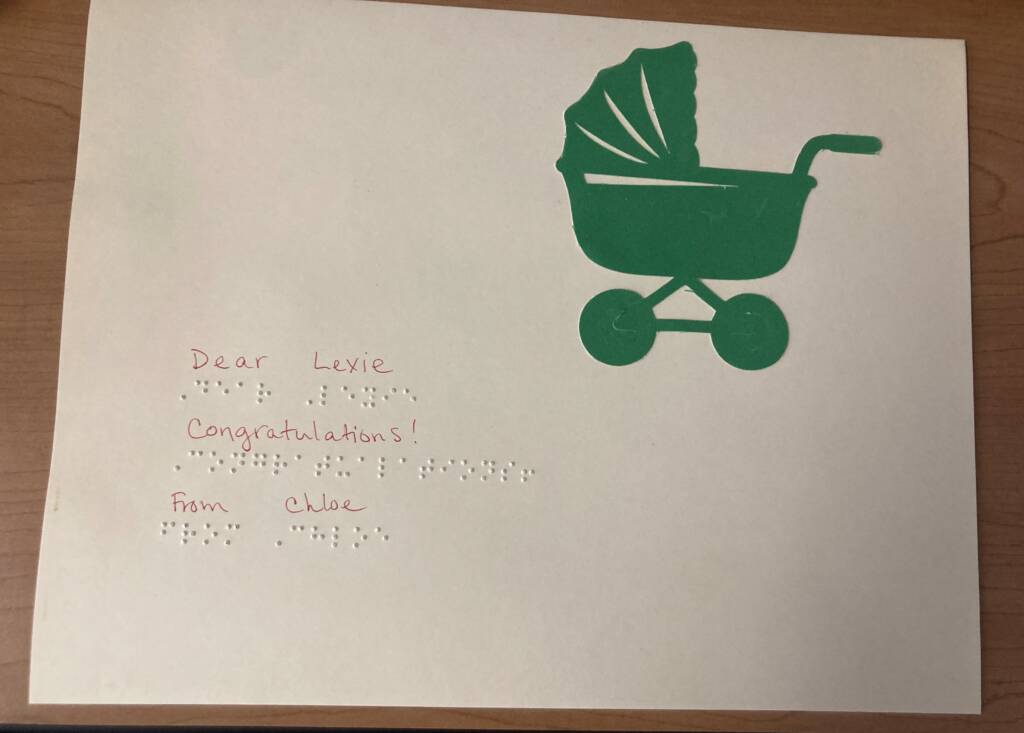
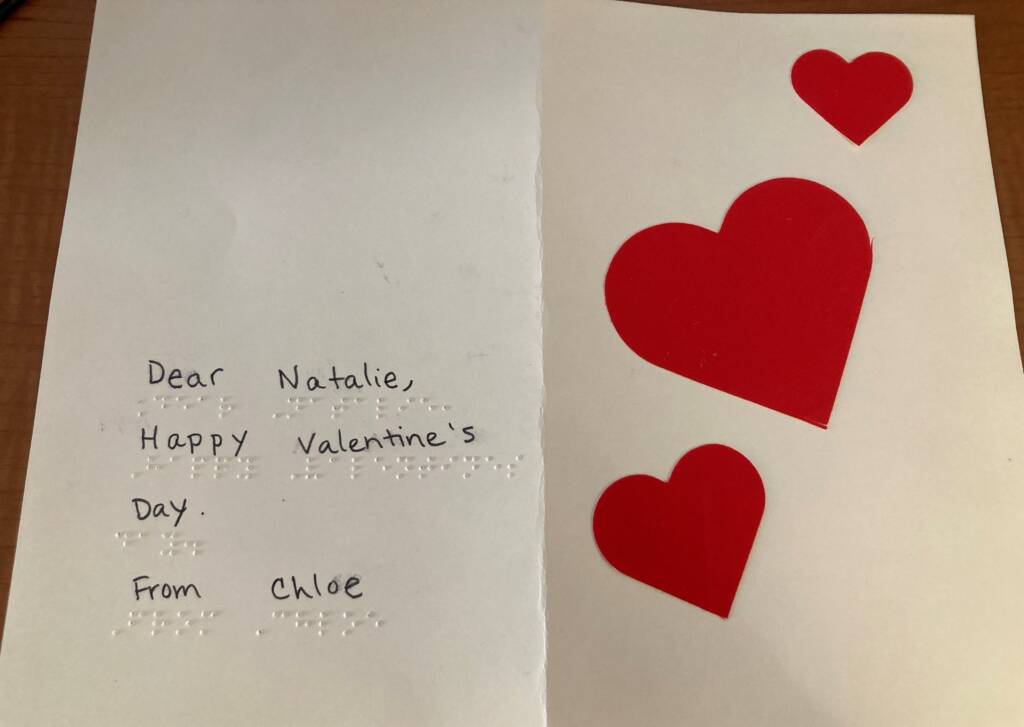
The first cards we made were rough around the edges: A note in braille, not transcribed into print, with a Christmas bow affixed on them to deliver as holiday cards. The recipients she delivered them to clearly appreciated the homemade cards that featured my student’s own writing. After a couple more trials, I started using the Cricut and APH Feel & Peel Carousel of Textures sheets, and our card making process really hit its stride. I am sharing in the hopes that other TVIs and COMS may enjoy doing these types of lessons with their students.
Why Use Accessible Greeting Cards
Students who use braille may have fewer opportunities to write than students who use print. And unless they are using technology, the audience for their writing may be limited to themselves and their TVI. These cards are a nice opportunity to write a message to share with someone since they include both braille and print. The activity reinforces the fact that their writing has meaning and that someone else can read it.
In addition to the print-braille format, the visual-tactile graphics are also fully accessible to both sighted and blind people. Using the carousel of textures sheets, students who are blind can feel the shape and texture of the graphic, while sighted people can both see and feel them. Although the accessible greeting cards don’t look like cards you’ll find at the store, they are attractive and could even be considered a tool to educate others about how to make accommodations for the visually impaired.
I also found that greeting cards are convenient to use during orientation and mobility lessons because they need to be mailed or delivered, which requires travel. We delivered many cards to people around the school campus, which allowed for targeting any number of skills including cane technique, map use, using room numbers, and more.
On occasion we also traveled to the post office to mail a card, which also makes for an enriching orientation and mobility lesson.
How to Carry Out an Accessible Greeting Card Lesson
- Start with a piece of braille paper. We used 8.5” x 11” braille paper but 11” x 11.5” paper could be used, as well. Just remember you’ll need a larger envelope if you plan to mail these.
- Decide on your graphic. I suggest a simple symbol related to the occasion, selected by the student.
- Pick a medium for your artwork. If you have access to a Cricut, I highly recommend using it for this! There are plenty of free image templates to choose from, and if you can’t find what you’re looking for, you can also import images from the web. The APH Feel n’ Peel Carousel of Textures also made creating graphics that were easy to transfer to paper a breeze. However, if you don’t have access to these materials, you could use any number of other materials such as tactile stickers, images adapted with puffy paint or glue dots, textured paper with a stencil, etc.
- How involved your student is in creating the artwork for the card will depend on the student’s skills. Due to my student’s multiple disabilities, I created the graphics for the card and had the student involved in placing it on the card.
- Have your student write a simple message using the Perkins Braillewriter or other braille writing tool.
- Add print.
- Have your student deliver the card to the recipient, travel to an outdoor mailbox, or take it to the post office to buy a stamp.
- Repeat and enjoy!
Read more about braille literacy