In the world of special education and multi-tiered systems of support (MTSS), student success is rarely the result of a single educator’s efforts. Instead, it relies on a cohesive framework of multidisciplinary collaboration bringing together general education teachers, special educators, paraprofessionals related service providers (such as speech-language pathologists and occupational therapists), Teachers of the Visually Impaired (TVI), Teachers of the Deaf and Hard of Hearing, orientation and mobility specialists, administrators, and families. Educators know that students with moderate to severe disabilities experience the best outcomes is when their educational and support teams work fluidly together.
With this thought in mind, I reviewed how I did collaborations. When I first became a TVI, someone at the Region 4 Educational Service Center in Houston gave me this form to help document the collaborations. I have no idea who created it, but it helped me tremendously during my time in Houston ISD. And it worked great until I stopped using it. I stopped using it as I couldn’t find it when I moved from Houston to the state of Washington. I recreated the form that I plan to use this fall with educational teams (including parents) this fall. I wanted to ensure I was thinking of more than just my meeting with the teacher. More professionals are working with the student than just the teacher and I. I needed the form to reflect that. Writing down the collaborations is a great way to document the meetings and who is responsible for what. This eliminated the finger pointing and the blame game that tends to happen. Once the meeting is over, everyone receives a copy. I am thinking of turning this into a Google Form once I finish working out any kinks. However, I am old school and I do love my paper copies!
To bridge the operational gap between educational teams will require a way to log, track, and analyze the meetings. I created a Multidisciplinary Collaboration Record which is a more targeted professional template engineered to track communication, assist with compliance, and translate that collaborative dialogue into actionable classroom outcomes. I don’t want to play phone/email tag that often occurs across environments.
Examples of this:
- An occupational therapist discovers a sensory accommodation that dramatically increases a student’s focus.
- A parent notes a behavioral trigger observed during homework routines.
If these insights remain trapped in isolated email threads or verbal hallway check-ins, then the student loses out on consistent intervention delivery. This also means collaboration is not working as not everyone on the team has information that could enhance the student’s learning opportunities.
Furthermore, under the Individuals with Disabilities Education Act (IDEA), schools are legally obligated to provide and document specified accommodations and services consistently across settings. When teams fail to track their ongoing consultations, they risk non compliance and undermine the integrity of the student’s Individualized Education Program (IEP).
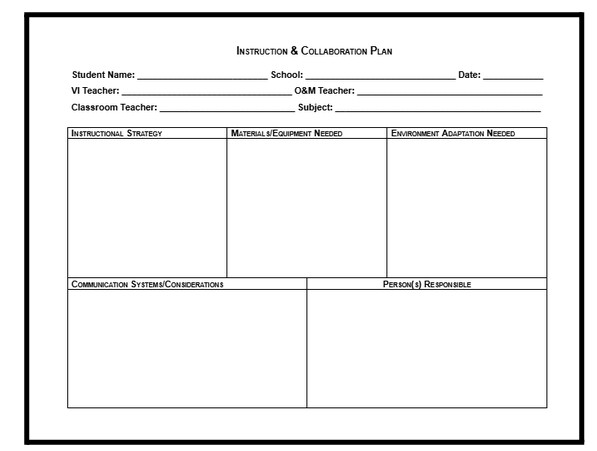
The form creation
My hope is to use the Multidisciplinary Collaboration Record to function as a centralized living document. It will move teams away from passive meeting and toward an active tracker of strategies/activities/accommodations. I plan to employ this template systematically to capture my four main critical pillars of the collaborative service delivery:
Cross-disciplinary attendance and focus
Every collaborative meeting should start off with a focus. Are you meeting about a specific student or a lesson focus or something else? The form I created starts off with session details as well as logs the date, time, and active participants that are present and what disciplines. I was thinking by deliberately tracking who is at the table (including general educators, paraprofessionals, and parents) the log will establish an ongoing standard of equality and share the accountability.
Longitudinal tracking of current concerns
During the collaboration meeting, the team systematically reviewed the student’s current educational programming across four key areas.
First under the Topic/Focus Area is Academic Lessons and Needed Materials/Accommodations. Team members shared baseline assessment data, noting that while the student demonstrates strong potential, a more standardized strategy is required across all service domains to prevent fragmented support.
Next, we cover Social, Emotional, or Behavioral where the team can highlight the student’s peer interactions, emphasizing the need for consistent behavioral scaffolding to maintain high engagement and reduce frustration during challenging academic transitions.
Thirdly, if anyone from the different therapies that the student has can share any updates they have. If they are not able to be present, I always ask them if they have anything to share. I also share anything that we addressed during the collaborative meeting. This is where the form will make the sharing following the meeting easier! Next, I want to share anything the parent may have shared with ANY educational team member if they are not present. This helps everyone be on the same page.
The last thing in this section is other. Here is where to document specific updates/concerns about the academics, student’s abilities, and behavior.
Action items and to-do list
To ensure everyone at the table feels valued and maintain momentum, the team established a clear action plan detailing next steps, responsibilities, and deadlines. Deadlines are vital and helps prioritize the item/task. Each specific item and task can be thoroughly outlined, ensuring that all follow-up deliverables will be clearly defined. To guarantee seamless execution, each action item will be assigned to a designated team member, clarifying exactly who is responsible for leading the effort. Finally, realistic timelines were established for each task, specifying when it is due to keep the project on track and ensure all collaborative components are seamlessly integrated before the next scheduled review.
Comments, Future Projects, and Next Steps
I have found that collaborative meetings frequently stall or fail during execution because tasks are poorly delegated. The record features a dedicated section for resource tracking. Whether it involves designing a custom visual schedule, investigating assistive technology, or adapting tactile math manipulatives, every item mentioned is discussed as well as what upcoming lessons/activities/school-wide events is coming up is shared.
Implementing a structured tool like the Multidisciplinary Collaboration Record fundamentally alters the team dynamic in a meeting. All those at the table are experts at what they do. It also honors the IEP is a fluid document that requires continuous oversight across all instructional settings.
Effective collaboration does not happen by accident or through casual goodwill; it requires structural intent. Hopefully by institutionalizing the Multidisciplinary Collaboration Record, a roadmap for unified, equitable advocacy becomes a reality. When the whole team is literally on the same page, the distance between discovering an accommodation and a student mastering a skill shrinks substantially.
References
- The Intentional IEP. (2023). Tracking accommodations in the general ed classroom. https://www.theintentionaliep.com/tracking-accommodations/
- Sisti, M. K., & Robledo, J. A. (2021). Interdisciplinary collaboration practices between education specialists and related service providers. The Journal of Special Education Apprenticeship, 10(1), Article 5. https://doi.org/10.58729/2167-3454.1123
- VIVA Pressbooks. (2023). A case study guide to special education: Chapter 9 – Collaboration. https://viva.pressbooks.pub/casestudiessped/part/chapter-9-collaboration/
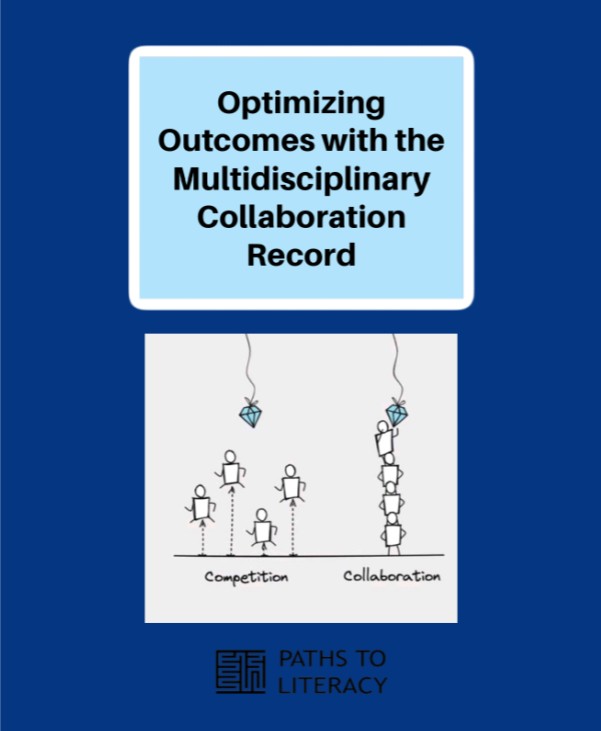
Note: The sketch was done by Jono Hey the creator of Sketchplanations