This year has already been a whirlwind, but one of my favorite highlights so far is the tactile art activity my student’s teacher designed. It was a beautiful blend of creativity, collaboration, and accessibility.
Why tactile art
- Encourages inclusive participation, allowing every student to engage fully
- Builds awareness of textures, shapes, and spatial arrangements through touch
- Encourages student choice, planning, and ownership over their creations
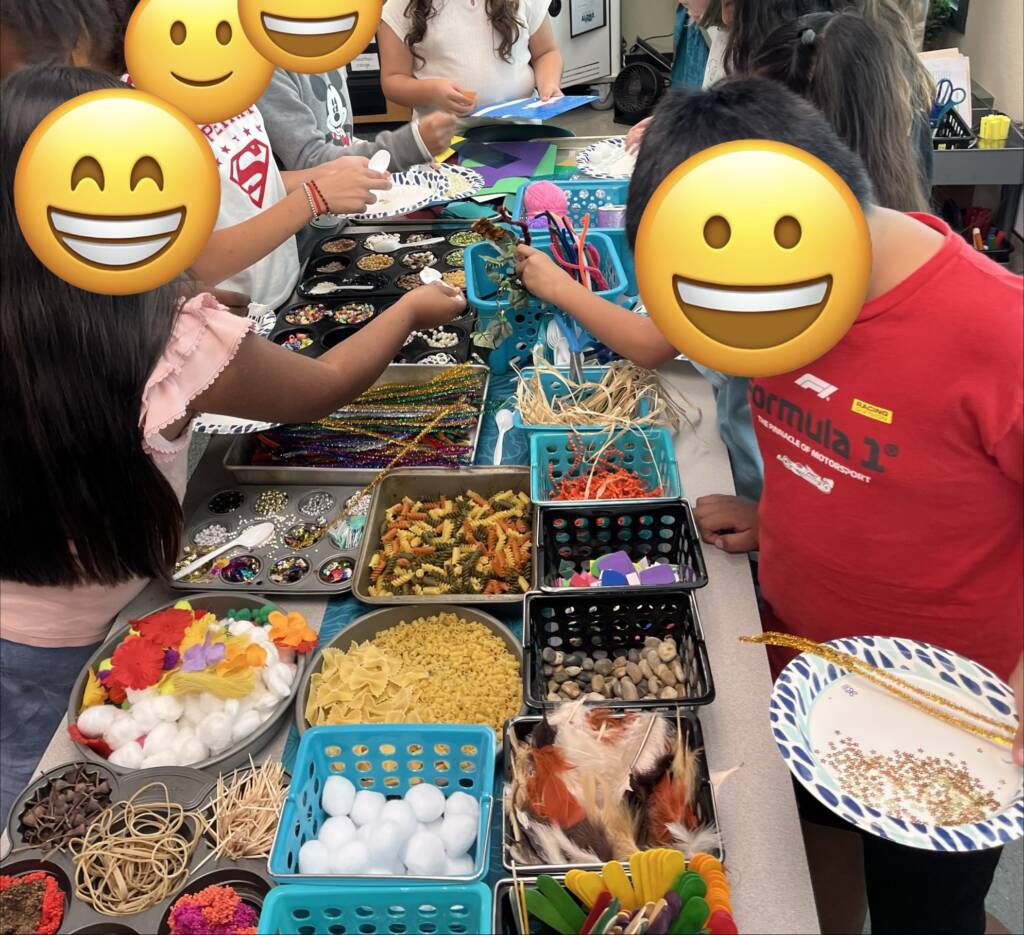
Materials and preparation
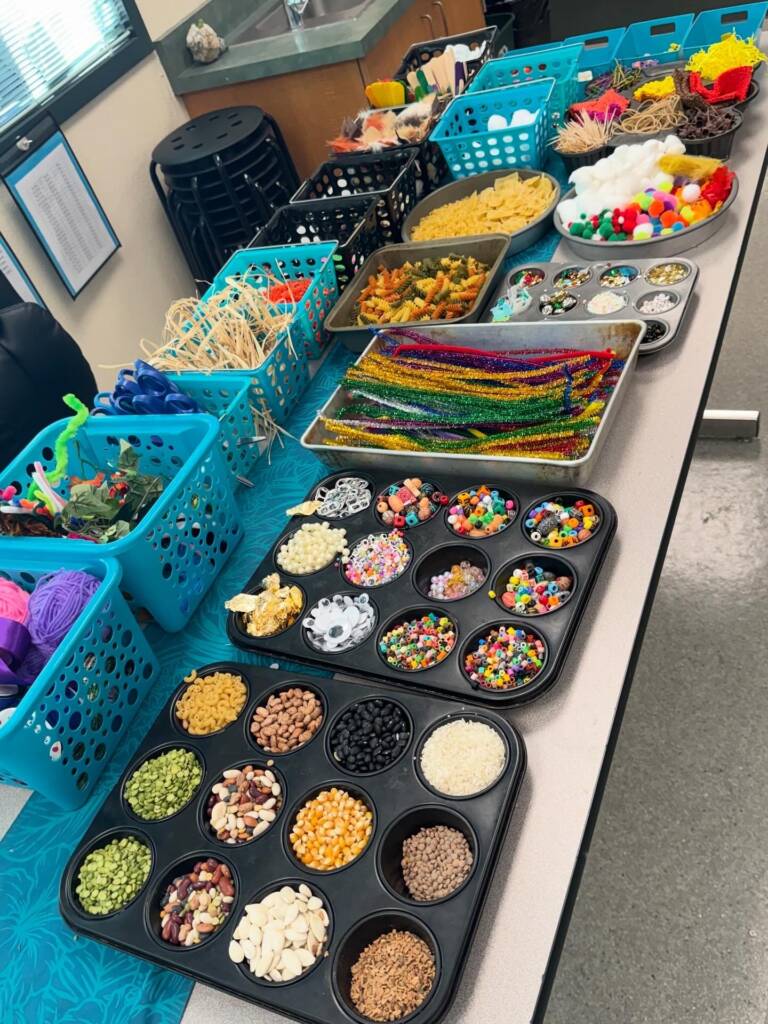
All students in the class were asked ahead of time to bring various items from home. The diversity of supplies inspired creativity and made the project feel personal. The students were given about 1-2 weeks to bring supplies from home. Some of the materials included:
- Poster board cut into individual sized pieces (roughly 8.5”x11”)
- Rice (different types)
- Beans
- Dry pasta noodles (different types)
- Beads
- Sea shells
- Fabric scraps
- Textured paper (APH Carousel)
- Q-tips
- Toothpicks
- Pipe cleaners
- Popsicle sticks
- Corn kernels
- Pumpkin seeds
- Googly eyes
- Cotton balls
- Any odds and ends you can part with to create something tactile
The materials were organized on a “supply table” so students could browse and select what they wanted for their project.
The process in the classroom
- Introduction and explanation: We began what “tactile art” could mean and how students could combine materials to make their design. You can bring in examples of projects you’ve made in the past to give some ideas.
- Material exploration: Students were encouraged to touch, test, and compare materials before choosing what to use (eg. rough vs. smooth, hard vs. soft).
- Design phase: They sketched or imagined what they wanted to build. They could decide to make it more representational (eg. ocean scene) or more abstract.
- Construction and collaboration:
- Some students worked together to make a bigger project
- Most students worked independently
- Students balanced elements of texture, raised levels of materials, layering, and contrast
- They often changed decisions as they went, experimenting by feel
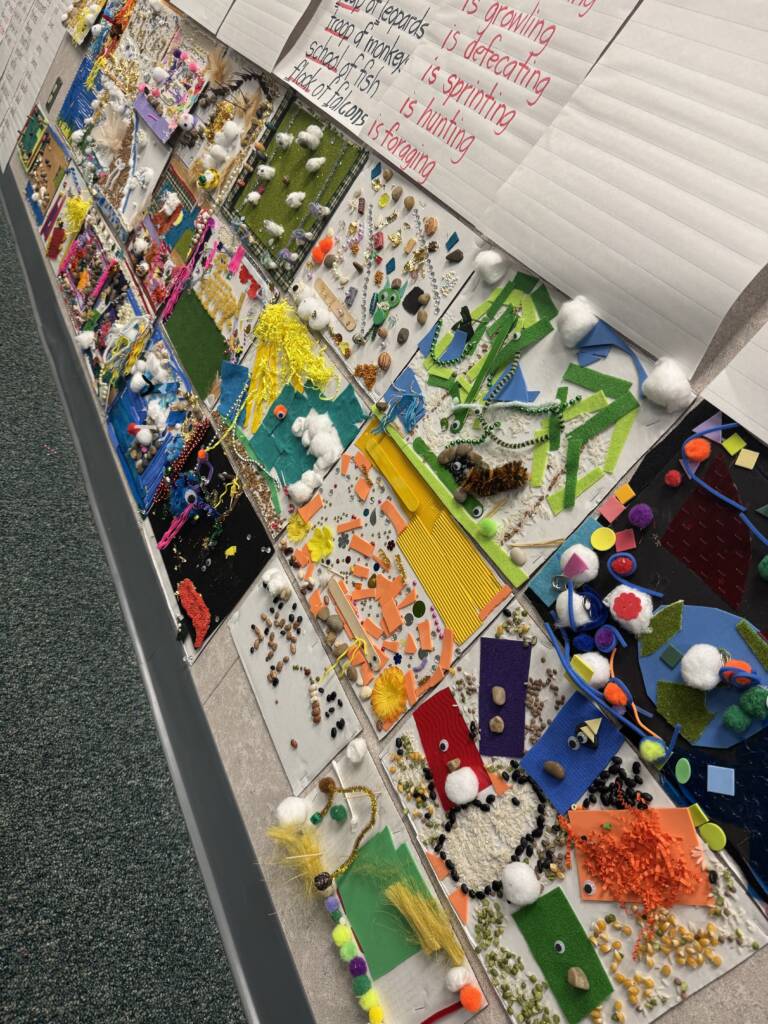
- Sharing and Reflection: When all projects were complete, we did a “Gallery Walk” where we all took turns looking at each other’s creations. Students were able to talk about why they used certain materials, what decisions they made while creating, and what they might change next time.
Student experience
One moment that stood out during this project was when my student exclaimed, “I’ll actually be able to know what everyone else did because I’ll be able to feel all of it.”
That statement was so profound and really summed up the meaning behind tactile art. This teacher in particular has done a phenomenal job at including my student in conversations, talking about vision and visual impairment, and making accessibility an ongoing conversation with the class. All of the students were so focused and enjoyed the process of creating so much.
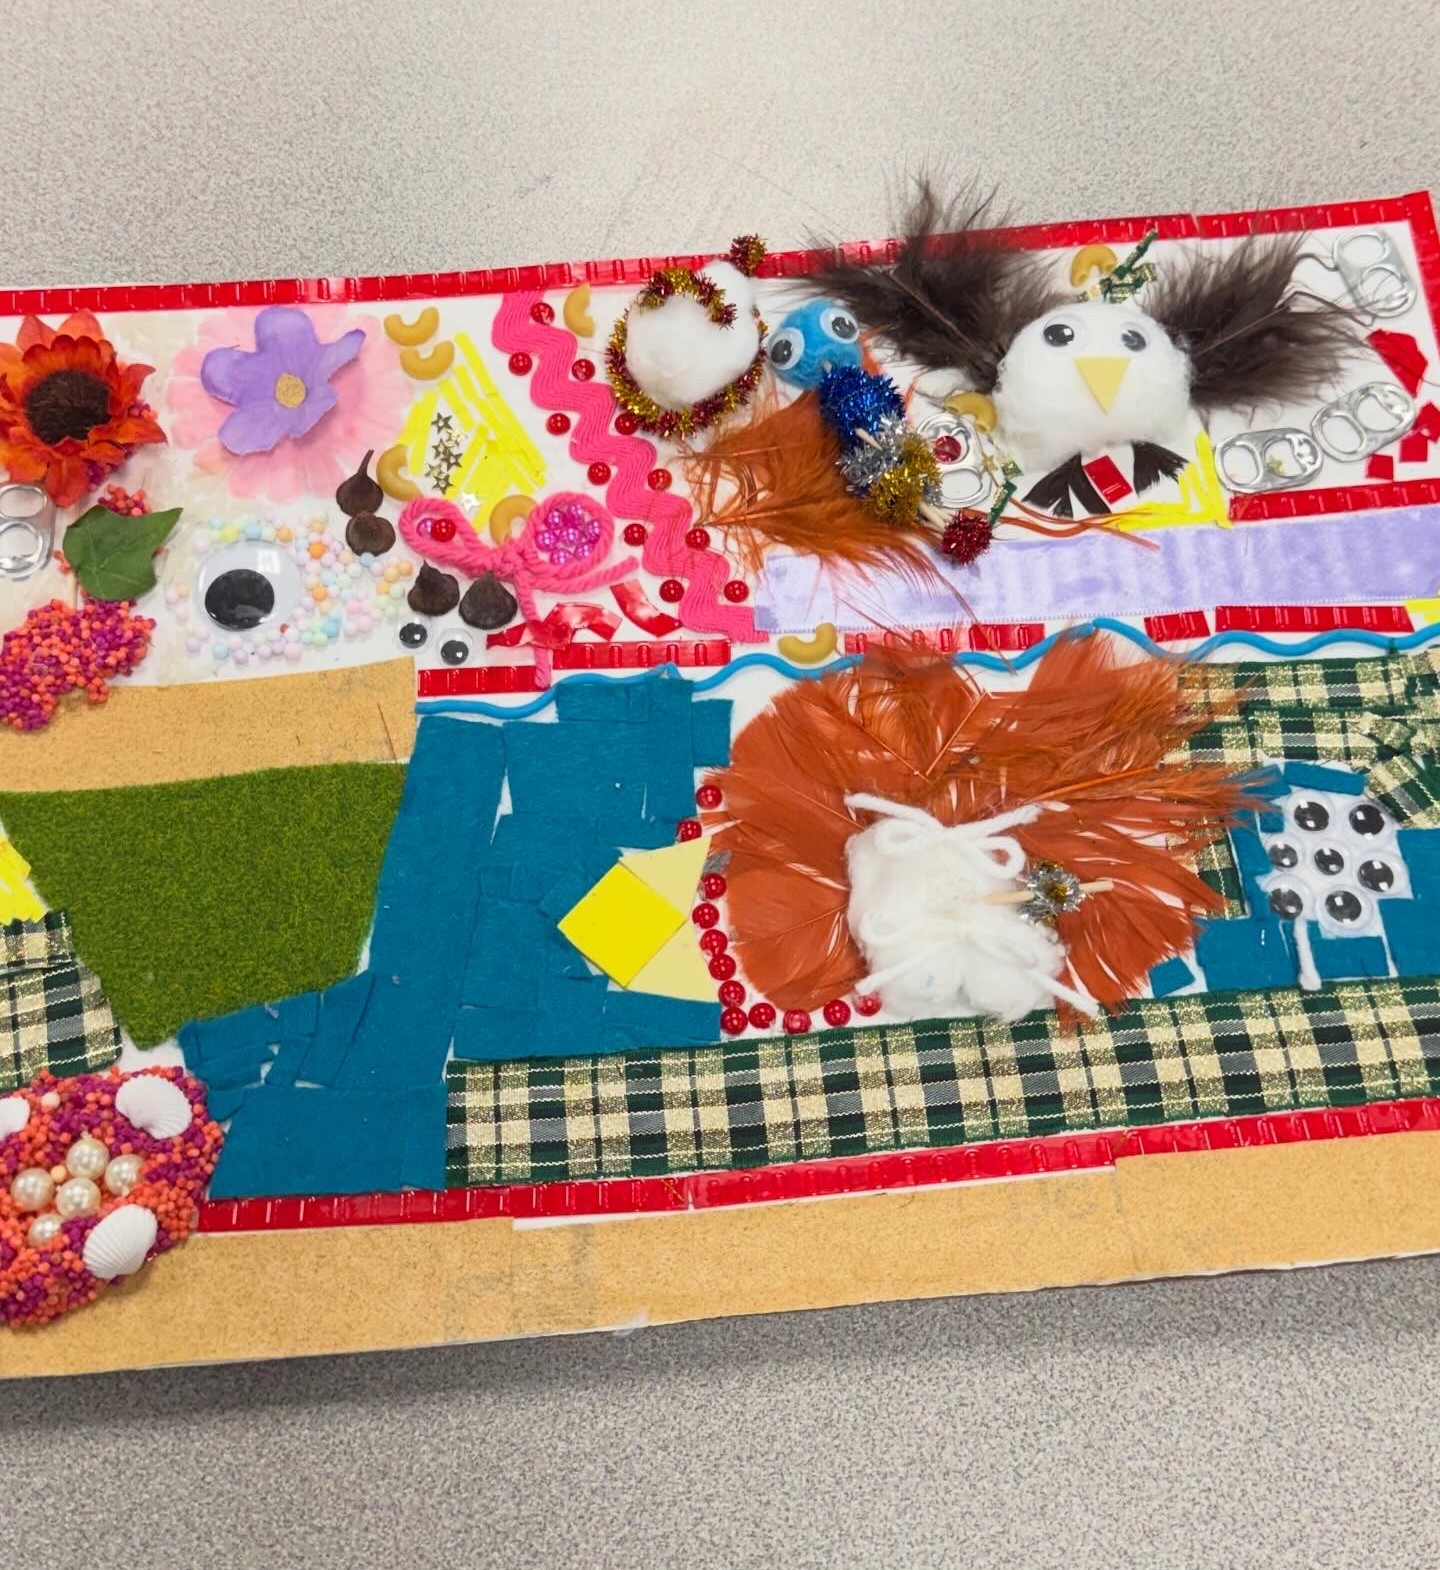
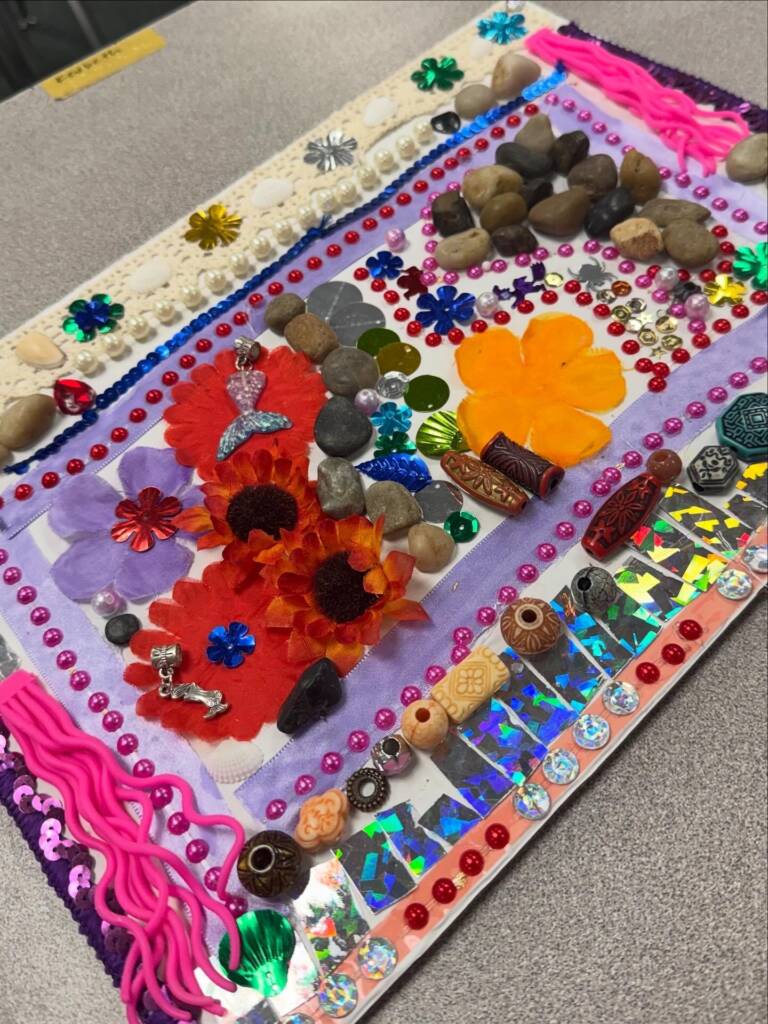
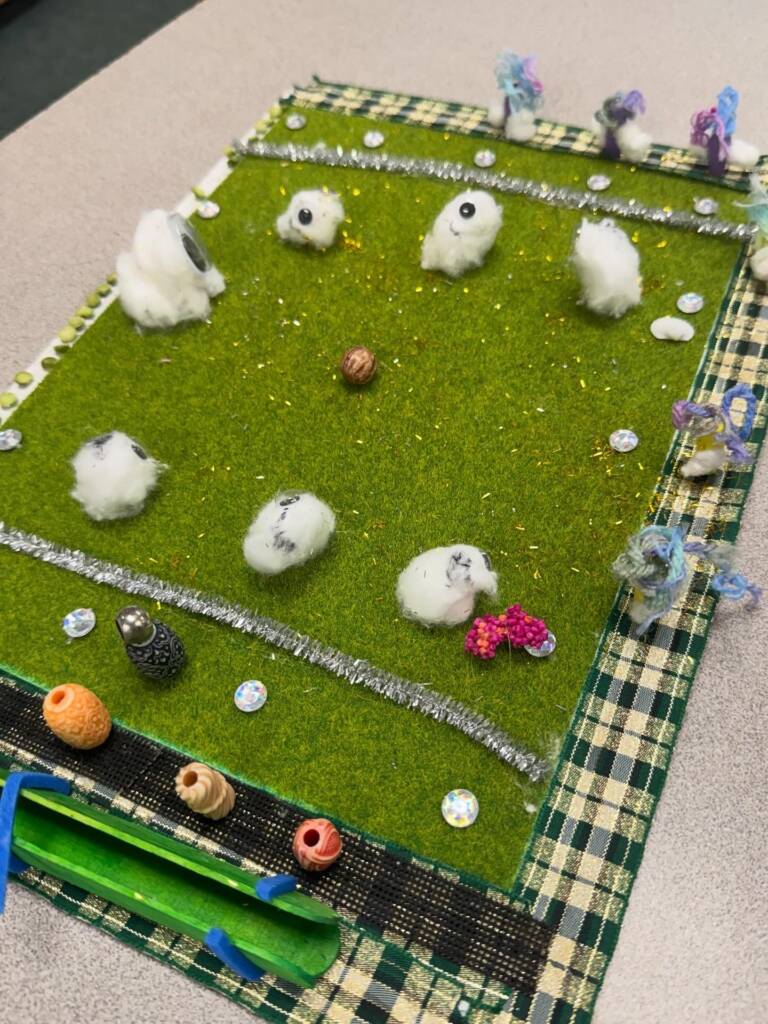
Examples of creations
- Ocean scenes with shell waves, rice “sand” and textured seaweed
- Football fields using sticks, beads, and fabric
- Abstract compositions focused on contrast, layering, and texture
What made it work
- Student agency- trusting the students to choose, experiment, change their mind, and create
- Variety of materials
- Support and scaffolding
- Collaboration and sharing- students learning from one another’s tactile decisions
What’s Next?
Because the students were so enthusiastic and brought so many materials, we’re already planning a tactile monster art project for Halloween. I can’t wait to see how they imagine creatures you can feel!