I remember the first story box I made almost 20 years ago. It was for my preschool-age son who was legally blind, and it was a book about his favorite toys. I still have the photos we took of his red silky, Elmo doll, magnet numbers, Animals See ’n Say toy, and LEGO musical toy. He would sit and explore that book for hours. He loved it, so we made more!
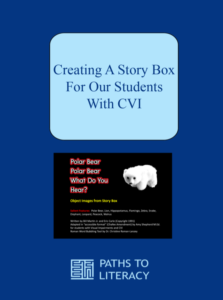
Eventually, I created a variety of story boxes to enjoy together at home. I used cloth bags to store the objects I had collected to go along with the stories. Polar Bear, Polar Bear, What Do You Hear? by Bill Martin, Jr., and Eric Carle, was one of the first books I tackled. At the time, my son loved Beanie Babies, so I drove around town to find as many as I could to go along with the story. The memories of snuggling with my son to read those story box books brings me great joy to this day.

My son is now a senior in college, but I have continued to make story boxes to share with local teachers for the visually impaired. The story boxes I’ve created are intended for students who are blind or visually impaired. Each box contains an original book, a braille book, and a variety of relevant tactile objects.
Over the past several years, I have worked with the Washtenaw Intermediate School District visual impairment team on creating and adapting materials for students who have cortical/cerebral visual impairment (CVI). This work has led us to reimagine how we can use story boxes. As we began to add CVI materials to the story boxes, a “starter kit” resulted.
Read on for tips to create your own story box! If you would like visual examples, this article is also available in a PDF format with sample images: Create a Cortical Visual Impairment Story Box [PDF]
Creating a CVI Story Box
Always include the original print book in addition to a braille book in your story box. If you are creating a personalized story box, such as a “favorite toys” box or a “daily routine” box, make up a short story to go along with the tactual items you choose.
Next, create an inventory list of the tactile objects needed for each book. Flip through the pages and pick out objects that are important for conveying the concepts of the story. Remember, you don’t have to include a tactile object for every object in the book.
Try to include objects that:
- can be found around the home or in a classroom
- are as realistic as possible
- can be cleaned
- are large enough for tactile discrimination
- are made from materials that provide a variety of tactile feedback
- can be purchased again if they disappear from the box
The following items are “accessible copies” (as outlined in the Chafee Amendment) that can be included in your story box.
1. CVI-Adapted Book
Create a CVI-accessible copy of the book to include in your story box. My process for creating this type of book starts in PowerPoint or Google Slides.
- Large print: Make the text large print (at least 16- to 18-point font) so all of your students who are visually impaired can benefit from the story box.
- Salient features: Add text to describe the image’s most important, or salient, features. This can also be useful for any adult (classroom teacher, teaching assistant, or caregiver) who might use the story box with a student.
- Formatting: I typically place the text (28- to 36-point font) on one side of the page against a white background. I place the image on the other side of the page against a solid black background.
- Image outline: I often use a “glow” tool to add a colorful outline around the image. I also use a free online tool called Remove Image Background to remove any distracting background patterns from the image.
If you follow these tips, the result is an “accessible copy” of the book that can be used as a “starter” with students and can be easily adapted to meet individual needs in terms of complexity, color, and movement.
Three Adapted Book Types
There are three types of adapted books I try to include in my story boxes, in addition to the original book. You might only be able to include one or two types, depending on the book you are adapting. Each includes the original text from the story and replaces the images in some way to meet students’ unique visual needs.
- Book with Object Images: Replace the original book images with actual photos you have taken of the objects that are in the story box.
- Book with Realistic Images: Replace the original book images with realistic images that go along with the objects in the story box. Two sites to start with are Pixabay and Unsplash, which offers images that are free for commercial use. If I can’t find what I am looking for on those sites, I look for images that fall under the personal use and creative commons user rights categories.
- Book with Adapted Illustrations: Edit the original book images to reduce visual complexity. Remove the background from the original drawings to adapt them for the unique visual needs of students who are Visually Impaired.
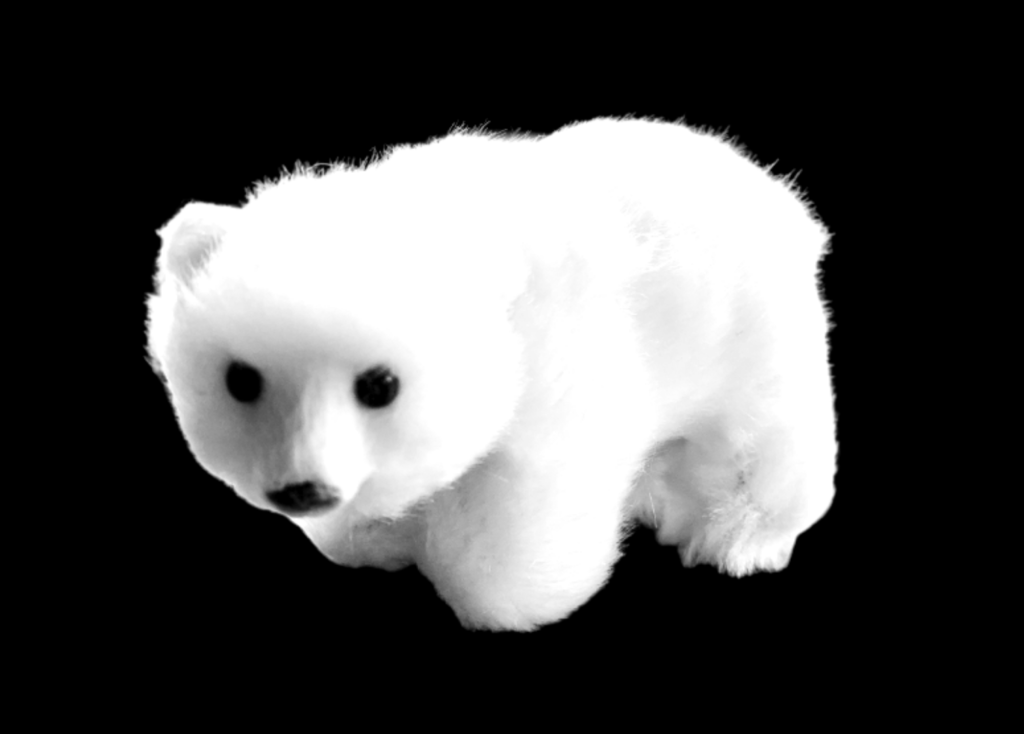


Images of polar bears from a stuffed animal, to an illustrated one, to a picture of a real polar bear all with black backgrounds.
Book Formats
The great thing about starting with a PowerPoint (or Google Slides) book is that you can complete your book in a variety of formats.
- CVI Print Book: Save the document as a PDF. Then, you can print it on cardstock, laminate, trim, and bind it into a handheld print book.
- Apple Books: Each PDF can also be converted to an EPUB file that can be opened in Apple Books. There are a variety of PDF to EPUB conversion tools. I use ABBYY FineReader PDF. In Apple Books, you can change the view settings to a variety of backgrounds. Additionally, the built-in backlighting from an Apple computer, iPad, or iPhone can also be helpful for some students.
- Movies: A PowerPoint book can also be created to include audio and animation and can then be exported as a MP4 or MOV file to watch as a movie. I have found this format to be particularly useful for students who may need backlighting and movement to visually access the content.
2. Object-to-Image Flashcards
Matching an object to an image is an important skill for students with CVI. A variety of objects are in the story box, so it makes sense to use them to create object-to-image cards. Flashcards can be created in any size, but I tend to make them half-page.
- As with the “accessible copies” of the book, place the image on a solid black background on one side of the flashcard, and 28- to 36-point text on the opposite white side, with the name of the object and its salient features, if applicable.
- For the text side, put the name of the object in large red block letters, or create bubble letters on the Roman Word Bubbling site.
- Optional: Add salient features for the object. This is also useful for any adult who may be using the story box with a student.
The result is a starter set of flashcards that can be easily adapted for individual students.
Three Types of Flashcards
I try to include three types of flashcards in the story box:
- Object-to-image flashcards: Take a photo of each object and remove the background.
- Realistic-image flashcards: Use realistic images that go along with the objects in the story box and remove the background.
- Black and white flashcards: Use black and white drawings that go along with the objects in the story box and remove the background.
3. Image-to-Image Matching Cards
Another important skill is being able to match an image to the same image. For the image-to-image matching cards, print two sets of the object-to-image cards (six images per page, no text on the back). Each card will be about the size of a business card, which is easy to manipulate in matching games.
4. Background Complexity Cards
The fourth “starter kit” item is a set of background complexity cards. This concept is a digital adaptation of Dr. Christine Roman-Lantzy’s practice of using a variety of fabrics as backgrounds for visual activities with objects. The ideas are endless, but remember that these materials are intended to be “starter” materials that can be easily altered for individual needs. Here are my tips:
- Format: My cards are full page, front and back. Each side has the same background.
- Complexity: I include cards with three backgrounds that vary in complexity; for example, solid green grass, a large polka dot on white background, and a colorful rainbow stripe.
- One image: I choose one object image from the story box and place that object somewhere on the background card. I then place two of the same images on the flip side to increase the visual array. I do this for 3-4 different objects in the story box.
What you end up with are an assortment of “starter” background cards that can be made more complex depending on the student’s needs.
Conclusion
The materials in these CVI story box “starter kits” provide teachers and parents with visual activities to work on with their students as they become familiar with the story. The kits are intended to be a starting point that can easily be adapted for the specific visual needs of each student. Enjoy creating your own story boxes!