This book is one of the examples shared showing how to adapt books for children with cortical visual impairment (CVI). Please begin by reading the introductory information:
- Literacy for Children with CVI: Overview and Implications for Different Phases
- Guidelines for Modifying Books for Students in Phases I, II, and III
- Adapting Books and Literacy for Students with CVI
- General Materials Used to Adapt Books for Children with CVI
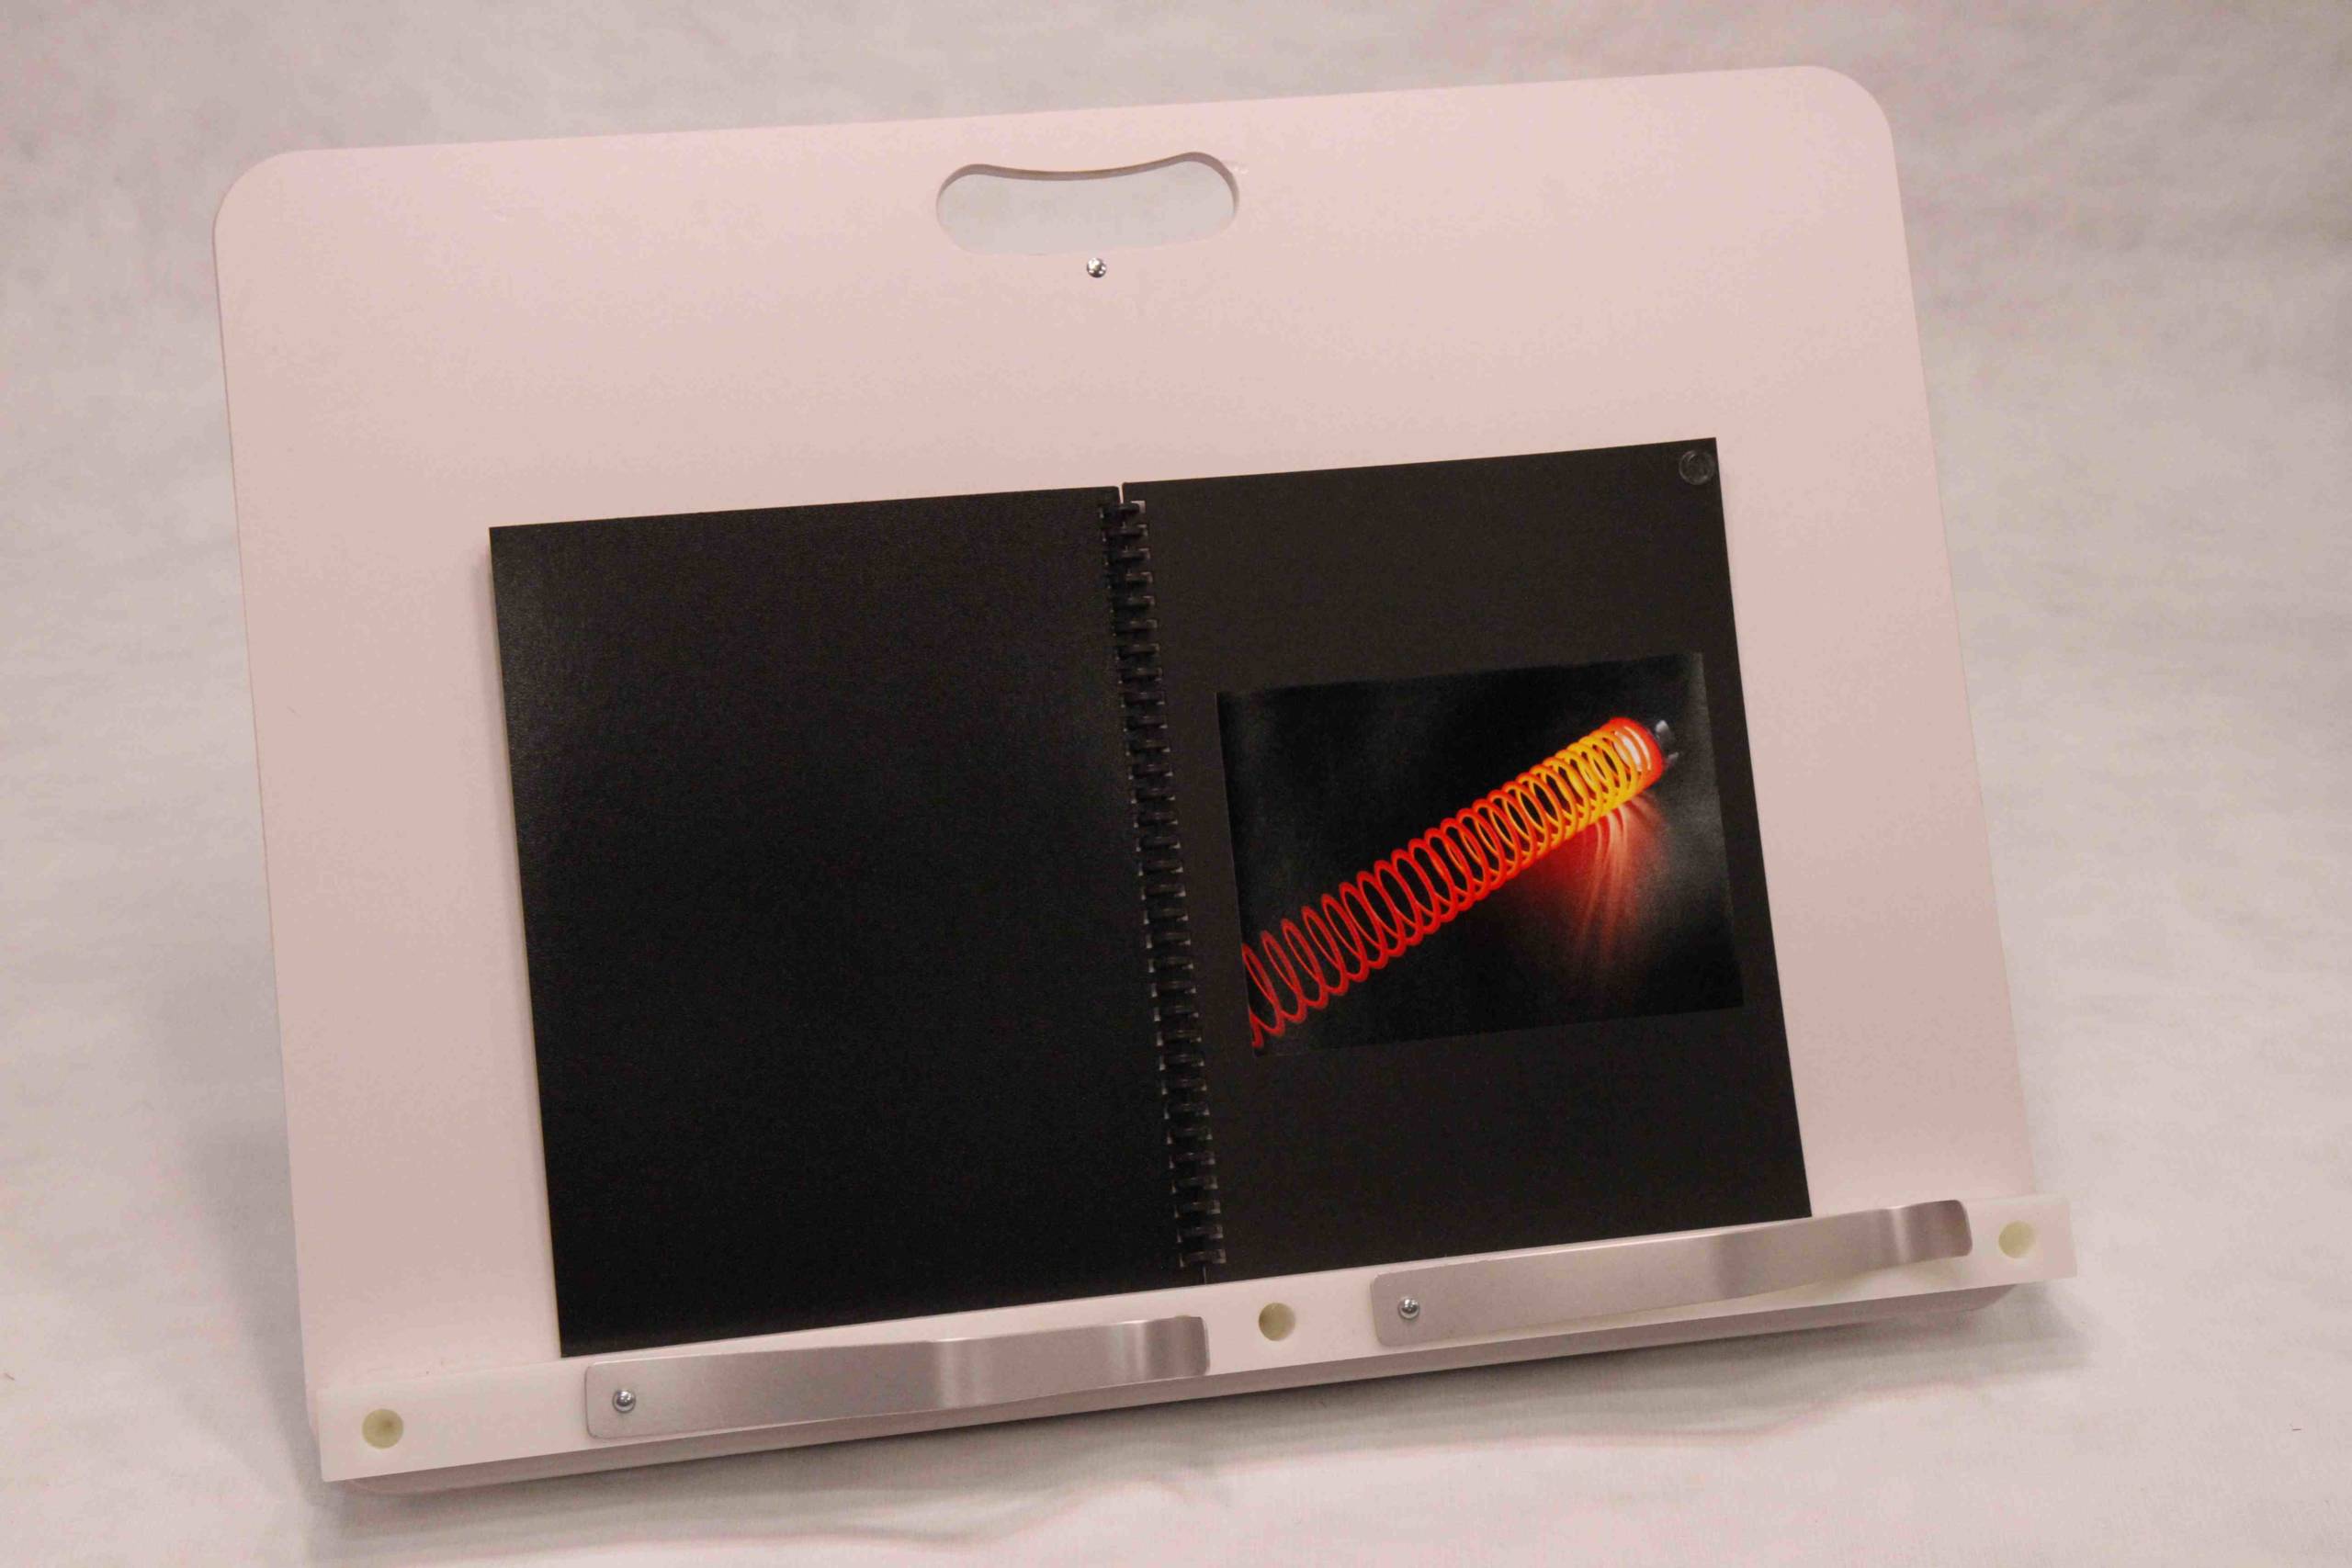
I have created many, many books in a similar fashion to the following pictured book, “My Favorite Things”.

Students with CVI often have a difficult time with pictures or 2D representations of 3D items. Look carefully at the results of the Functional Vision Evaluation and the CVI Range and make certain your child or student is ready to use 2D pictures. It has been my experience that most students need to be well into Phase II, visually functioning at approximately 6 on the CVI Range, before they begin to interpret and understand 2D representations or pictures.
The use of abstract color illustrations, black and white line drawings and color symbols seem to be especially difficult for students with CVI (this has also been supported in limited informal observations by other TVIs). Students may alert to or visually attend to a bright color found as part of an image, but often do not understand what the image represents. In addition, the complexity created due to the multiple colors or lines found on most images, causes many children to look away and “tune it out”.
I often have the most success with this transitional process (moving from a 3D target to a 2D image) if I take a color photograph of my student’s favorite, familiar target(s). I try hard to make sure the image is very sharp and the target is photographed against a black background to make the image of the target really stand out. I print 5” X 7” photographs in a matte finish, which produces less glare. I then mount the photographs, one to a page, using heavy, black card stock for the pages.

I begin helping the student make the transition from their favored, familiar 3D target to the 2D image by showing the student the photo, encouraging them to touch the photo (if able) and then giving them the 3D target. I also present individual photos on an iPad using either Keynote or Pictello.
Several years ago, one of my student’s parent was working on this process. She had her child’s favorite ball (an Oball) presented as a photo on her iPad, which was in her son’s field of view. Her son saw the image, crawled to the iPad and reached out to grab the ball, thinking it was the real thing. The perceptive mother quickly gave him his real, 3D Oball and said, “I see you want your Oball”. This began the process of this child learning about 2D images.
To make these books, place only one photo on the right-side page (no back to back images). Because transitioning from 3D to 2D is often a difficult process for students with CVI, I try to keep the array as simple as possible. While a white reading stand was used in the following images for photographic purposes (to show the size of the book and to make the book stand out), use of a black reading stand, and an Invisiboard behind the reading stand, is recommended.
For the pages of the book, I use an 8.5 X 11 inch flat, black heavy weight paper (80 lb.) made by Neenah called, “Astrobrights Cover Eclipse Black“. You can order this paper from Amazon. When you get your photos developed, make certain they are printed with a “Matte” finish. Also, be very careful how you photograph the objects for this book. I take the photo of the object when it is against a black background. I use a high quality camera and make certain there is good lighting (no or limited glare). For a complete listing of all of the materials I use to make my books, see, “General Materials Used to Adapt Books for Children with CVI” on this website or at my Strategy to See website.


This type of book provides the perfect opportunity to discuss the salient features of each target. Because there may be several different people who “read” this book to the child each day, it is important that there is a script, so that the same descriptive words are used to describe each target. A script for this book might look like this:
- This red slinky has coiling, continuous circles and lights up.
- This lighted spoon is red and yellow, has one pointed end and a bowl-shaped tip.
- Clifford is red, has a black heart-shaped nose and wears a red, reflective bow around his neck as a collar.
- This toothbrush is red, lights up and has short white bristles on one end with a suction cup on the other end.
- This iPad has a red frame around it. There is a round, black button at the bottom of the frame.
- This Oball is round and has a clear tube running down the center with small balls inside the tube.
The key idea to remember when helping a child with CVI transition to 2D images is to begin by using the child’s favorite, VERY familiar targets that he/she has had lots of experience with.
Examples of Books
The following are other examples of books I have created for students with CVI:
- Where is the Red Gift Bag?
- Getting Ready for School (CVI-friendly pegboard book)
- One Yellow Slinky Bouncing Up and Down
- Three Silver Pie Tins and One Red Puff
- Three Bright Red Pom Poms Lined Up in a Row
- Five Little Lights
- Clifford’s Family (Modified Version)
For more ideas from Diane Sheline, visit Strategy to See.