Power Point E-Books are an easy way to make accessible books. This page features step-by-step instructions on how to create one, as well as some sample templates.
Step-by-Step Instructions to Make a Power Point E-Book
By Deirdre Walsh, Speech and Language Pathologist, Perkins School for the Blind
 E-Books are relatively simple to make. On this page I will provide a quick and simple recipe to create electronic books using Microsoft’s PowerPoint application. It is included in Microsoft office, it is a presentation tool that can combine graphics, animation, sound effects and speech. Sorry guys, these instructions apply to Mac users only, although if you are a PC user you should be able to follow along without too much difficulty.
- Open PowerPoint.
- Click on the square with one horizontal bar at the top of the page with the rest of the square blank, then OK
- Click on the Blank slide (it looks like a plain box with a border), then OK
- Under Format, click on Background
- Click on More Colors, pick the color you want and then click on Apply
- Under Format, click on Font, pick your font style, size and color, then OK
- Congratulations, you just made the first page of your book!
- To add more pages, under Insert, click on Duplicate slide for as many slides (or pages) you want to create. If you want to know how many slides you have look at the bottom tool bar (3 of 3 slides)
Get ready to create!
- Go to your first slide, this will be your title page, just slide the bar on the left hand side to the top to find a specific slide. Highlight Click to Add Title, and start typing in your story text.
- To add graphics: You have two choices, you can use pictures from Microsoft Art Gallery or you can use one of your own files. Under Insert, click on Picture, then click on ClipArt. Find the picture you want and then hit Insert. Resize the picture (hold the mouse on the white squares) to the size you want and place it where you want it ( hold the mouse down and move it.)
- Or you can add a graphic or digital picture you downloaded, scanned or created. Under Insert, click on Picture, then click on From file. Find the file you want, and then hit Insert.
- You can add sound or you can record your own voice to narrate the story.You must have an external microphone to record sound. Under Insert, click on Movies and Sound. To record a sound click on Record Sound and start talking. To use a sound from the Microsoft Gallery, click on Sound from gallery, to add a sound you downloaded click on Sound from file, find your file, and then click Insert.
- To advance to the next slide, click on the downward arrow in the left hand tool bar. Repeat all the same steps until you have finished creating.
- To activate your book, Under Slide Show, click on View Show, put the mouse anywhere on the screen, and with one click, advance to the next page.
Congratulations, you have just created a talking book!
For the adventurous, you can add animation, change the transition between slides and all that jazz.
- Under Slide Show play around with the Preset animation, Custom animation and the Slide Transition feature. One hint for those who want to play with the animation feature, you must highlight the graphic first, otherwise PowerPoint doesn’t know what you want to animate.
PowerPoint Book Templates
Center for Literacy and Disability Studies, University of North Carolina
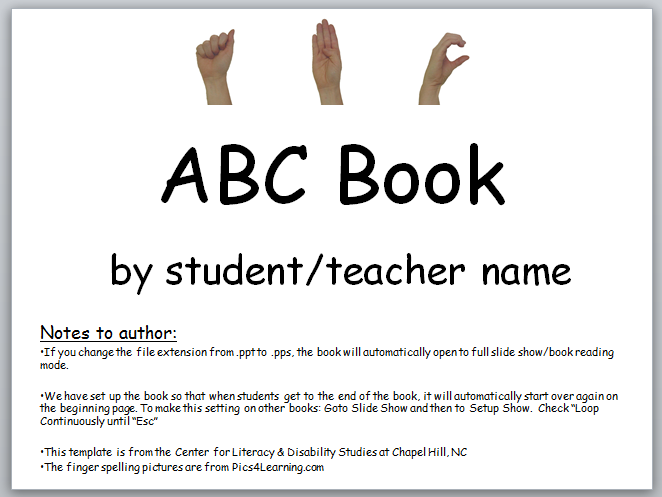
When making your own PowerPoint book, a template can be a helpful time saver. The templates below are for creating ABC books and personal books for students with significant disabilities, including deaf-blindness. The templates have high contrast backgrounds and some have finger spellings. (The finger spelling photos come from Pics4Learning.com. They are free!). The templates have also been setup so that there is an auditory click and some movement when students turn the pages in the book. In all of the downloadable templates, the pages and the text boxes have already been made. Teachers, therapists and/or parents can spend time adding pictures and text, rather than the technical aspects of starting from scratch. Open the PowerPoint Book Template.
Above photo of ABC PowerPoint is taken from this template.
This Step-by-Step Instructions to Make a Power Point E-Book were created by Deirdre E. Walsh M.S. CCC/SLP, a speech and language pathologist at Perkins School for the Blind, Watertown, MA. She has worked with children with visual impairments and multiple disabilities for over twelve years. This site was designed as partial fulfillment of her doctoral coursework in Educational Studies, Lesley University, Cambridge MA. Her materials in this section appeared on the e-advisor site, which was originally hosted by Boston Children’s Hospital.