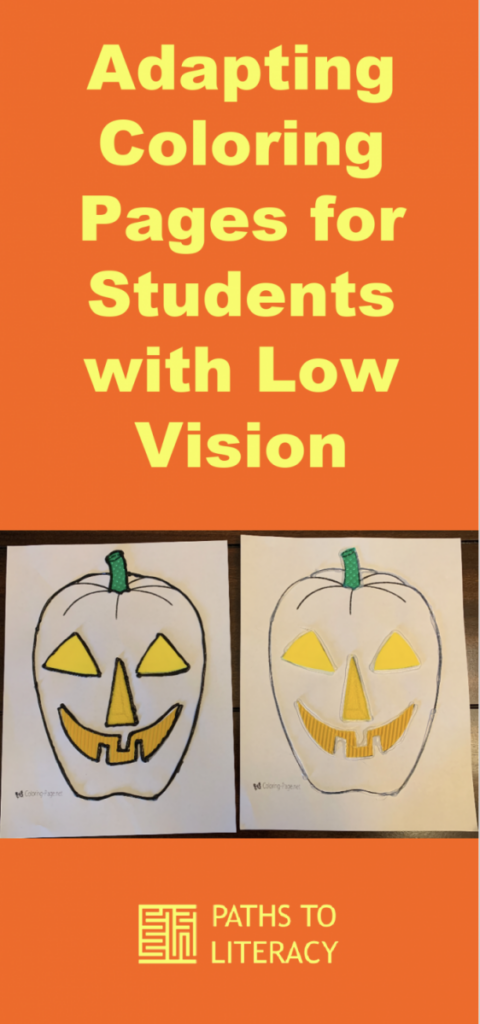
I have found that some of my students hate to color. They frequently tell me that the pages are too busy with too many lines and they don’t always understand the design that they are supposed to color. They also tell me that the teachers often fuss at them because they used only one color. Or that they went out of the lines. Or that they colored 2 things the same color. So I decided to try to adapt the page beyond just using hot glue or black puff paint to raise the lines for them.
Finding a Coloring Page to Adapt
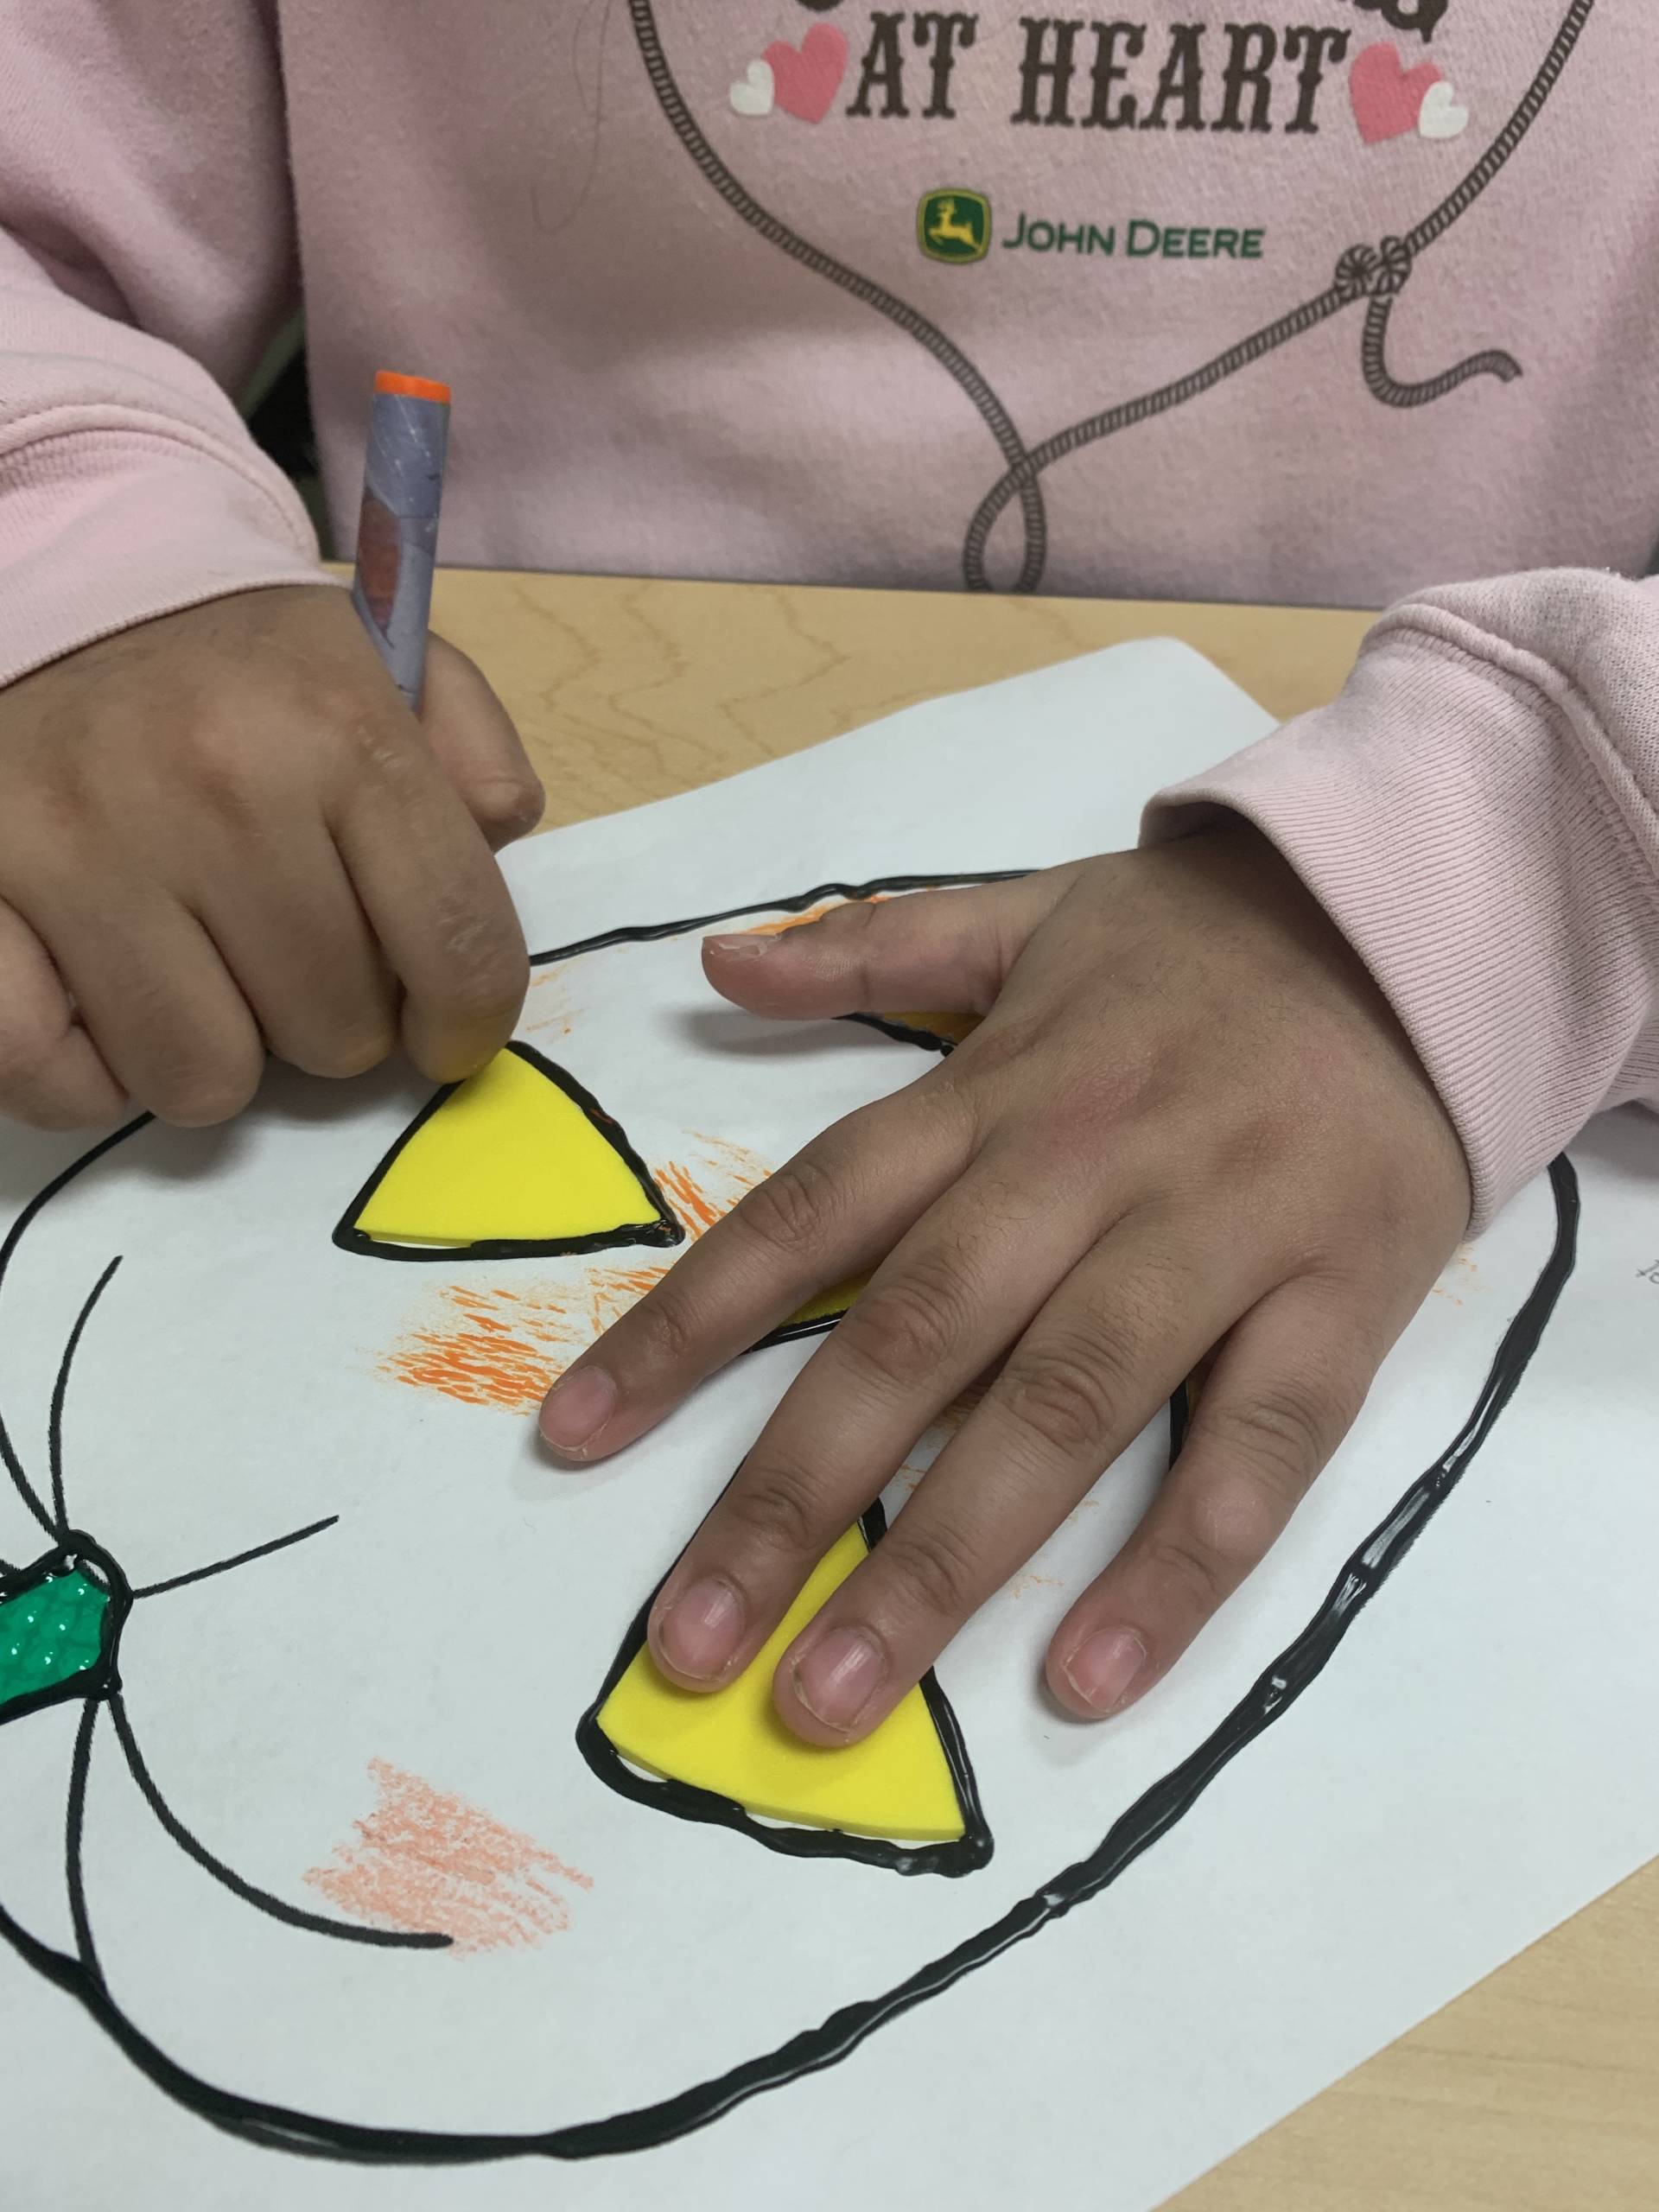
I went to Coloring-Page.net and found a fairly uncomplicated image of a jack-o-lantern. They have a ton of images you can choose from. The eyes, nose, mouth and stem can be adapted with different textures and the student can then olor the pumpkin orange. The nice thing about doing this is I was able to:
- talk about the parts of the face on the image as well as on their own face
- discuss the textures: soft/rough
- trace the outer image with our finger to determine the shape
- work on scanning the image for the textured details
- color without stress
Taking away that stress worked miracles! They laughed and colored more than usual. My freshman in high school, while wanting to color, was hesitant. The images can be so daunting. By filling in some of the space with a purposeful texture to help explain the image to be colored, she was more confident. Her hesitancy and tenseness disappeared, and she rocked it her first time out of the “gate”!

Tips for Adapting the Pages
Some tips for creating this page the way I did:
- When doing the eyes, I wrote a L or a R on the back to differentiate between the left and right eyes. This makes life WAY easier when trying to put them back.

- Number your items while tracing. This helps me know how many I’ve traced without having to continually recount them.

- Don’t forget to turn the image face down on the back of the textured paper you are using. This ensures everything fits correctly when it’s assembly time!
- Hot glue vs. puff paint/tshirt paint: I preferred the black paint as it makes the image “pop” and makes the lines easier for my students with low vision to see. Hot glue is faster in regards to drying times.

Variations
- Fill in the shape or not? You need to know your student. For my younger students and the ones who get overwhelmed seeing a blank sheet of paper with a bunch of lines, I put the shapes in first. For my other students who can handle the images, I’ll have them color and then together put in the shapes.
- Whether or not I put in the shapes or I have them do it, I still outline the area with the paint or glue gun for consistency. This helps when I don’t add in the textured pieces any more. They’re ready for those spots.
- If time is a factor when adapting pages like this, you can make a sample page and ask for volunteers. Schools typically have parent volunteers or student organizations that need volunteer hours. I also ask the parents of my students if they’d like to volunteer.
- The bottom line is that it’s important to KNOW YOUR STUDENT. I ask my students their preference and then pull out the page they want to do.