By Carla Brown, Program Specialist
Exceptional Student Education Program Development & Services
Florida Department of Education
Download this article (RTF version).
The relevant research tells us that variations in visually impaired children’s abilities and characteristics are related in part to variations in their environmental circumstances (Warren, 1994). We know a rich physical environment versus a restricted environment and encouragement to engage the environment rather than being protected from it positively affects development.
This checklist attempts to look at factors that can be addressed in the visually impaired child’s environment that will lead to more independence. Looking at both the physical and social environment, the checklist is divided into three areas:
Check all areas that seem to be a concern so that the teachers and team working with the child can develop strategies to increase independence and mobility.
I. Physical Environment
When looking at adapting and changing the environment, think about changes that will allow a child to be more independent rather than thinking about just making things easier for them. For example, if there are no natural obstacles in the way, the child will never learn to go around an obstacle. But on the other hand, if there are so many things in the way that a child cannot move independently, then he will most likely be restricted in his movement and interaction with his environment. When adapting or changing the physical environment think about:
- changes that increase the child’s independence; do what makes sense versus creating an artificial environment
- changes that will benefit all the children
- making adaptations natural versus artificial
- before making adaptations, can the child negotiate the physical environment with familiarization versus changing the environment
- fading adaptations and making sure that the child can negotiate the real world.
A. Safety
| Stairs/drop-offs | – Add visual adaptations such as painting color contrasting strips, wall or baseboard painted with contrasting strip, handrails painted contrasting color – Add tactual cues such as non-slip mats, strips or different type of flooring can be used at the stairs or drop-off – Good cane skills should detect drop-offs, adaptive cane techniques can be used (touch & drag, continuous contact) – Use of landmarks to identify with stairs or drop-offs (i.e., the stairs are by the double doors) |
|---|---|
| Head-high obstacles (shelves, fire extinguishers, drinking fountains, phone booths, sinks on pedestals, free standing stairs, open windows) | – Place box, stool, other item underneath overhang such as placing a stool under a water fountain, a table under a shelf – Use of “high bumper” to be used in specific areas |
| Low-lying obstacles (stool, wagon, motor equipment, toys, mats, toy box, etc.) | – Try to decrease obstacles by putting objects away or by arranging environment – Use rugs or different floor surfaces to define space around obstacles – Make sure child is familiar with area so there is more confidence in moving – Use of “low bumper” to be used in specific areas |
| Vertical obstacles (doors part-way open, poles) | – Partially open doors are dangerous for a student who is visually impaired especially when a student is trailing walls without using a cane. Contrasting colored tape can be used on the edge of the door so that when it is open, it gives a good visual cue. – Use of “bumpers” when approaching known obstacle |
| Swing-sets (moving swings, angled posts) | – Defined space under swings the width and length of “safe space” – Fence around area – Sensory cues at equipment – Buddy-system |
| Glass doors, glass furniture | – Use window decals to provide more visual cues for glass doors – Use protective covers on edges of glass furniture – Put glass furniture on contrasting colored rug for easier identification |
| Child groupings in class | – If children who are non-ambulatory are grouped with ambulatory children, “safe” spaces can be developed within the classroom so that child who is visually impaired is not restricted in movement and explorations. |
B. Environmental Factors to Enhance Vision and Visual Efficiency
| Lighting | – Information on the impact of the child’s visual condition on lighting needs is important. More is not necessarily better; child may be light sensitive or respond more in dim lighting. Dimmer switches can be helpful to control lighting. – Where should the lighting be positioned? Usually it is better for light to come from behind the child so child should be positioned for best natural light – Some children need higher intensity lighting for detail vision. Task lighting can sometimes be helpful. – Check for glare: culprits include television and computer monitors, blackboards, laminated pictures. Looking at positioning of light and changing the angle of how the light hits the materials usually can control glare. |
|---|---|
| Contrast | – Contrasting colors are easier to see. Contrast can be used in providing a contrasting colored background, which emphasizes the material visually. |
| Size and Distance | – You can increase the magnification of an object by bringing it closer or by increasing the size. Allow the child to bring materials as close as they need to and allow them to be close to you or the materials such as in circle time. |
| Positioning of Materials | – Make sure that materials are positioned in the visual range of the child. If the child needs to hold materials close to see, raise the materials on a slant board, wedge, or higher surface so that the child does not have to hold his head down to see it. If the child is in equipment such as a sidelyer, make sure materials are positioned in his visual field. |
| Time | – The speed of which an object passes through the visual field affects the visually impaired child’s ability to see it. A fast moving ball may move too fast for the child to fixate and follow but a balloon of the same size moving slowly may be easier for the child to follow. |
C. Use of Sensory Cues and Landmarks
| Areas of classroom distinct | – Different tactile and visual flooring in each area (tile in kitchen area, carpet in living area, different colored flooring in work area, etc.) – Different types of shelving or cabinets (open shelving in work space, shelves with brightly colored doors in kitchen area, drawers in living area) |
|---|---|
| Personal locations are marked | – Chairs and lockers can be marked in Braille or tactile/visual cues |
| Auditory clues are used for goal-directed movement | – Natural auditory landmark can be used that are stationary sound sources (clock ticking over door) – Natural auditory cues associated with activity (water running in sink for clean-up) – Enhancement of natural auditory clues (silverware tapping) – Musical sound clue (tape playing at music area) – Repeated voice clues at the goal (use with one of the methods above) Don’t use: – A moving sound source – Sound sources that change from day to day – Verbal directions from other than the goal, i.e., don’t stand behind or beside the child and tell him which way to go. |
| Landmarks used to increase independence | – Sometimes you may need to add a landmark so that the student can be more independent. The door to a specific location can be marked with a textured sign, a different type of doormat can be placed in front of the door, an object can be used such as a set of drumsticks taped to the door of the music room. |
D. Arrangement for Unobstructed Travel in Classroom
| Travel areas are free of clutter | – If a child can trail a wall or furniture, have the routes that he can do independently and functionally, free of clutter (i.e., no trash cans or chairs against wall, no toy baskets, etc.) – Have a designated “parking lot” for wheelchairs, etc. that is clearly marked. |
|---|---|
| Areas of classroom match classroom routine | – To increase the chance that a child can move independently from one area to another within the routine of the class, arrange the classroom so that areas follow the sequence of the day. Position tables so that there are straight paths of travel. Carpet or different flooring can designate straight paths. |
| Moving furniture in classroom is minimal or done with students’ participation | – When furniture is moved in the classroom, it may take the child who is blind longer to explore the changes; have the children participate in moving the furniture if possible. |
E. Travel in the School
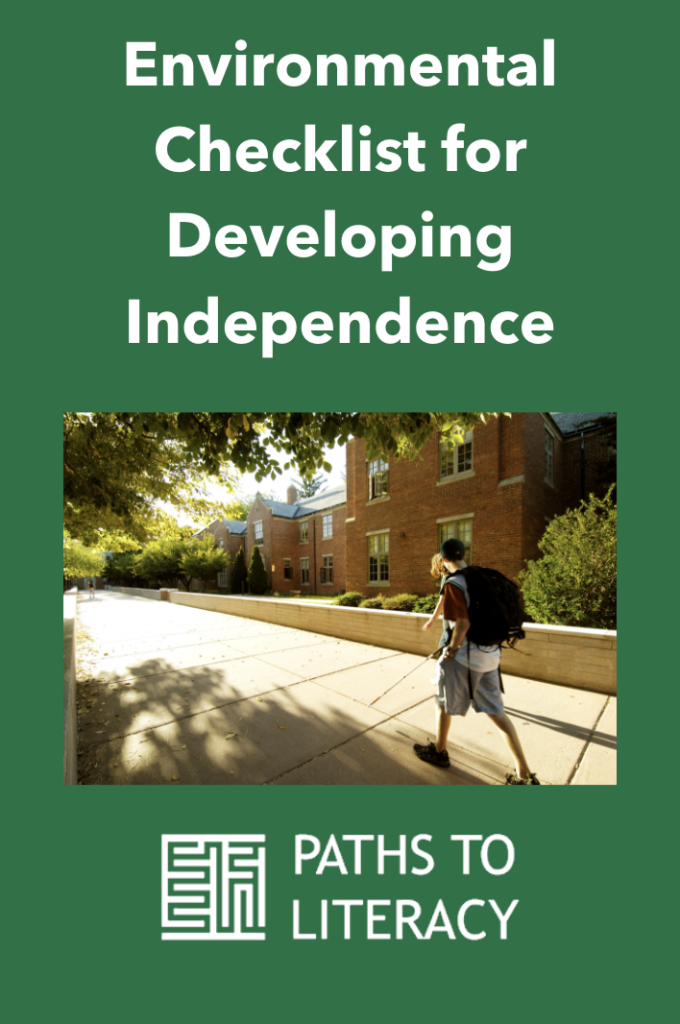
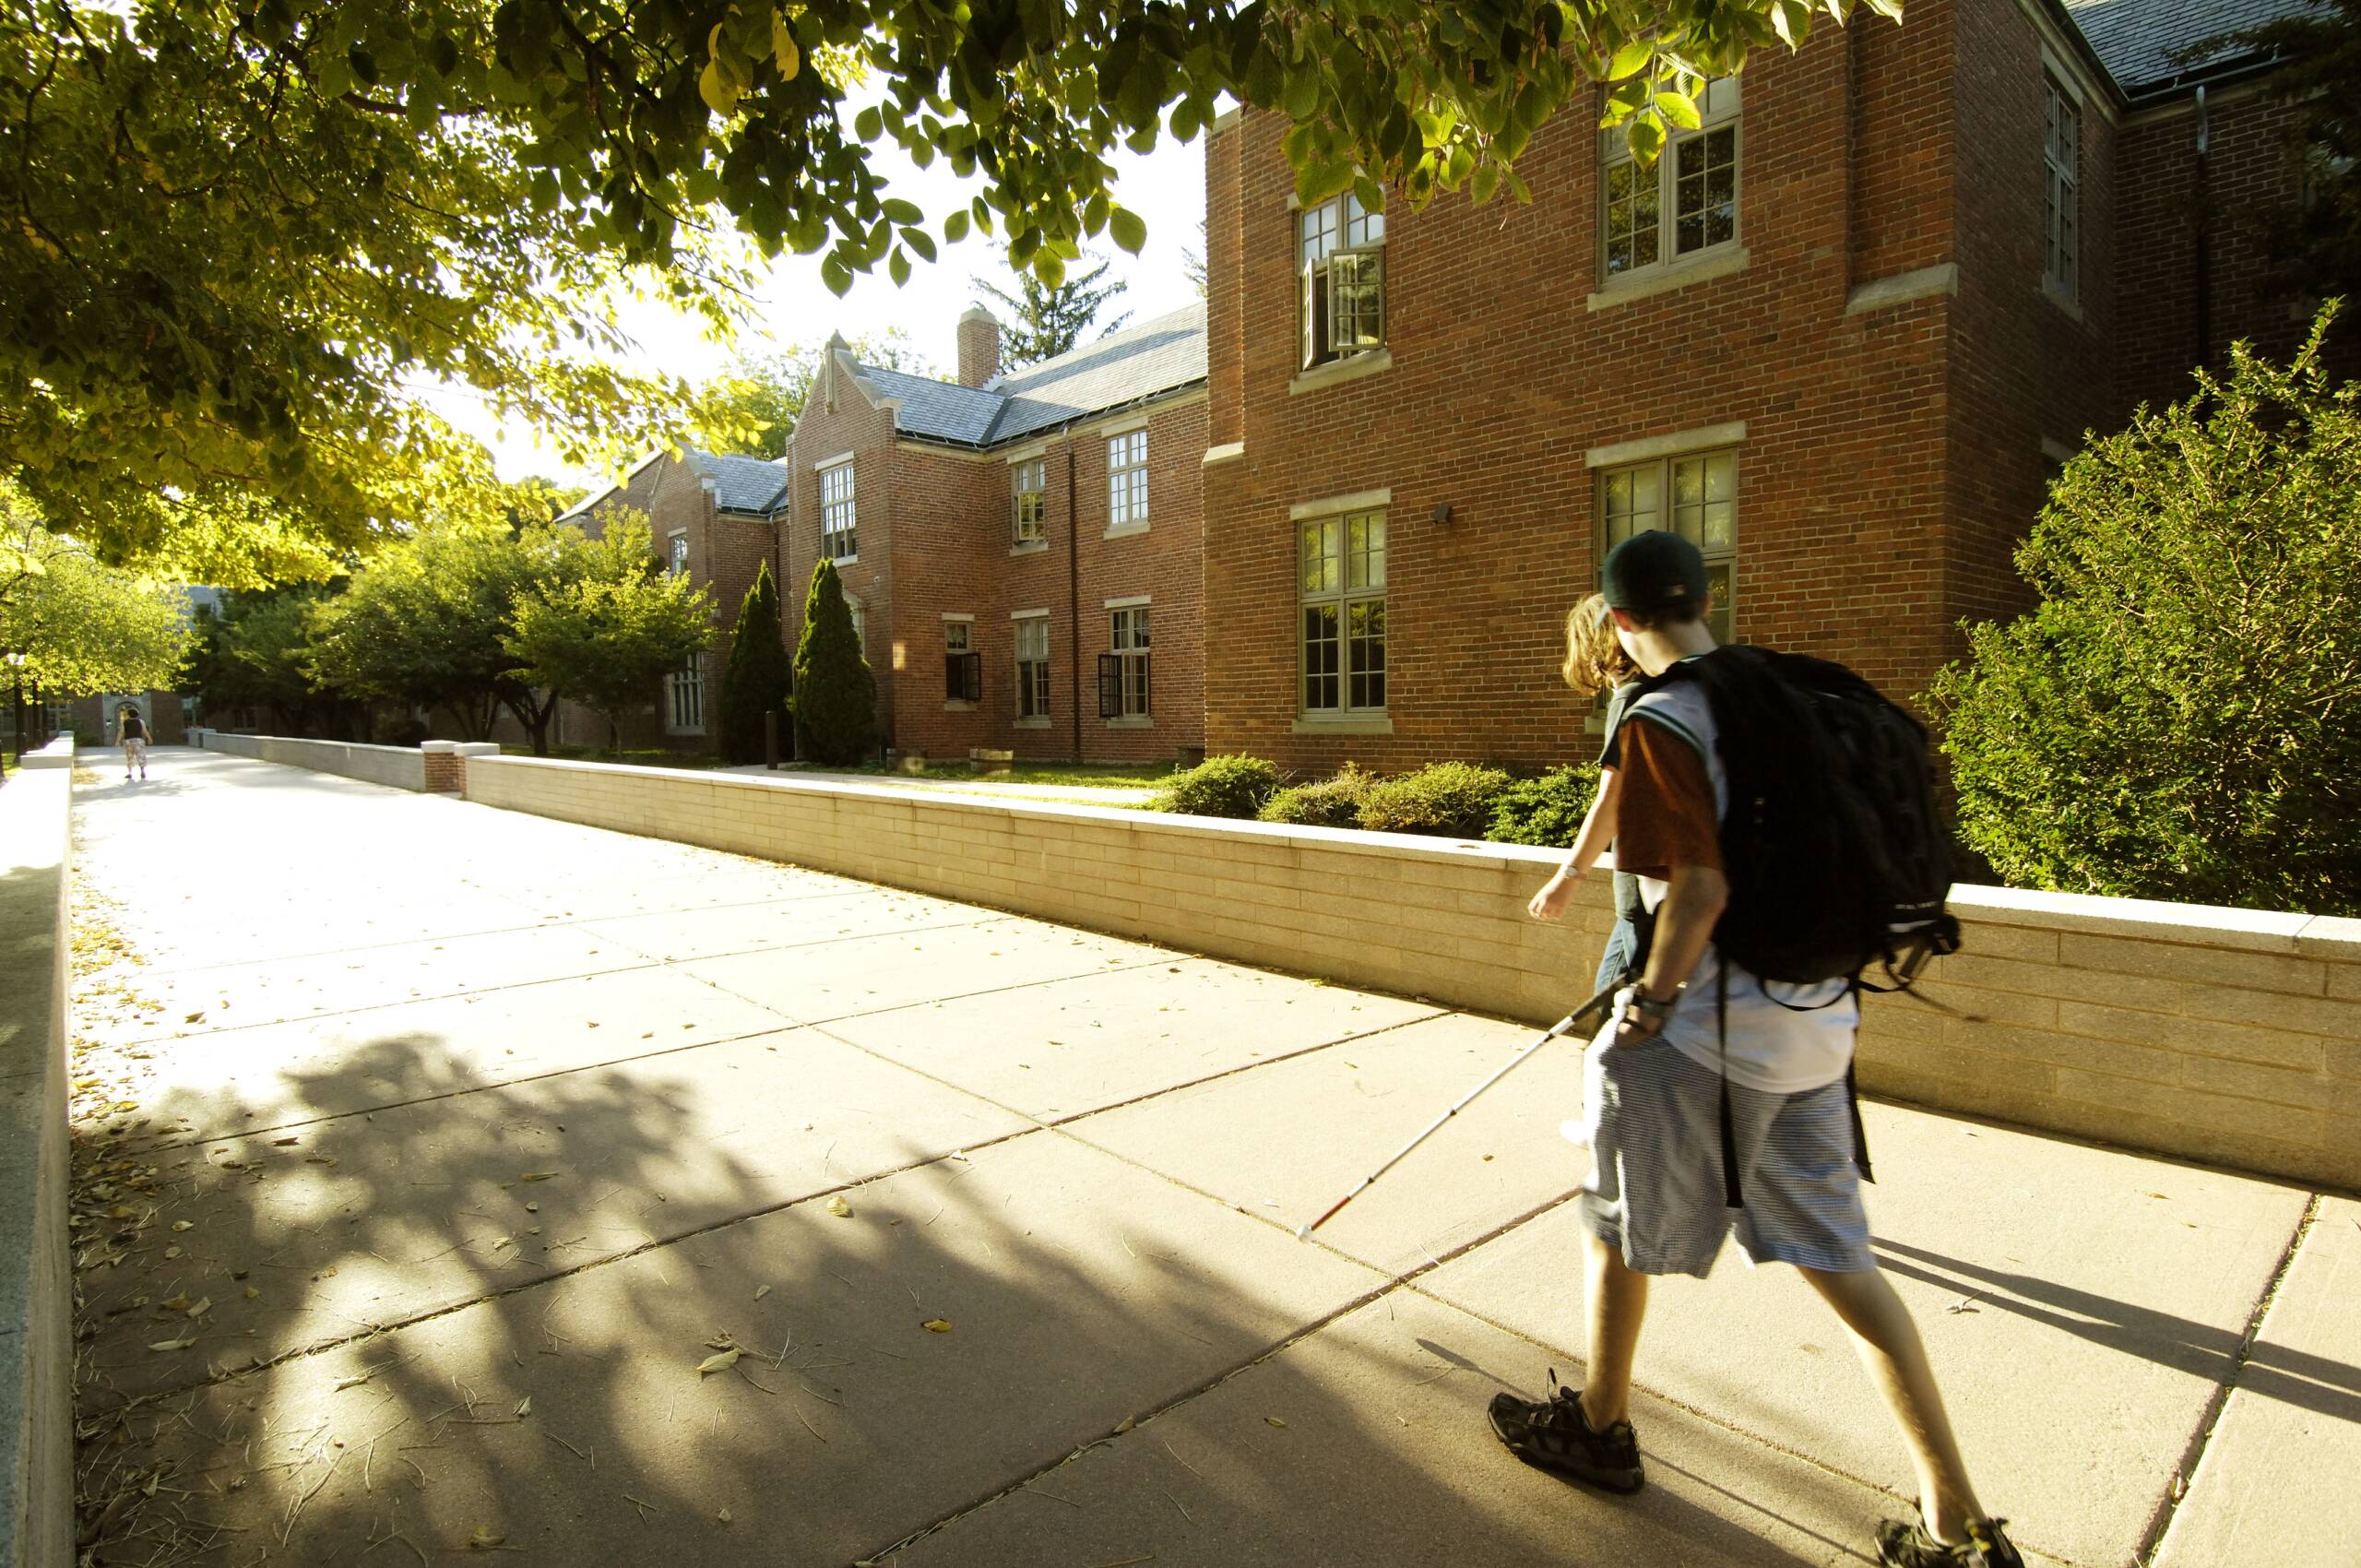
| Child has opportunity to travel to different areas around home or school | – It is best to teach routes during the time that the student needs to travel there so that he will know where he is going. Object symbols or a specific task can be used to help the student understand where he is going. For example, going to the cafeteria to pick up milk, taking a ball back to PE. – Once the route has been selected, consistent carryover by educational staff and family members is important. – Frequent repetition of the route during the routine is helpful. – Consistent labels are used for locations in the school, such as the “cafeteria hallway”, “courtyard”. – Routes to a goal may not always be the most direct but can be selected for ease in identifying landmarks. – Landmarks may be constructed that fit naturally in the environment (i.e., placing room signs or tactile international signs at a height that a child can reach or see easily or putting a brightly colored mat in front of the door. |
|---|---|
| Student has a way to carry belongings | A backpack is helpful so that a student can have his hands free to use a cane, adaptive device, etc. A basket on a walker can be used. |
II. People: Expectations & Opportunities
| Child optimally participates in routines and activities | – Problem-solve ways that a student can participate at some level in all activities (getting toys, objects; setting up materials, putting materials away) – Because a child with limited vision cannot see these natural routines, they may need to be “moved” through the activities so that they understand the expectations. Use “hand-over-hand” or “hand-under-hand” assistance to show the child the activity. Decrease assistance as soon as possible so that the child can be active. – Child is given time to perform whatever part of an activity himself. – When a child is moving independently, allow him to “bump” into things so that he can learn where they are, place you hand between the child and object so that he does not “run” into an object and protect him from getting hurt. |
|---|---|
| Child understands who the persons in his environment are | – For symbolic students, introduce yourself and always speak before you touch a child. When leaving, don’t “disappear”. Be sure to say good-bye or that you are going to another room. If you leave a child, tell him where she is or leave them in contact with something in the environment. – Say the child’s name when giving directions or making comments so that the child with visual impairments will know whom you are talking to. – For non-symbolic students, a unique procedure can be used by the different persons before interaction, i.e., taking the child’s hand to guide him through “give me five”, showing the child something that is unique to you (braids, beard, jewelry, etc.) or use coactive sign for your name. |
| Child is systematically familiarized to new areas and spaces | – As children move into unfamiliar environments, they may not be as secure to actively search out what is in the new environment. It is important to allow the child time to become familiar and to help them systematically explore what is in the environment. |
| Child is given time to do things independently | – It will most likely take a child with visual impairments longer to do an activity or to learn an activity thorough movement rather than vision. Be sure that the child is given adequate time to do activities independently. |
| Child is given non-visual cues when transitions take place | – Children receive many visual cues that there will be a transition to another activity. Try to provide non-visual cues to the child who is visually impaired that it is time for another activity. |
| Child has opportunity to interact with other children in class, school, community | – Activities can be structured to facilitate interaction and cooperation among students (students can take turns distributing material to other students, classmate can be shown how to be a sighted guide, student can push someone in wagon or wheelchair). – Seating arrangements can facilitate more than one person in an area at a time. – Specific routes can include requesting materials from another teacher or student. – To help other children to feel comfortable, inservices for teachers and other classes may be helpful. |
| People in the environment feel comfortable in interacting with child | – Try to avoid the “who is this” game, instruct staff to say “hi, this is ____” instead of using questions as a way to interact. – For students with augmentative communication or sign language, staff that has opportunities to interact with the student should receive information on how to communicate. |
| People in the environment give the child who is blind information and language about what they are doing at the moment | – It is not meaningful to provide a non-stop verbal description of everything that is happening all of the time. Provide labels and action words talking about what they have their hands on or what they are doing at the moment. The amount of information depends on the age of the child. Don’t be afraid of using language involving sight. |
III. Materials
| Materials are in a consistent and accessible location | – Materials should be in consistent places and in an accessible location. For a non-mobile child, materials should be presented to allow the most independent interactions that match his motor capabilities. For example, placing a toy on his lap instead of putting it in his hand allows a child to actively reach for the toy. For students in wheelchairs, having shelves at their height is important. – Students should participate in setting up the task (beginning), doing the task (middle) and putting the task away (end). This allows them the ability to get a big picture of the activity and anticipate the next step. When you know what the next step is in the activity, you can initiate that step. – Consistent locations will help a child learn spatial concepts. – For some children, it is important to have materials in a confined space such as a work tray or container. |
|---|---|
| Materials are selected or adapted to match sensory needs of child | Select or adapt materials addressing visual components: – lighting – contrast/color – size – movement – decreasing visual clutter Select or adapt materials addressing auditory components: – high pitch – low pitch – loud – soft – irregular/intermittent – constant – fast – slow – how sound is activated Select or adapt materials addressing tactile/proprioceptive components: – weight – texture – resistance – vibration – movement |
| Materials used to indicate the beginning and ending of tasks and events | – Use object cues to indicate what activity is next and a “finish” box to put the object into to indicate the end of the activity |
| Materials include real objects whenever possible | – Real objects are used throughout the day in functional activities such as stacking cans on the shelf, making nature books using leaves, acorns and items from outside, using kitchen utensils for fine motor development, etc. |
| Selection and positioning of materials for optimal interaction | – If there are centers, make sure there are spaces and chairs for more than one person – Restrict the number of materials so that students must share or pass the materials around the table – Give two students different “jobs” on one activity such as one folds and the other puts the paper in the envelope – Have one child assist another (pulling in wagon, help pushing wagon or wheelchair) – Use of materials in turn-taking games – Have students take notes or materials to another teacher or student |
This article was originally published by Texas School for the Blind and Visually Impaired (TSBVI) and is reprinted here with permission.