“Snowmen fall from heaven… unassembled.” – Unknown
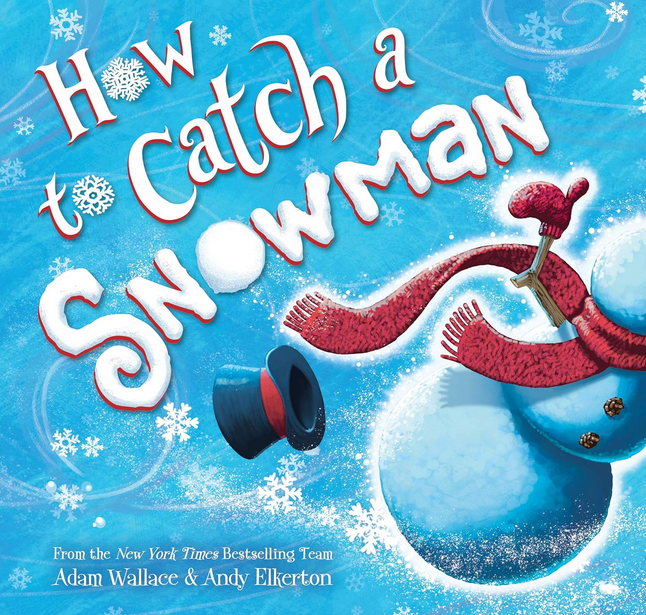
The book I selected for this month’s craft inspiration is called How to Catch a Snowman by Adam Wallace. It’s a fun story that doesn’t require a magic hat for the snowman to come alive but an enchanted snow star at midnight. The snowman runs away and the story is about the children trying to catch him so they can claim the prize for building the best snowman.
One of the things I liked about the book is that the letters of the title are tactile. My students have really enjoyed running their fingers over the letters.
Skills to Practice
- Book knowledge (i.e., title, author, page turning, image walking)
- Explore the texture on the cover
- Use of low vision tools while reading the book
- Develop hand and eye coordination
- Soliciting assistance appropriately
- Fine motor skills
- Communication
- Positional concepts
- Choice making

Activity 1
Button Snowman Ornament
A colleague sent me an image of this craft that was on Facebook. I immediately fell in love with it and started thinking of adaptations. The image had the hat painted on. I found mini hats that the students could glue on instead. The set came with scarves. I gave the option to my students to use the scarves or not.

Materials Needed
- Plywood rectangles (5.35 inches x 2.6 inches)
- Wood stain
- Paintbrush or paint sponge
- 1 inch Resin Buttons (1 for the head)
- 1 1/5 Inch (30mm) Buttons White Resin Buttons (2 for the body)
- White paint markers
- Mini hats/scarves
- Hot glue gun
- Hot glue stick roll (one of my favorite things!)
- Christmas ribbon (3/8 inch wide)
- Plastic Sewing Needles
To prepare for the activity, I used a Dremel to drill holes in the top of the plywood rectangles so we could add ribbon to hang them on the tree. I stained both sides of the rectangle. Be sure to do the staining in a well vented area.

The first thing I have my students do is to either write their names or use their name stamp to mark the back of the rectangle. After that, students had to get the required number of pieces out of the container. They choose either a green or a red mini hat. Using the example, the students placed the items on the plywood rectangle. Once the students had the items where they wanted them, I adhered them to the rectangle with hot glue.
Tip:
Many rooms I work in rarely have an accessible outlet so I can plug in the glue gun. I use a Rechargeable Mini Glue Gun. I just ensure I charge it the night before I need it. This works great for these smaller projects!
The last thing they did was to choose the ribbon they wanted to use to hang their finished ornament. Using a plastic needle, they pull the ribbon through the drilled hole for me to assist them in tying a knot in it.
Tip:
- I used a flattened box to lay the rectangles on to ensure the stain did not get on any unwanted surfaces.
- In order to hold the plywood rectangles in place to refrain from staining your fingers, you can do one of two things. You can wear disposable gloves to hold the rectangles or use painters tape that has been looped to adhere to the back of the rectangle as well as the surface you’re working on.
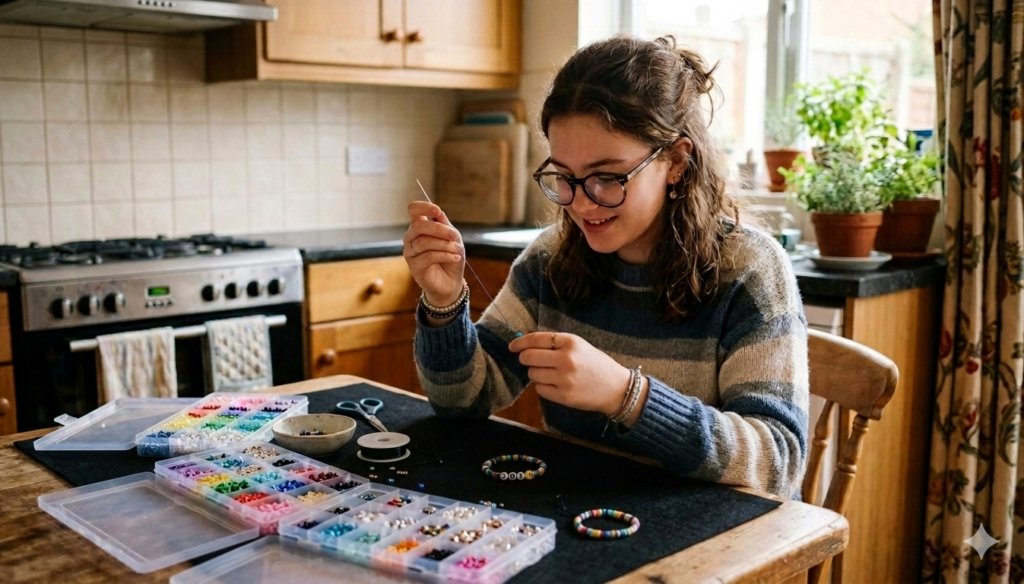
Activity 2

This is actually supposed to be a garland craft that I purchased from Temu. I changed it to create individual ornaments.
Materials Needed

- Snowman Beaded Garland Kit (pieces can easily be obtained online or in a craft store)
- A tray with compartments to separate the pieces
- 40PCS Plastic Sewing Needles
- Kraft Paper Gift Tags with String
I pre-bagged all the items needed (minus the needles) for this craft. The student had to obtain the bag, open it and pour it into their tray. They organized the materials. A needle is selected, and the jute string is threaded through it. They’ll string the beads and then either make a loop and knot it closed, or solicit assistance.
The gift tag is attached after the student either writes a message or uses their name stamp on it. If they are unable to do so, they select what message, if any, for me to write on it for them.
Tip 1:
I use a drop of hot glue on the end of the jute to keep the knot from unraveling and another at the top.
Tip 2:
If the student is unable to see the face/buttons on the beads with their low vision devices, t-shirt paint can be used to raise the images.
Activity 3
Teachers Pay Teachers had a free printable Christmas sweater craft template. I printed the template on green and red cardstock. After cutting them out, I assembled an array of items for the students to use (i.e. pompoms, miniature bows) to decorate the sweaters.
Materials Needed
For this craft, I used the following. You can use other items as well. These are just things I already had in my craft storage containers at home:
- The free template from Teachers Pay Teachers printed on green or red card stock
- Divided Serving Tray with Lid & Handle (I liked this one as the individual compartments can be taken out of the tray if needed)
- Mini pompoms
- 2 types of mini bows
- Cotton balls cut into pieces
- Pinwheel beads
- Mini textured beads
- 2 types of small beads
- Craft glue or hot glue
The students chose either the red or the green cardstock. They explored their choices of items to put on the cardstock sweater. Once they had it the way they wanted it, they glued the items down.
Optional:
Instead of using items to glue on, the student can create an original design by drawing it and coloring the image.
Activity 4
The blog site, Sunny Day Family has 3 free Christmas cards for students to color and create for their families. I chose to have my students color the cards and either sign their names or use their name stamps. I cut out the images using scissors with a decorative edge. The student chose red or green cardstock to have their colored card pieces glued on. The student glued the images to the front of their card and the message with the signature to the inside of the card.
Materials Needed
- Christmas card templates
- Crayons
- Red or green card stock
- Craft Scissors Decorative Edge
- Stick glue
All the crafts and cards made this month were put in Christmas gift bags to be sent home as a gift to their families.

Extension Activities
- “Snowball Catch” is my spin on a snowball fight. The students play catch with one ball at first for me to assess their abilities. More snowballs may be added to the mix. This is a great way to get the students moving. I try to find a small space with not a lot of furniture/boxes/etc. in the room. I also seek input from the Adaptive PE teacher, PT, and O&M Specialist. 36 PCS Snow Balls for Kids Indoor
- “Snowball Roll” is another spin off of the snowball fight. Here the student rolls the snowball across the floor or table. Any flat surface will work.
- Freeze the snowballs to give the students a simulated tactile experience of real snow.
- Read other books about snowmen.
- Create an original story about snowmen.
- Watch “Frosty the Snowman”.
- Use cotton balls on colored cardstock to create a snowman and/or friends and family. Count the number of snowballs used to create it. Who says a snowman is only 3 snowballs tall?
- The Best Ideas for Kids has a blog post where you can download for free Christmas Would You Rather questions that are easily adapted in braille or large print.
- 25 Easy Snowman Crafts from the Primary Parade blog
- Shape snowman activities from Primary Parade blog
- 33 Cool Snowman crafts from In The Playroom blog (UK parent blog)
- Melted Snowman Craft from Simple Everyday Mom blog
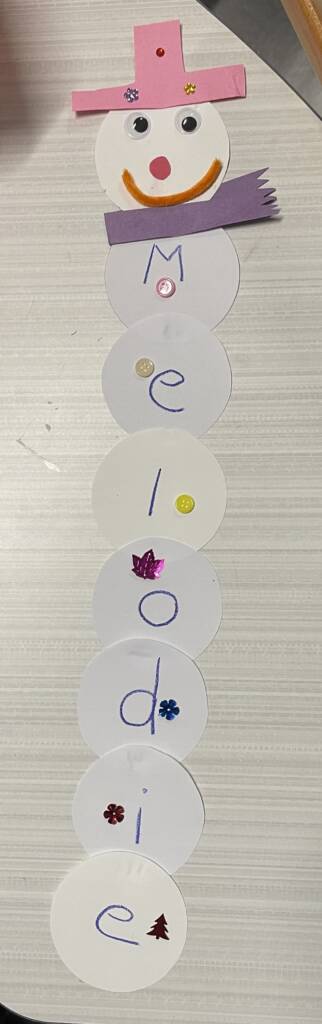
- Make a name snowman