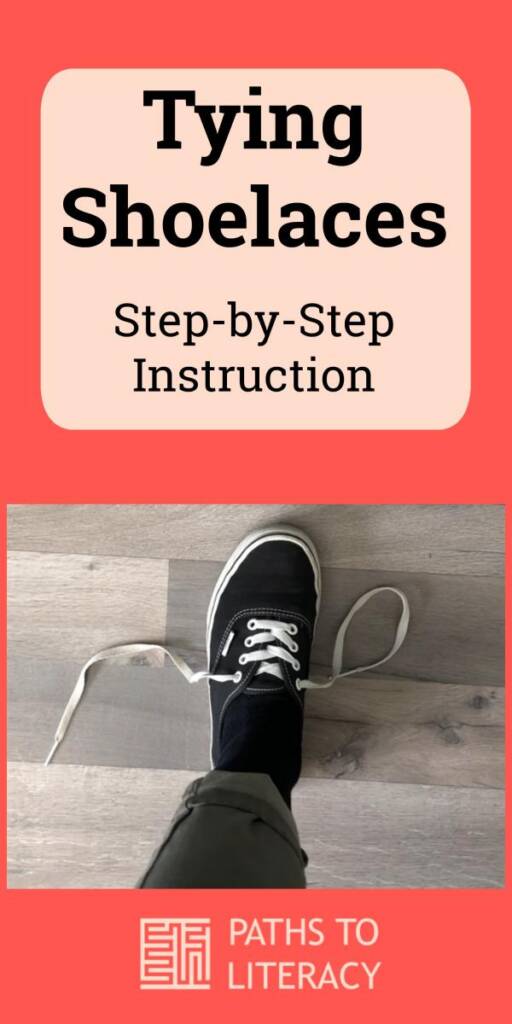
Learning to tie shoes can be a challenge for any child and is often a difficult skill for those with visual impairments to master. The task is broken down into small steps below, and is demonstrated in the video, to provide clear step-by-step directions to teach this skill.
Invite the students to read these steps to incorporate literacy!
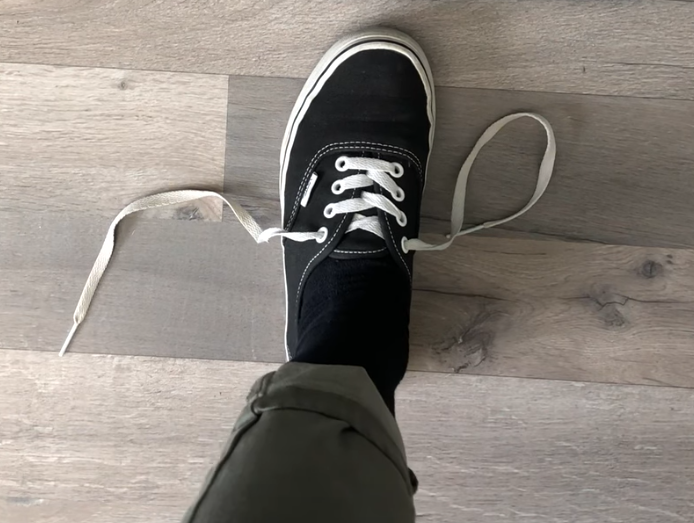
Begin with laces untied.
Criss-cross:
- Cross RIGHT lace over to the left side of the shoe & drop it there.
- Cross LEFT lace over to the right side of the shoe & drop it there.
Pinch, Tuck, Grasp and Pull
- Use the MIDDLE FINGER and THUMB of the LEFT hand to pinch both laces where they cross. This should be very close to the shoe (within about 1-2 cms). At the same time, grasp the dangling side of the LEFT lace gently with your pinkie and ring fingers if you can.
- Use the LEFT POINTER FINGER to TUCK the lace on the right side of the shoe UNDER the crossed laces.
- GRASP the lace from the LEFT POINTER FINGER (which should still be under the TUCK) with the RIGHT HAND and PULL it through to make the first tie. Don’t let go!
- RELEASE the pinch with the LEFT HAND and slide your left hand along the lace (away from the shoe) to grasp the left shoelace.
- With BOTH HANDS, PULL AWAY from the shoe to TIGHTEN the first tie.
Thumbs Up, Pointers Out
- KEEP HOLDING ONTO EACH LACE with the PINKIE, RING, and MIDDLE FINGERS of each hand, while EXTENDING each THUMB and POINTER FINGER.
Under and Over
- WITHOUT LETTING GO, move the top of the LEFT POINTER FINGER under the LEFT LACE so that you are pointing down to the floor. MOVE the POINTER FINGER UP and away from your body, catching the LEFT THUMB under the taut lace. STOP THERE. DO NOT LET GO.
- Move the top of the RIGHT THUMB under the RIGHT LACE and point it down toward the floor. TWIST the THUMB UNDER and UP, catching the POINTER FINGER under the taut lace. STOP THERE. DO NOT LET GO.
- If you have vision, your laces will look like a zigzag. If you do not have vision, have another person demonstrate this step so that you can explore how the laces look and feel.
Tilt, Pinch and Pull
- STILL HOLDING ON, TURN the LEFT hand 1/8th of a turn forward (away from your body), AND TURN the RIGHT hand 1/8th of a turn backward (towards your body).
- Move both of the hands in this position towards each other until you feel the laces touch. Use your RIGHT POINTER and LEFT THUMB to find the OPPOSING LACE and pull it slightly outward away from the other lace.
- Bring your POINTERS to YOUR THUMBS to GRASP the OPPOSING LACE.
- PULL DOWN AND OUT WITH BOTH HANDS. TA-DA! You have just tied your laces.
Release the Tie
- Using one hand on each side of the shoe, grasp the aglet (plastic end of each lace) and pull outward away from the shoe. This will undo the loop. Then hook one pointer finger under the cross tie and lift up to undo this tie as well.
Well done!