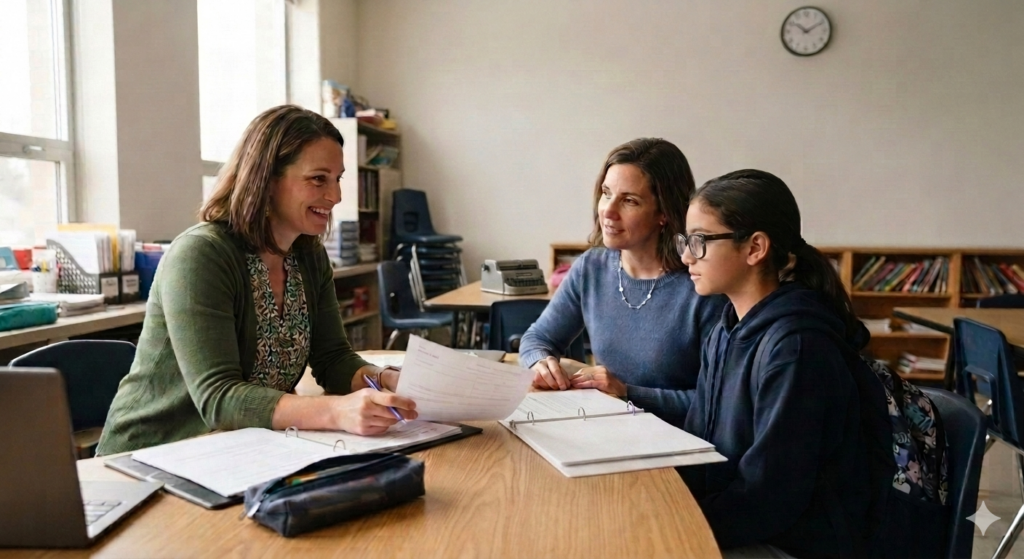
Summer is a great time to help support teens discover their creative interests by providing opportunities for them to explore. Diving into a more creative side of learning can be as simple as providing the materials in the home setting, getting inspiration by attending an art event or museum, or signing them up for a camp or lessons that involve learning about a particular art or craft.
Start with an interest survey
Asking the teen about their interests helps to guide them to potential projects. It can be a simple Q&A or a more detailed survey. Ask them about their past experiences and what they liked and didn’t like about it. Consider sensory issues like noisy environments and participating with others or alone that shape the overall experience.
Here is a worksheet that may be helpful: Arts and crafts survey form
Using a survey can help get a conversation started and lead into a desired first project. It’s important to note that its okay for students not to always have an answer to a question. Some may find their results to be different than they thought.
Use the following ideas as inspiration that can be tailored to individual needs and tastes. Keep in mind specific ECC (expanded core curriculum) skill levels not only for the visual impairment but also for students with complex needs.
Areas of focus
The sculptor and builder
Focuses on tactile, physical media. Look into pottery, resin art, polymer clay sculpting, or woodcraft. These tactile, 3D mediums are naturally perfect for students with visual impairments, as they emphasize touch, spatial awareness, and fine motor control.
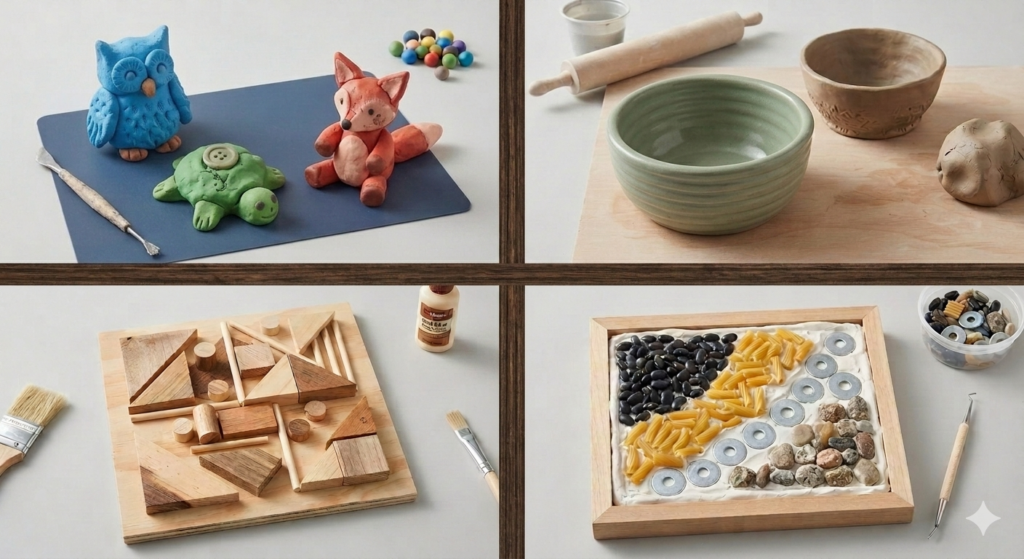
1. Polymer clay tactile creatures
Objective: Students will sculpt a small animal or character using distinct geometric shapes to master spatial joining and texture mapping.
Lesson guide
- Explore Geometric Bases: Roll a large sphere for the body, a smaller sphere for the head, and cylinders for limbs.
- Assemble the Anatomy: Press pieces together firmly using the “score and slip” touch equivalent (twisting and pressing until the clay melds).
- Texture Mapping: Use different household objects to stamp distinct patterns (ex., a fork for fur, a textured button for scales, a toothpick for dots).
- Baking Preparation: Place the finished sculptures on a baking sheet lined with parchment paper and follow directions that come with the clay.
Adaptive strategies and tools
- Contrast Mats: Use black silicone baking mats for light clay and white mats for dark clay to maximize visual borders.
- Scented Clay: Mix a drop of safe essential oils (like lavender or mint) into different clay colors so students can identify them by scent.
- Provide silicone ice cube or chocolate molds to help students quickly form consistent base shapes.
2. Pinch coil bowls
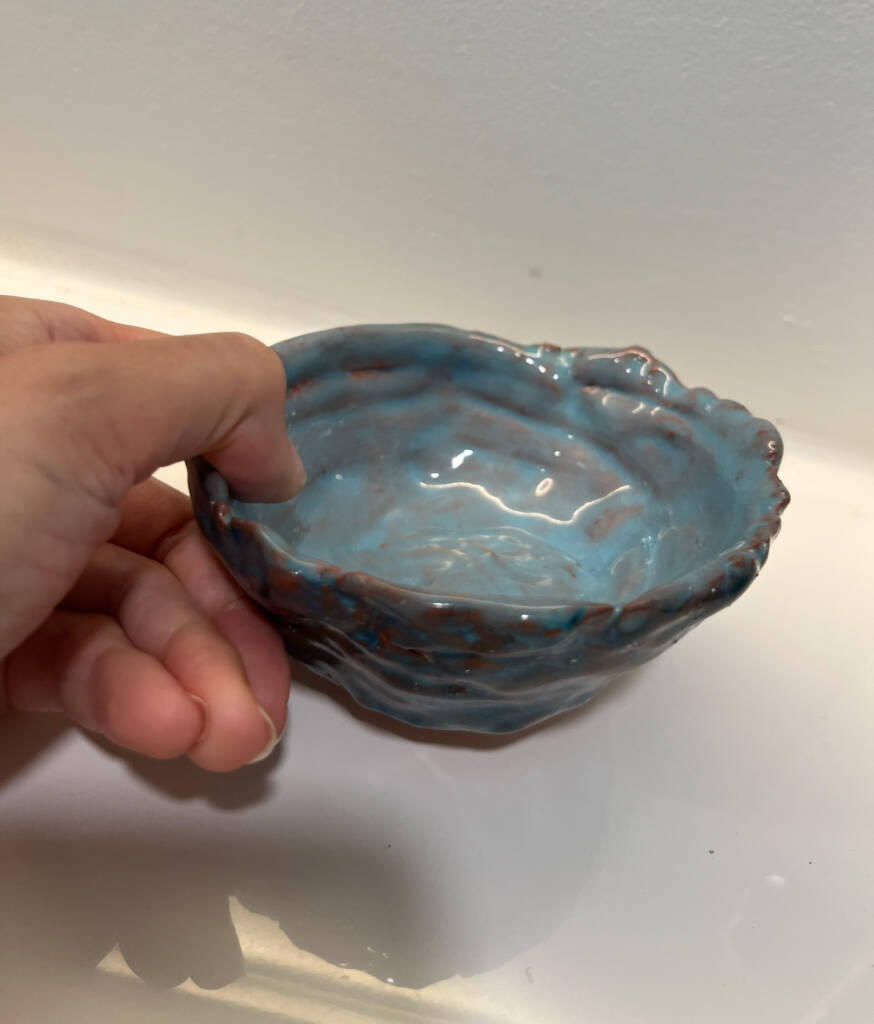
Objective: Students will use internal spatial awareness to create a functional vessel by blending coils of clay.
Lesson guide
- Create the base: Roll a piece of clay into a ball, flatten it into a thick pancake using the palm, and check for uniform thickness with a thumb and index finger pinch.
- Roll the coils: Roll clay back and forth on the table using flat palms to create “snakes” of equal thickness.
- Build the walls: Layer the coils around the perimeter of the base, stacking them vertically to build height.
- Smooth and blend: Support the outside of the bowl with one hand while the thumb of the other hand drags the clay downward on the inside to smooth the coils together.
Adaptive strategies and tools
- Thickness guides: Place two flat wooden dowels (1/4-inch thick) on either side of the clay when rolling the base to guarantee a perfectly even thickness.
- Tactile boundaries: Stick a loop of raised puff-paint or hot glue on the work table to define the exact workspace boundary.
- Rim markers: Use a textured notch tool to cut a small indent on the lip of the bowl so the student can easily track their start and finish points.
3. Found object wood collage
Objective: Students will plan and construct a rigid 3D abstract sculpture focusing on weight, balance, and structural integrity.
Lesson guide
- Sort the inventory: Categorize pre-cut wood blocks, dowels, and tree bark by size and texture into separate organizer bins.
- Dry fit the design: Arrange the pieces on a heavy cardboard backing without glue to test how the shapes puzzle together.
- Construct the base layer: Apply thick wood glue or tacky glue to the largest, flattest pieces and press them onto the backing board.
- Build vertical layers: Glue smaller blocks, sticks, or textured bark on top of the base layer to create height, depth, and overlapping tactile paths.
Adaptive strategies and tools
- Tactile glue lines: Use a fine-tip nozzle for the glue so students can physically feel the wet line of adhesive before pressing pieces down.
- Sanded materials: Ensure all wood pieces are tumbled or sanded to eliminate the risk of splinters.
- Binned workstations: Place all raw materials in a muffin tin or a desk organizer sorted by texture (e.g., rough bark in slot 1, smooth blocks in slot 2).
4. Air-dry clay textured mosaics
Objective: Students will map out a geometric design by embedding highly varied textures into a soft, receptive canvas.
Lesson guide
- Prepare the canvas: Roll out a flat sheet of air-dry clay directly onto a piece of particle board.
- Trace the grid: Use a blunt plastic stylus to score a simple grid or design lines directly into the wet clay.
- Embed the mediums: Press high-texture items (like ridged pasta, bumpy beads, or metallic washers) deeply into the clay sections.
- Seal the border: Wrap a piece of textured twine or thick yarn around the outer perimeter of the clay mosaic to create a framed boundary or use an old frame.
Adaptive strategies and tools
- High-contrast tiles: Pair dark materials (like black beans or charcoal beads) with white air-dry clay to give low-vision students strong visual feedback.
- Deep scoring: Guide the student to press hard enough when drawing their initial lines so their fingers can easily track the “valleys” of the design.
- Material trays: Use distinct trays or small containers to hold different mosaic pieces, making sorting and choosing purely a matter of muscle memory.
The visual storyteller
Focuses on 2D visuals. Explore digital illustration, watercolor, comic book art, or acrylic painting.
For students with visual impairments, a 2D “Visual Storyteller” area is highly accessible when transformed into a multi-sensory storytelling experience. By adapting the medium to emphasize texture, contrast, and digital feedback, these students can express narratives creatively and independently.
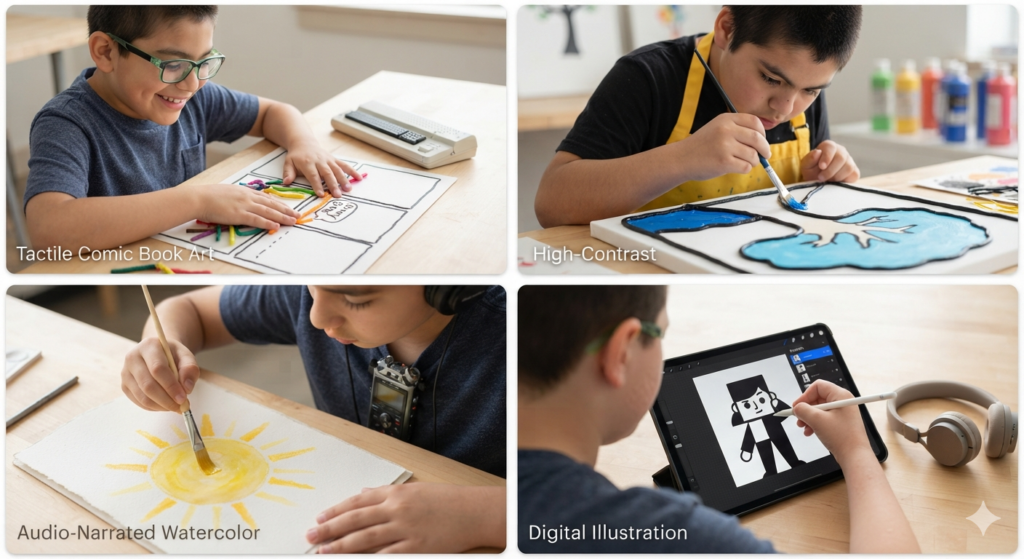
1. Tactile and embossed comic book art
Objective: Tell a sequential, 2D story using textures instead of line drawings.
Materials: Heavy cardstock or matte board pre-divided into 3–4 large panels, Wikki Stix (wax sticks), textured papers (sandpaper, felt, corrugated cardboard), puffy paint, and foam stickers.
Lesson guide
- Brainstorming: Have students plan a simple 3-part narrative (e.g., a character encounters an obstacle and resolves it).
- Panel boundary definition: Guide students to trace the pre-drawn comic panel borders using thick Wikki Stix or puff paint to clearly define their workspace.
- Character Creation: Assign specific textures to characters. For example, the main character is always represented by a soft felt circle, and the obstacle is a rough sandpaper triangle.
- Setting the scene: Students apply foam stickers or corrugated paper to build the background environment in each panel.
- Adding dialogue: Use plastic speech bubble templates. Students can add braille and/or large print.
2. High-Contrast acrylic tree painting
Objective: Paint a bold landscape independently using physical boundaries to separate colors.
Materials: Pre-stretched canvases, black puffy paint or hot glue, bright neon/high-contrast acrylic paint, thick grip paintbrushes, and egg cartons (as separated paint wells).
Lesson guide
- Canvas preparation (Done ahead of time by instructor): Trace a simple, bold design (like a large tree or geometric sunburst) onto the canvas using thick, raised hot glue or black puffy paint lines. Let it dry completely.
- Tactile mapping: Have the student run their fingers over the canvas to identify the raised boundaries. Verbally identify each section (ex., “This big circle at the top is the tree leaves”).
- Color Application: Arrange high-contrast paint colors in a sequence the student memorizes (e.g., far left is bright yellow, middle is neon blue). Instruct students to place their non-dominant hand inside a raised boundary section as a guide, while using their dominant hand to paint within that exact boundary.
- Detailing: While the background is wet, students can press small tactile elements (like plastic gems or sequins) directly into the acrylic paint to add texture to the leaves or trunk.
3. Audio-narrated watercolor and wax-resist
Objective: Explore fluid art mediums while maintaining spatial awareness and recording a spoken narrative.
Materials: Thick watercolor paper, white and yellow oil pastels or beeswax crayons, liquid watercolor paints, wide flat washing brushes, and a simple digital voice recorder (or tablet mic).
Lesson guide
- Story pre-recording: Have the student record a 30-second audio clip describing the scene they are about to paint (e.g., “This is a scorching summer sun beating down on a calm ocean”).
- Waxy outlining: Students press firmly with oil pastels to draw their central figures. The heavy wax creates a physical slick barrier on the paper that can be felt by sweeping a finger over it.
- Water application: Using a damp sponge or a large brush, students lightly coat the paper with clean water to prime the surface.
- The watercolor wash: Students apply liquid watercolor across the entire page. The paint will automatically resist the wax lines, pooling beautifully around the hidden shapes.
- Sensory playback: Once complete, play the student’s recorded audio narrative next to their drying artwork for a fully immersive display.
4. Digital illustration with assistive technology
Objective: Utilize tablets to create bold, digital character art with infinite zoom and high contrast.
Materials: iPad or tablet, Apple Pencil or high-grip stylus, Procreate app (or similar illustration software), and over-ear headphones if tolerated.
Lesson guide
- Accessibility settings: Open the tablet settings and make sure the accessibility features are being used to meet individualized student needs including high contrast and larger font.
- Canvas optimization: Guide the student to pinch-to-zoom into a massive magnification level so they can focus on just one corner of the screen at a time.
- Shape snapping: Teach the “QuickShape” feature (hold the stylus down at the end of a stroke to make a perfect circle or square). Students use this to build a geometric digital character.
- Color drop: Utilize the drag-and-drop color feature. Students drag the color icon from the top corner directly into their shapes, filling large spaces instantly without needing precise brushwork.
- Audio review: Export the artwork. If using an app with voice-over compatibility, have the device read out layer names and color profiles to the student so they can review their digital layout.
The wearable designer
Treats clothing and accessories as a canvas. Into fashion upcycling, tote bag painting, sneaker design, and jewelry crafting.

For students with visual impairments, the wearable designer area is a fantastic space to explore self-expression. By shifting the focus from visual alignment to tactile boundaries, distinct textures, and spatial mapping, students can independently design items they can proudly wear.
1. High-texture fashion Upcycling (patchwork denim)
Upcycling existing clothing allows students to transform everyday garments into personalized, tactile statements.
Lesson guide
Objective: Students take a plain denim jacket or vest and map out a design using fabric patches of starkly contrasting textures.
Materials: Up-cycled jean jackets or pants. Use a variety of fabrics including burlap, ribbed corduroy, smooth silk, and fuzzy fleece. Instead of sewing, they can use thick fabric glue or iron-on adhesive. Crafting jewels can be another addition.
Tactile guide: Outline the edges of the denim pockets and collar with thick puff paint or fabric gems first. This gives the student a physical boundary so they know exactly where to place and align their texture patches.
2. Raised-boundary canvas tote bags
Tote bags are excellent flat surfaces for building spatial awareness and experimenting with textile layouts.
Lesson guide
Objective: To create a tactile tote bag with a variety of textures that is individualized to each student.
Provide students with canvas tote bags with thick, raised lines made from hot glue, puffy fabric paint, or heavy-duty rope trim. Students paint inside the sections using fabric acrylics mixed with texturizers (like fine sand or glass microbeads).
Tactile guide: Use foam stamps with distinct geometric shapes (stars, triangles, circles) that have thick plastic handles. Students can feel the stamp shape itself to know exactly what design they are pressing onto the canvas.
3. Dimensional sneaker customization
Sneaker design allows students to explore 3D canvas manipulation by altering the feel and look of their footwear.

Lesson guide
Objective: Using plain white canvas sneakers or sneakers students have permission to accessorize to create a one of a kind dimensional pair of sneakers.
Materials: Fabric markers to color broad sections and then apply 3D elements like adhesive rhinestones, foam shapes, and textured patches to the sides, heel, and tongue.
Tactile guide: Replace standard laces with tactile alternatives like elastic bungee cords, bumpy textured ribbons, or beaded laces. This makes lacing a sensory experience and helps students easily identify different sections of the shoe.
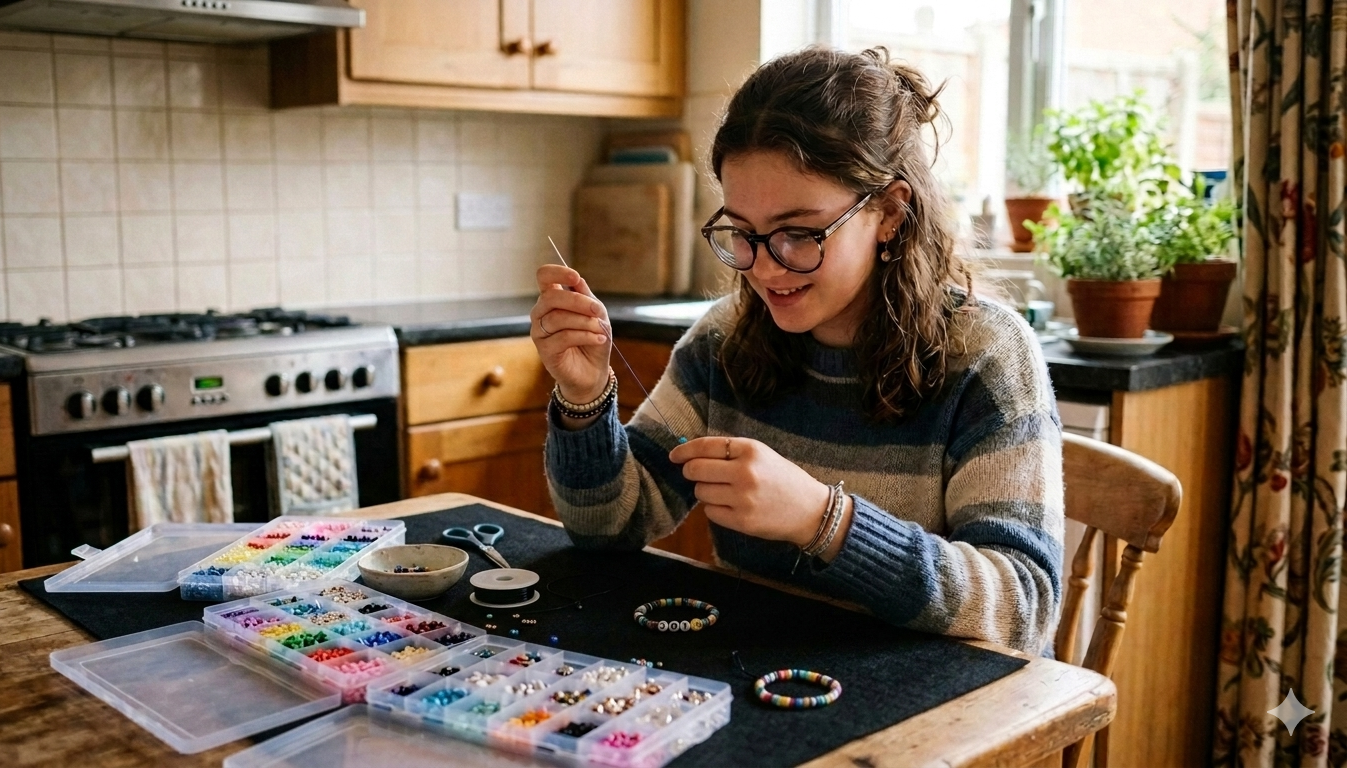
4. Sensory and tactile jewelry crafting
Jewelry making is highly accessible when beads and wires are selected for their physical variety rather than just color.
Lesson guide
Objective: Students craft necklaces or bracelets in a variety of textures, colors, and forms to meet individualized styles.
Materials: Using memory wire (which holds its circular shape automatically) or thick leather cords. They string beads of varying weights, temperatures, and texture (such as cold metal, rough lava rock, smooth ceramic, lightweight carved wood, jeweled beads).
Tactile guide: Use a sorting tray with separated compartments lined with velvet to organize beads by texture or size. Providing large gauge wire and beads with wide, easily felt holes ensures maximum independence. Adapt for possible finemotor needs, asking an OT for help if needed.
The cozy fiber crafter
Focuses on texture and textiles that include punch-needle tufting, embroidery, weaving, or modern crochet.
Teaching fiber arts to students with visual impairments relies on utilizing muscle memory, tactile landmarks, and adaptive tools. These ideas prioritize touch and texture, allowing students to independently create and “feel” their finished pieces. These cozy fiber crafts can be simple to complex, developing a lift long skill based crafter.
1. Modern crochet
Skill Focus: Single crochet and tactile row counting.
Setup: Use bulky, high-texture yarn (size 6 or 7) and a large, ergonomic hook (7–8 mm) to easily identify stitches by touch.
Lesson guide
- Have the student feel the “V” shapes of stitches to build spatial awareness.
- Use pipe cleaners or bright locking stitch markers at the first and last stitches of a row so the student can easily locate them by touch to begin the next row.
- Teach the “valley and mountain” method: Students use their thumb to count the physical peaks of previous-row stitches.
2. Punch-Needle Tufting
Skill focus: Muscle memory, filling space, and sensory design.
Setup: Mount Monk’s cloth in a sturdy, non-slip frame. Use high-contrast fabric paired with heavy, fuzzy yarn so the student can physically feel the borders of their design.
Lesson guide
- Draw bold tactile lines with puff paint, or secure thin puff-paint strings onto the fabric so the student can trace and map the pattern with their fingers.
- The student guides the punch needle into the fabric; they can feel the back of the tufting frame to ensure even, smooth loops are forming on the reverse side.
3. Weaving (lap or peg looms)
Skill focus: Warping, weft, and tactile texture exploration.
Setup: String a rigid-heddle or simple peg loom with a firm, high-tension warp. Provide varied weft materials (fleece, roving, thick spun yarn, or braided fabric).
Lesson Guide
- Have the student trace the warp (vertical) threads with their fingers, identifying the “up” and “down” pattern.
- If needed and tolerated veave the first few rows hand-over-hand with the instructor.
- Encourage students to identify mistakes by feeling for unusual tension or skipped threads rather than checking visually.
4. Hand embroidery
Skill focus: Textured stitches (satin stitch, french knots).
Setup: Use a stand-mounted hoop to free both hands for feeling the work. Provide open-eye/self-threading needles to prevent frustration when swapping thread.
Lesson Guide
- Use raised tactile puff paint or sandpaper cutouts to establish the design boundaries on the fabric.
- The student pushes the needle from the back, feeling with their non-dominant hand for the needle tip to emerge on the top.
- To anchor the thread, the student trails their hand down the thread from the needle base to the fabric.
Use these ideas as a jumping off point with your teens this summer to spark creativity and practice skills in a self-expressing way.
More inspiration: Meet Mr. Dot, The Blind Braille Artist